How to clock out of work with style
If there’s one defining characteristic of mine, it would be a horrible case of forgetfulness. It manifests in many different ways: sometimes I forgot to clock out of work, sometimes I forget to text my wife I’m coming home. Let’s kill two birds with one… massive stone today.


If there’s one defining characteristic of mine, it would be a horrible case of forgetfulness. It manifests in many different ways: sometimes I forgot to clock out of work, sometimes I forget to text my wife I’m coming home. Let’s kill two birds with one stone today. Or more precisely, with a massive boulder.
The end goal
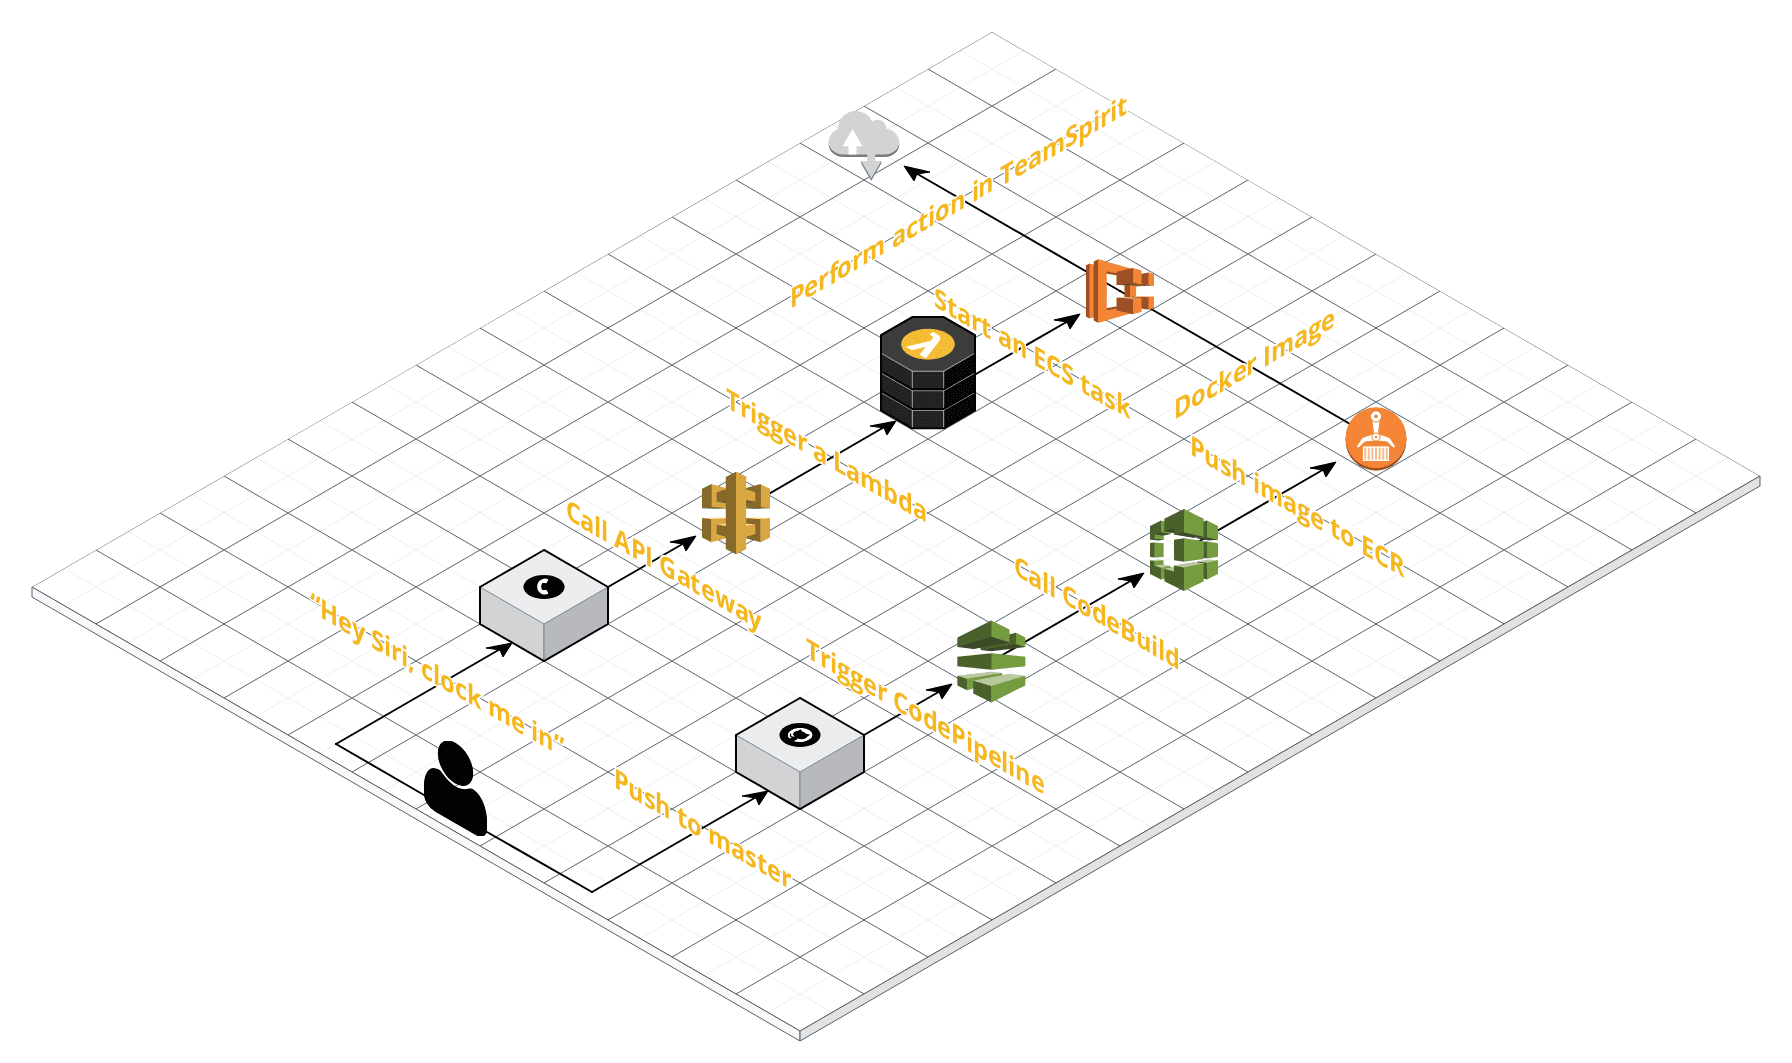
The goal of today’s exercise is to be able to clock out of work & send estimated arrival time to my wife with one simple “Hey Siri, clock me out” command. Let’s see how we can accomplish that.
TeamSpirit kills my spirit
My company uses TeamSpirit for tracking budget and work time. TeamSpirit is an application built on the Salesforce platform, and having worked with the Salesforce API a bit in the past, that information filled me with a little bit of optimism: a horrible, dreadful API is, after all, better than no API.
Upon further investigation, however, it seems that TeamSpirit does not expose any API whatsoever, and even on the off chance that its data can be manipulated through Apex classes, I won’t get anywhere without a Salesforce developer account and a sandbox environment anyhow. Combination of both makes this approach about as dead as modern liberal’s brain, it seems 🧟♂️
Light at the end of a Japanese tunnel
Thinking I’m surely not the first person ever facing this lazinessproblem, I started searching for alternative solutions. In particular, this Qiita entry seemed hopeful, but unfortunately, while the article is full of amazing hints, it skips over some crucial parts (and some of the code doesn’t work in current/our installation of TeamSpirit). Let’s see if I can try to rectify it in this article!
Our road will have two lanes: one for deployment of the code, and one for actually running the code. Let’s start with the code deployment.
Right lane: code deployment
What sort of code we will be deploying? Well, like many things, it all begins with a GitHub repository that contains three Python scripts with instructions for Selenium Chrome driver. These scripts get compiled into a Docker image and pushed into an AWS Elastic Container Registry (ECR). The compilation (done using AWS CodeBuild) happens automatically anytime the master branch obtains a new commit, via an AWS CodePipeline through a push webhook.
Finally, what the heck was I talking about when I mentioned Python and Selenium? Well, since TeamSpirit exposes no usable API, the only way to register a clock in/clock out event is to run a headless Chrome and using Selenium, automate it to:
- navigate to TeamSpirit’s login page;
- enter username/password;
- click the “Login” button;
- navigate to TeamSpirit homepage;
- click the “Clocking into/out of work” button to activate appropriate tab;
- finally, click the “Clock in” or “Clock out” button.
Phew, that’s a lot of tasks! 😫
If you wish to follow along, you can start by forking my GitHub repository with the necessary code. Compared to the original code from the aforementioned Qiita entry, I optimized the Dockerfile (reducing the final Docker image size by around 30 MB), enhanced the buildspec.yml file to automatically prune old unused Docker images in ECR (thus saving you some money) and adjusted all the scripts, so that they work with my company’s installation of TeamSpirit.
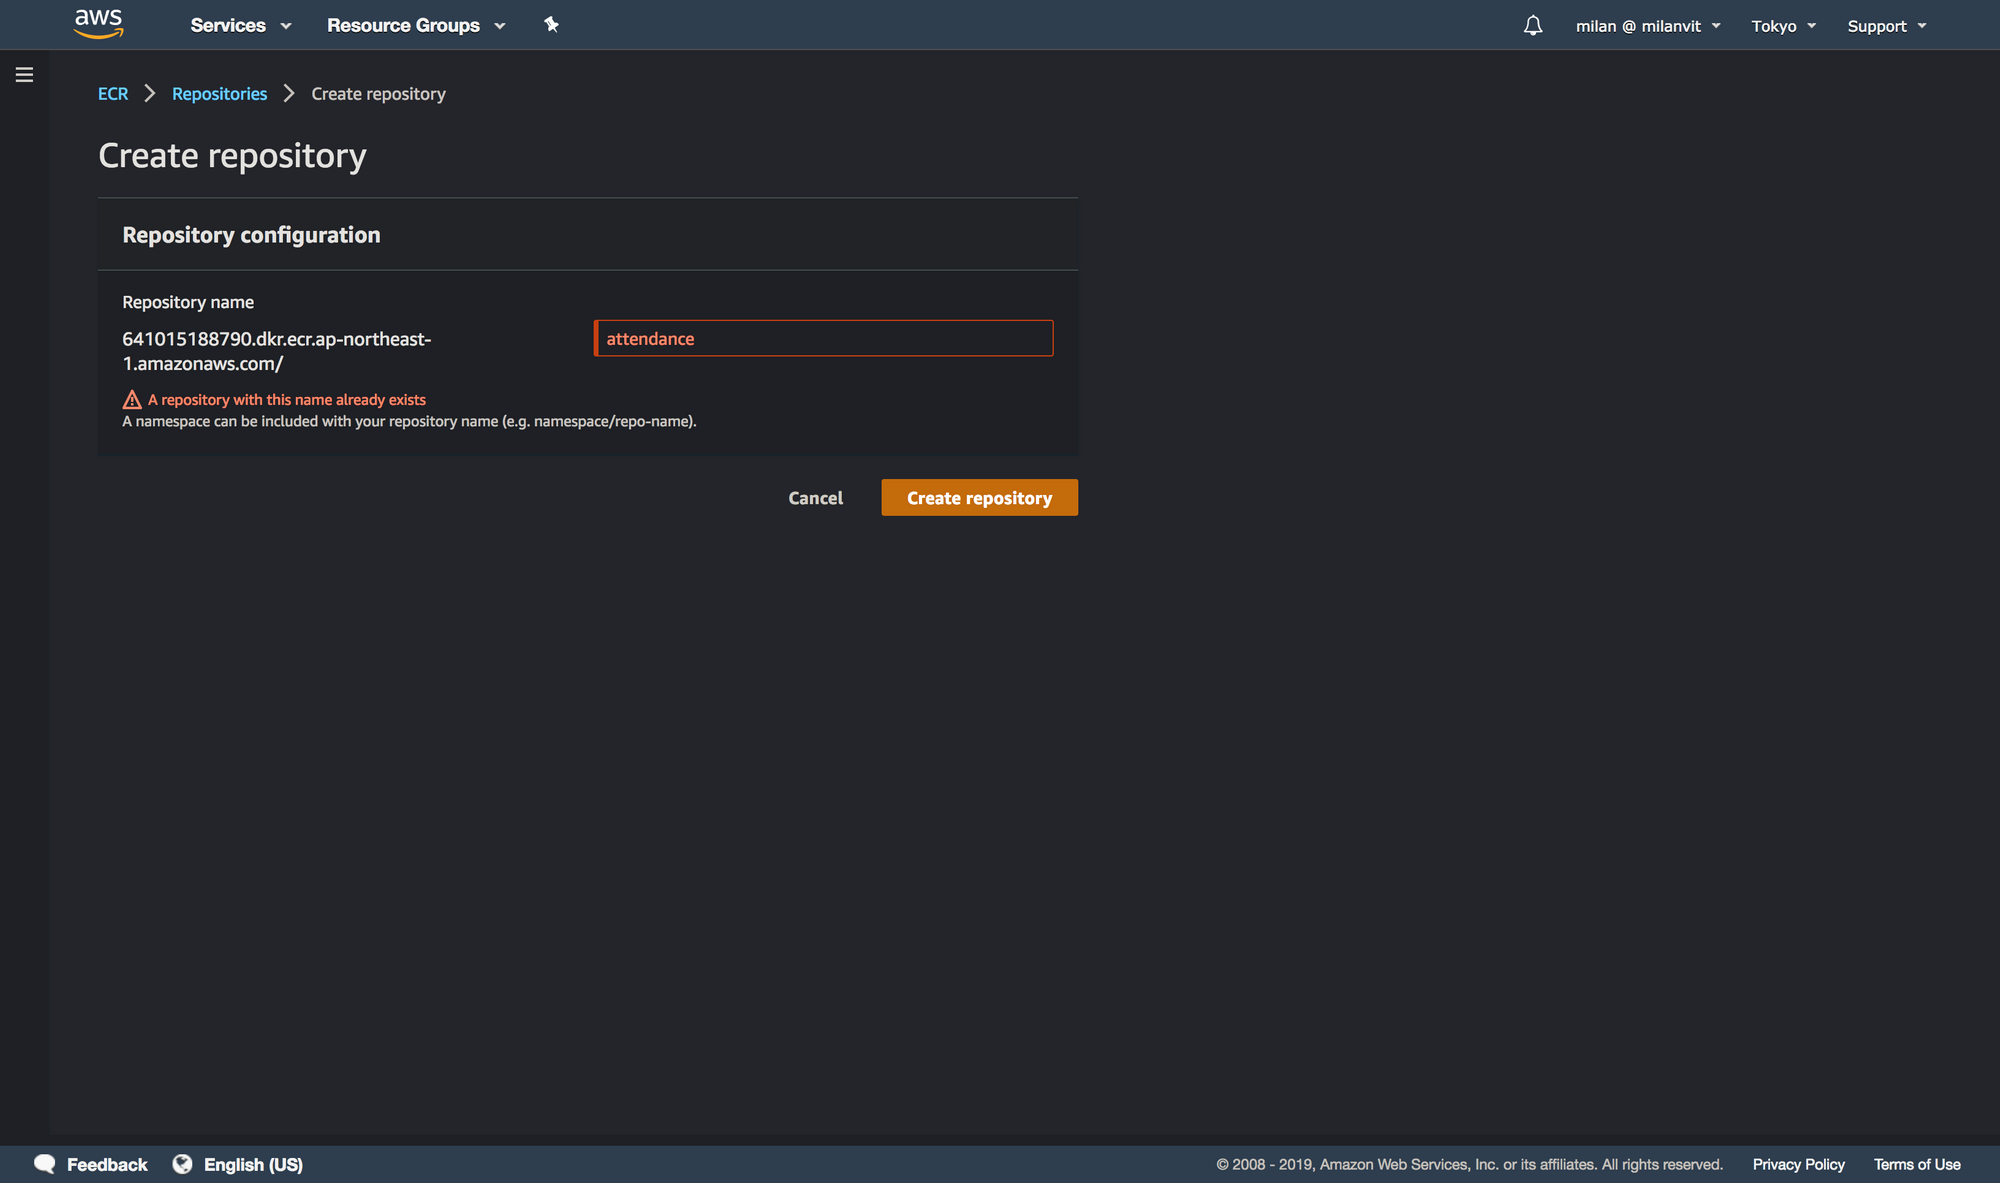
Elastic Container Repository
With that, we can create an ECR to host our built Docker images. Navigate to ECR management console and create a repository called attendance, like so:
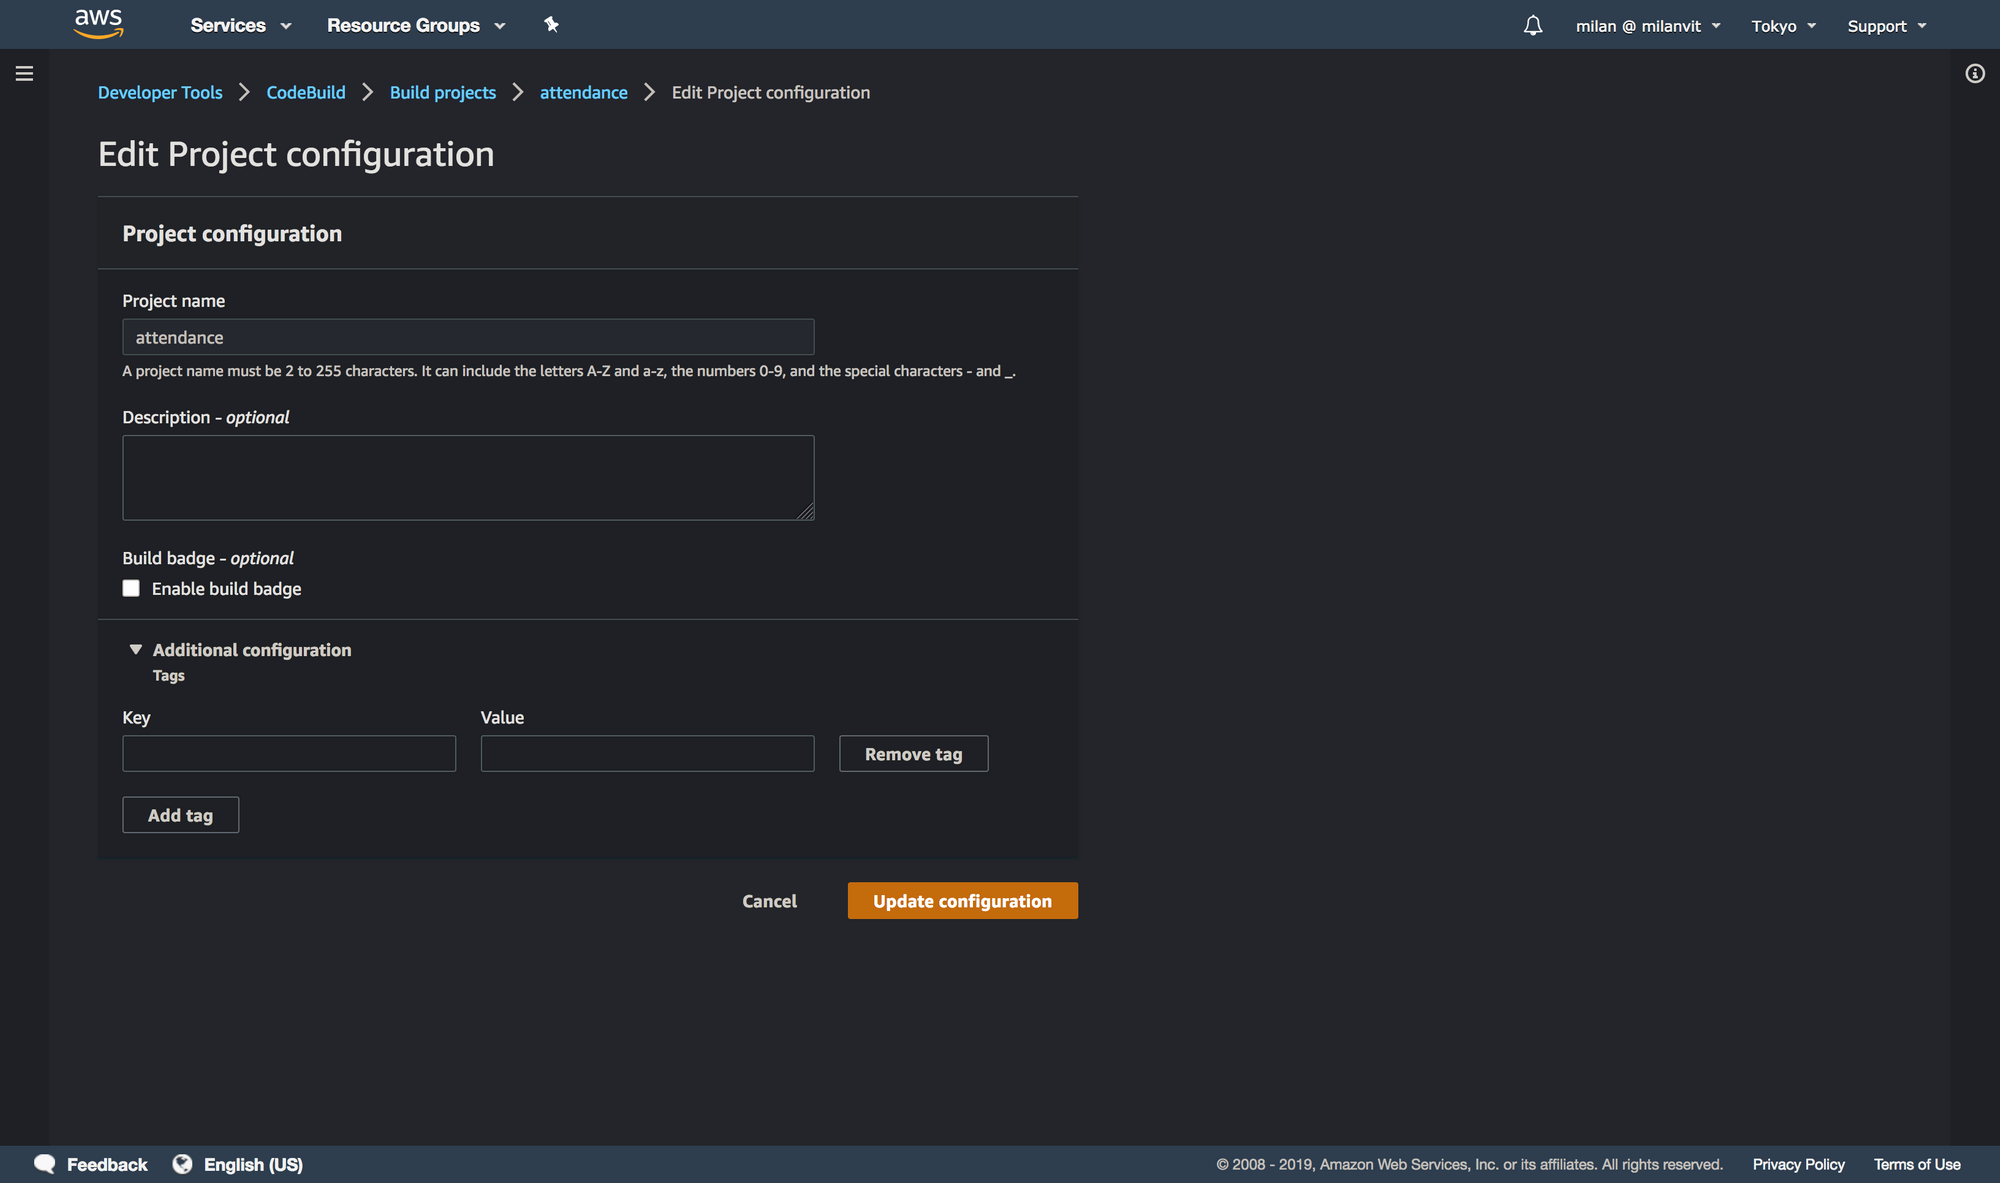
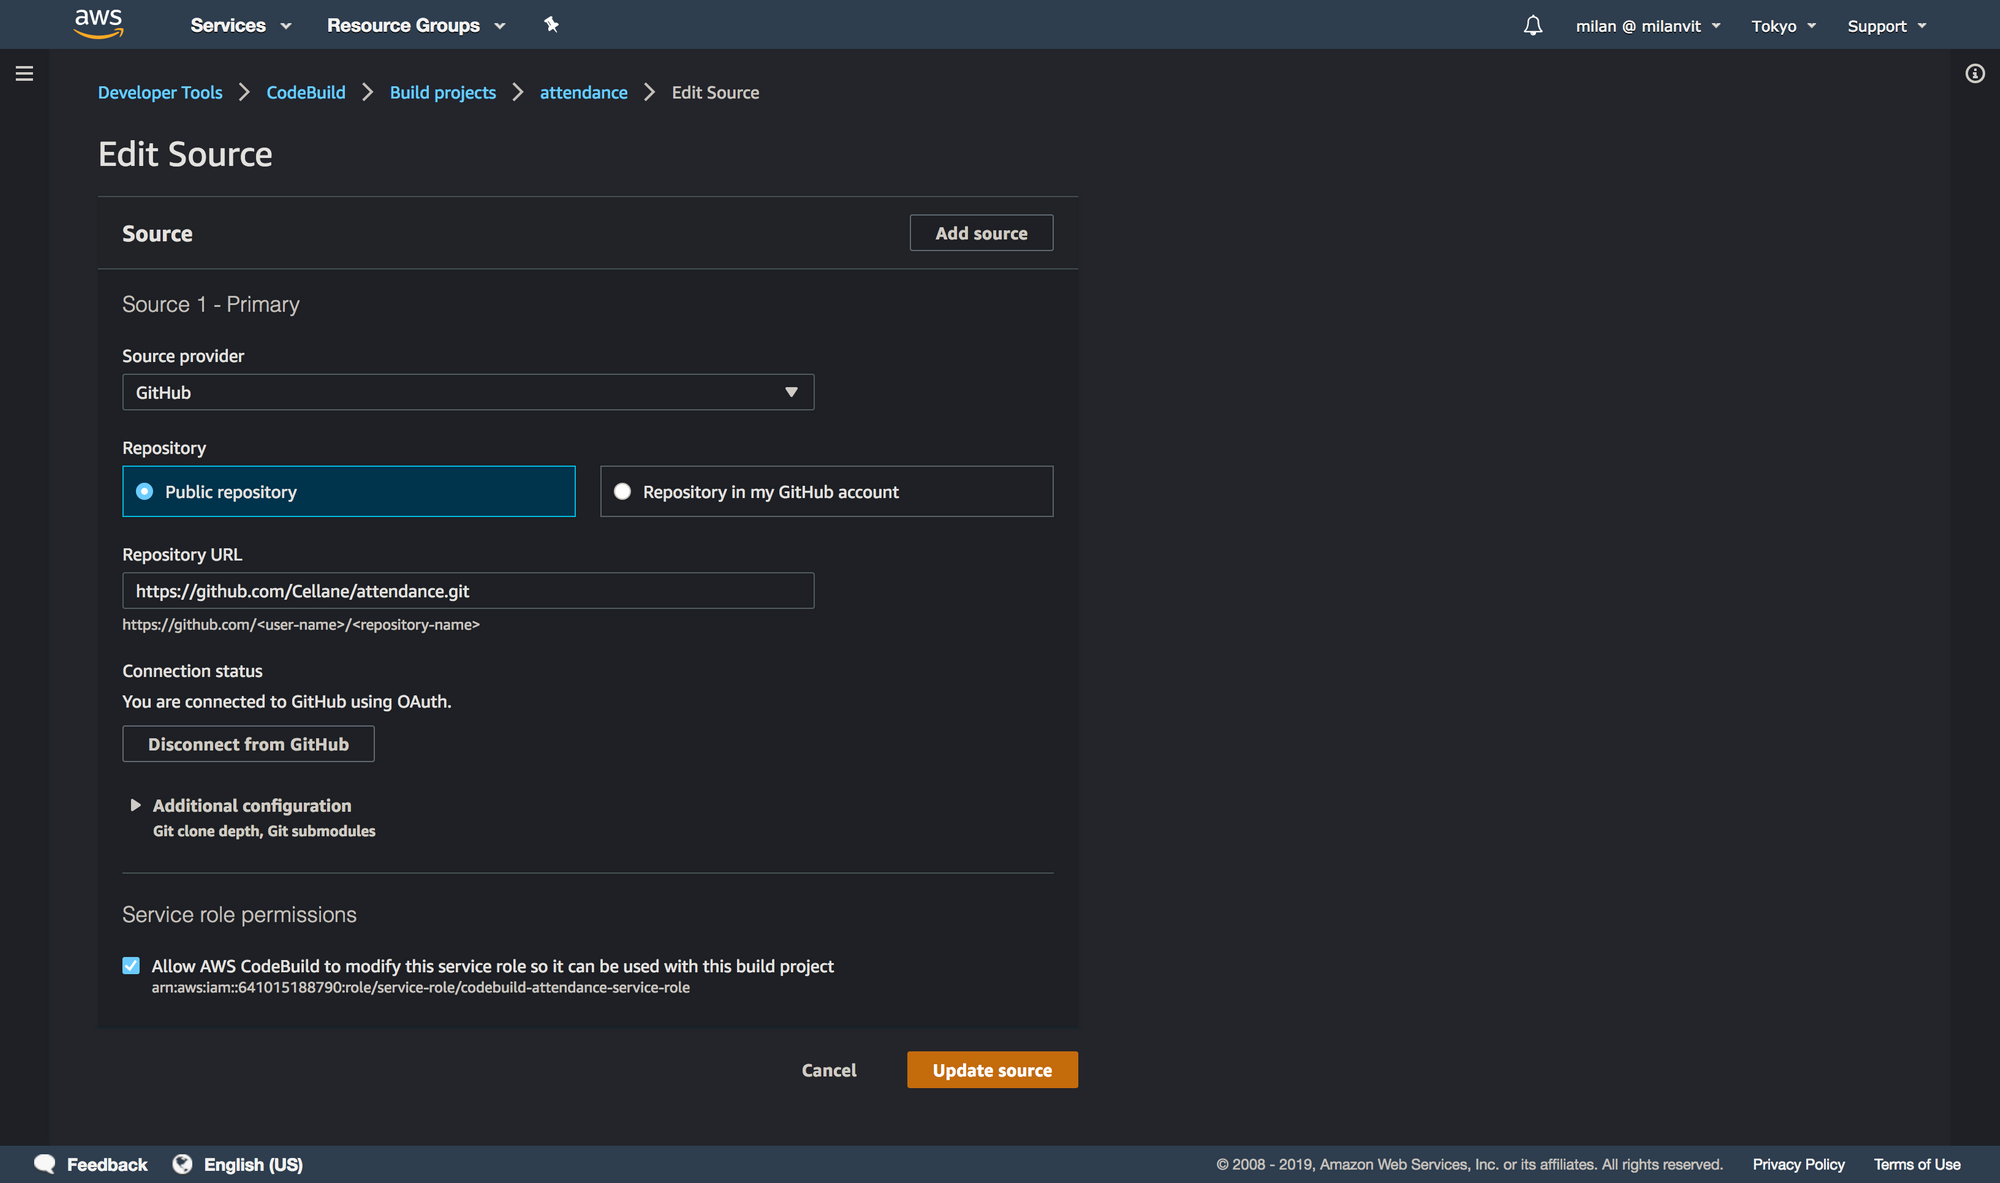
CodeBuild
With that done, you can create an AWS CodeBuild project that fetches the repository, builds a Docker image and pushes it into ECR. Don’t forget to attach an ECR full-access policy (AmazonEC2ContainerRegistryFullAccess) to your codebuild-attendance-service-role role, so that it can push new images as well as delete old ones, otherwise you’ll see a build error at the end of a otherwise successful build.
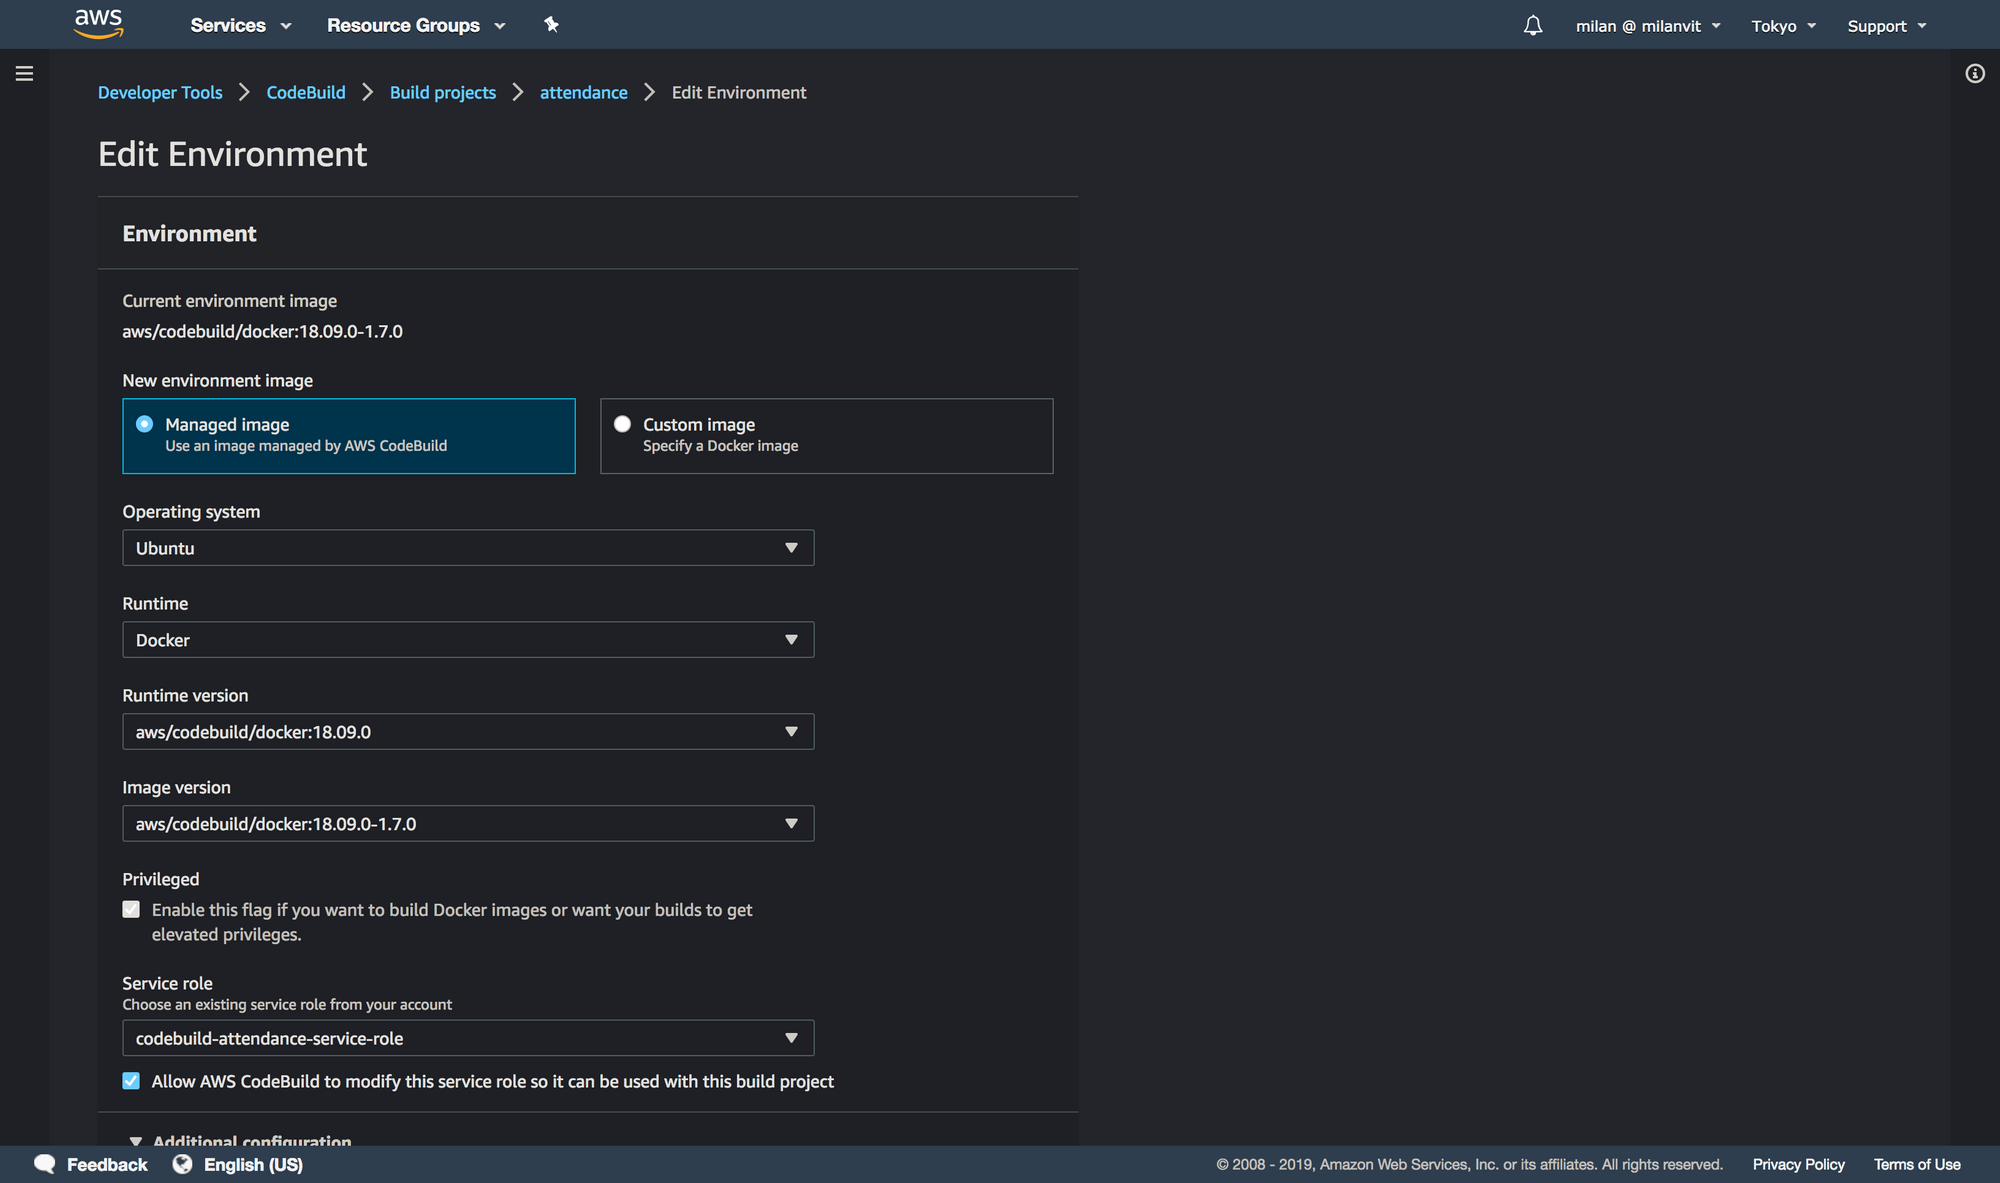
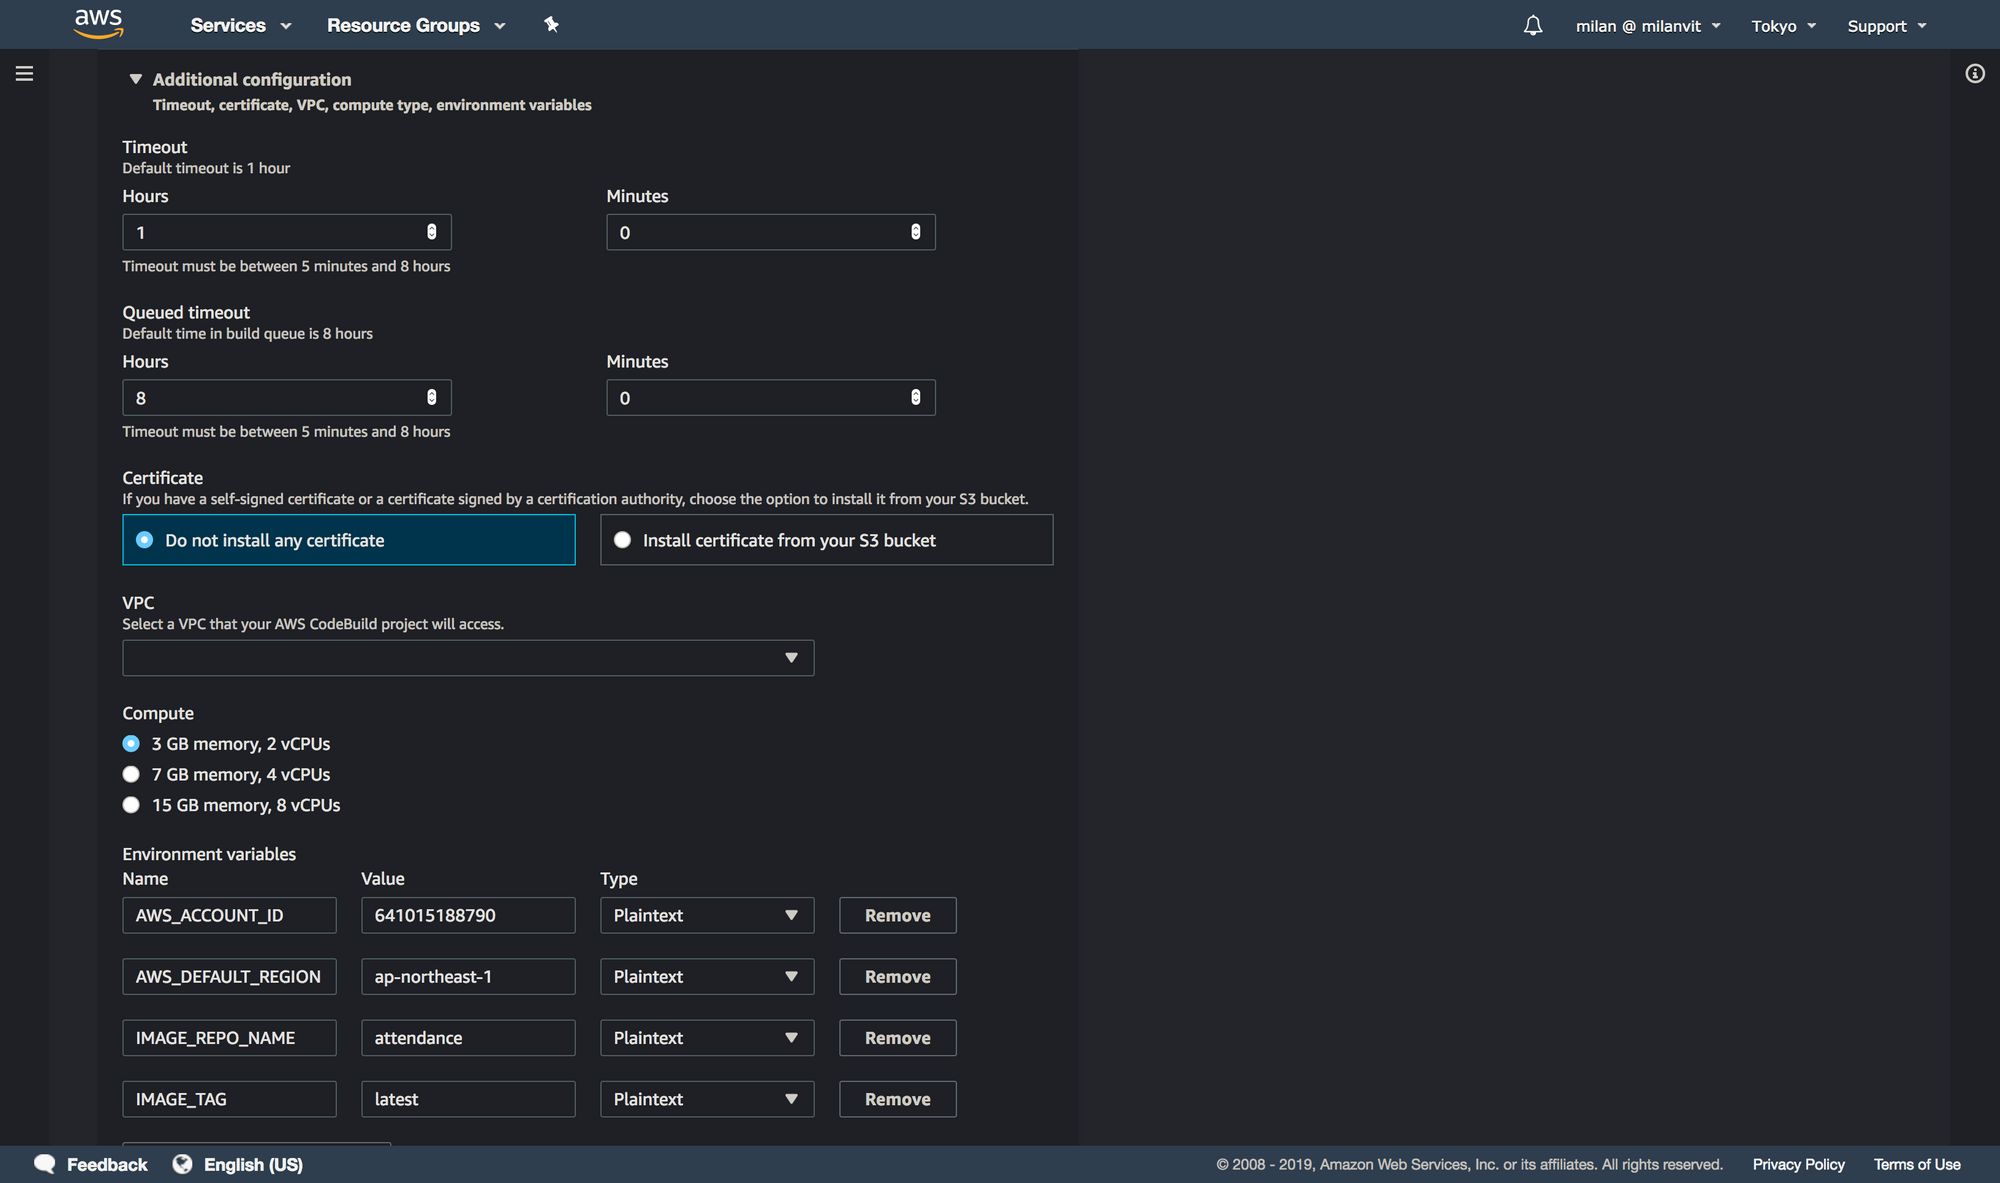
AWS_ACCOUNT_ID, AWS_DEFAULT_REGION and IMAGE_REPO_NAME and adjust them to your settings. You can find these values back in ECR console. IMAGE_TAG should always be latest.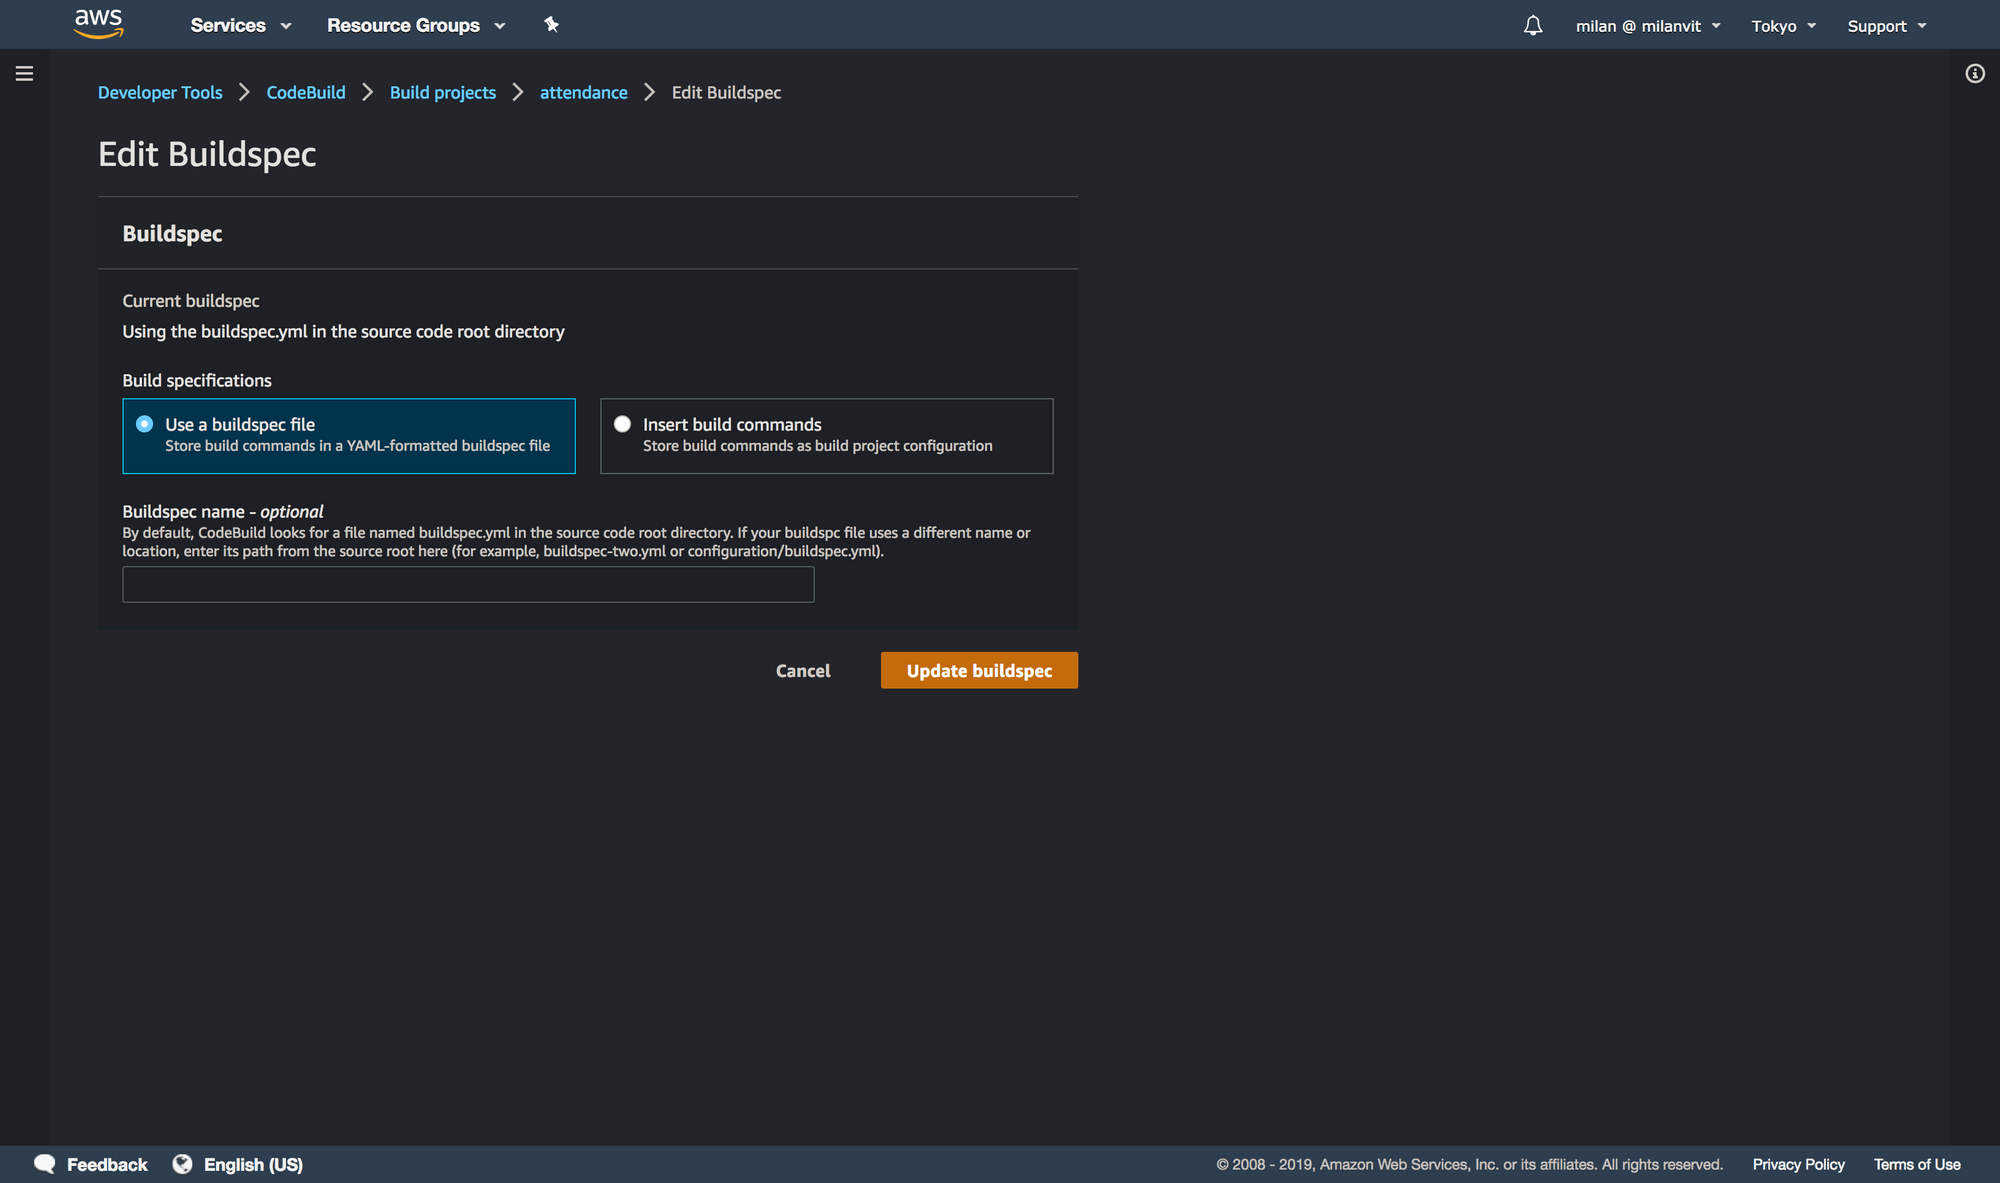
buildspec.yml file. See for yourself!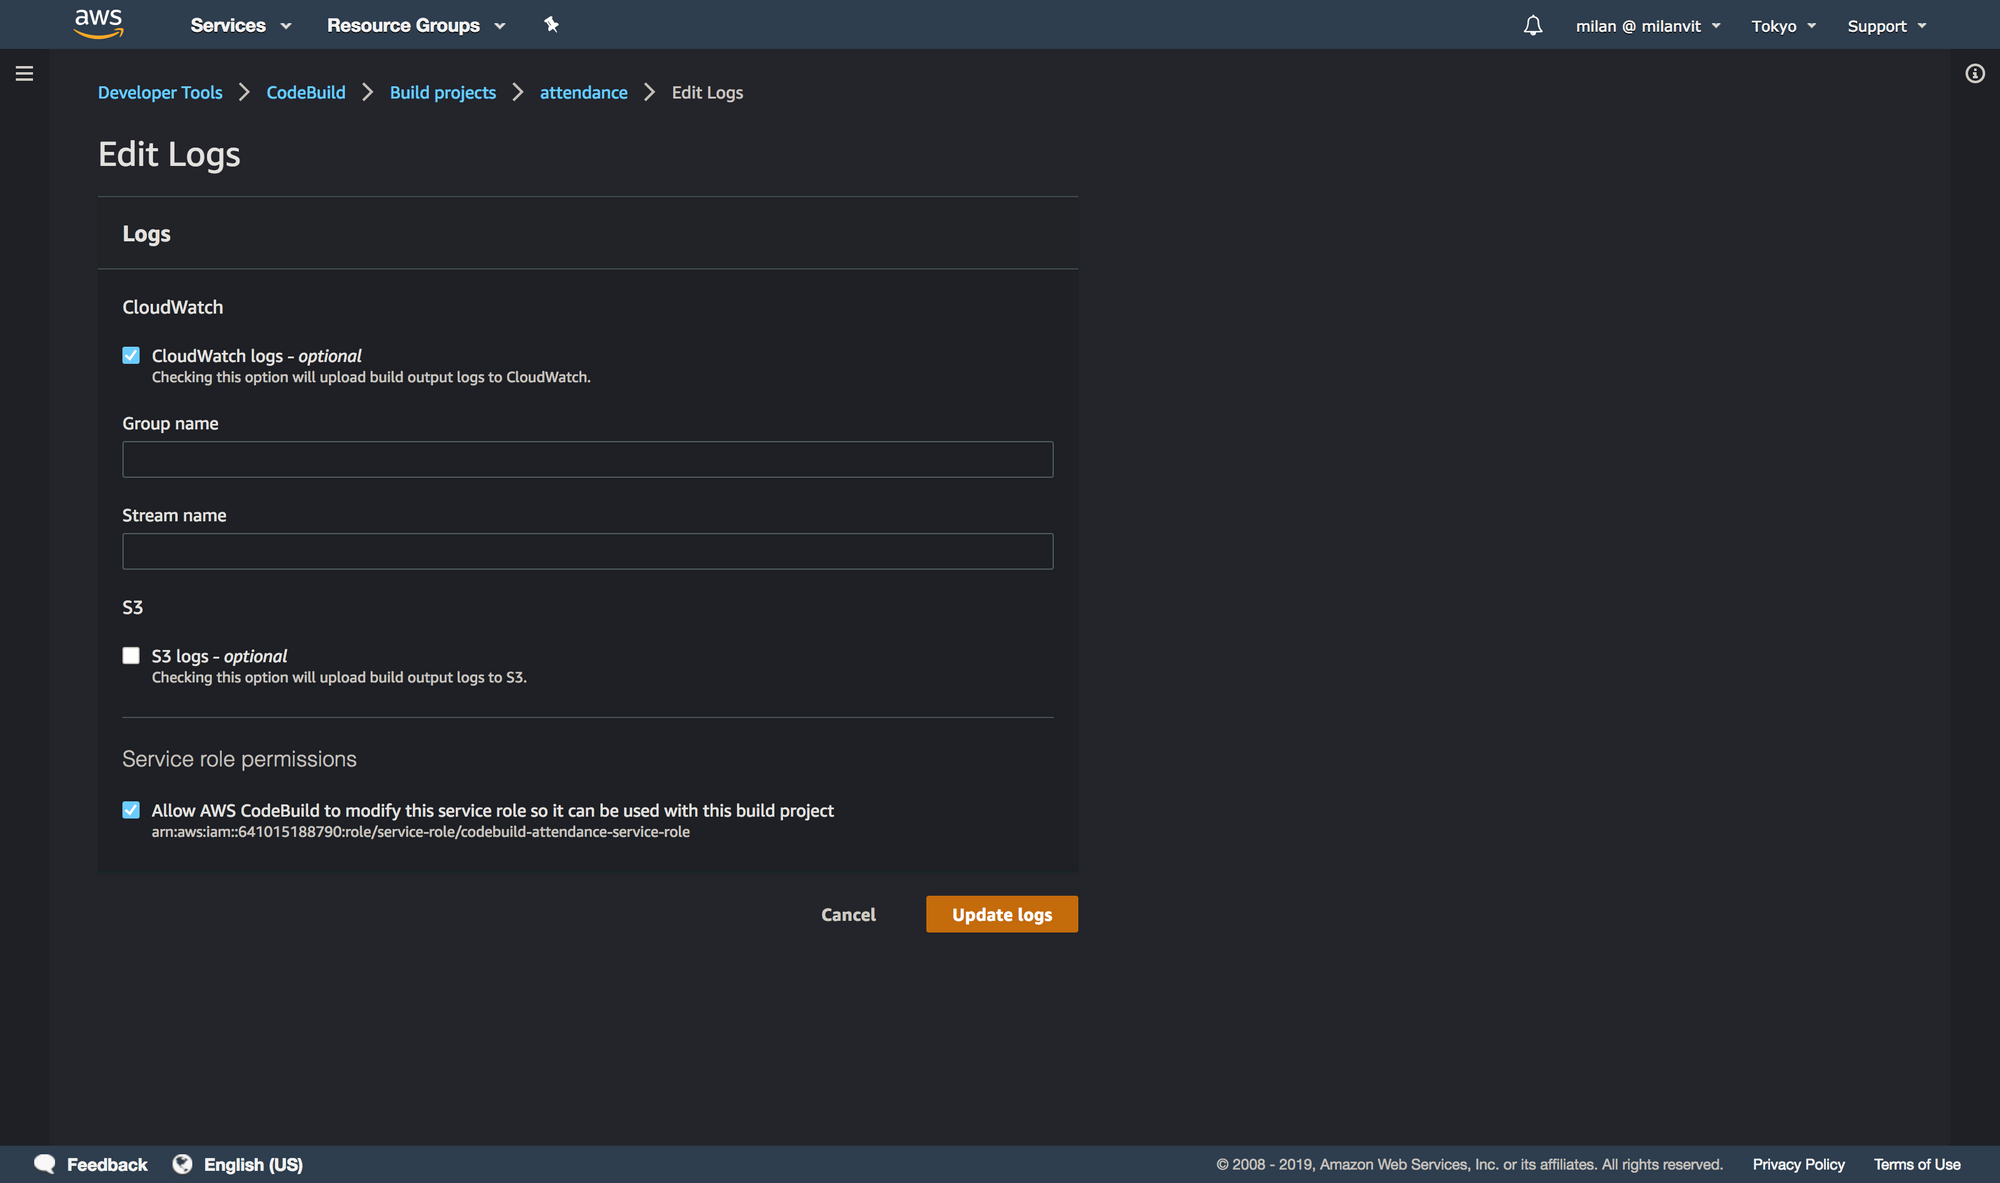
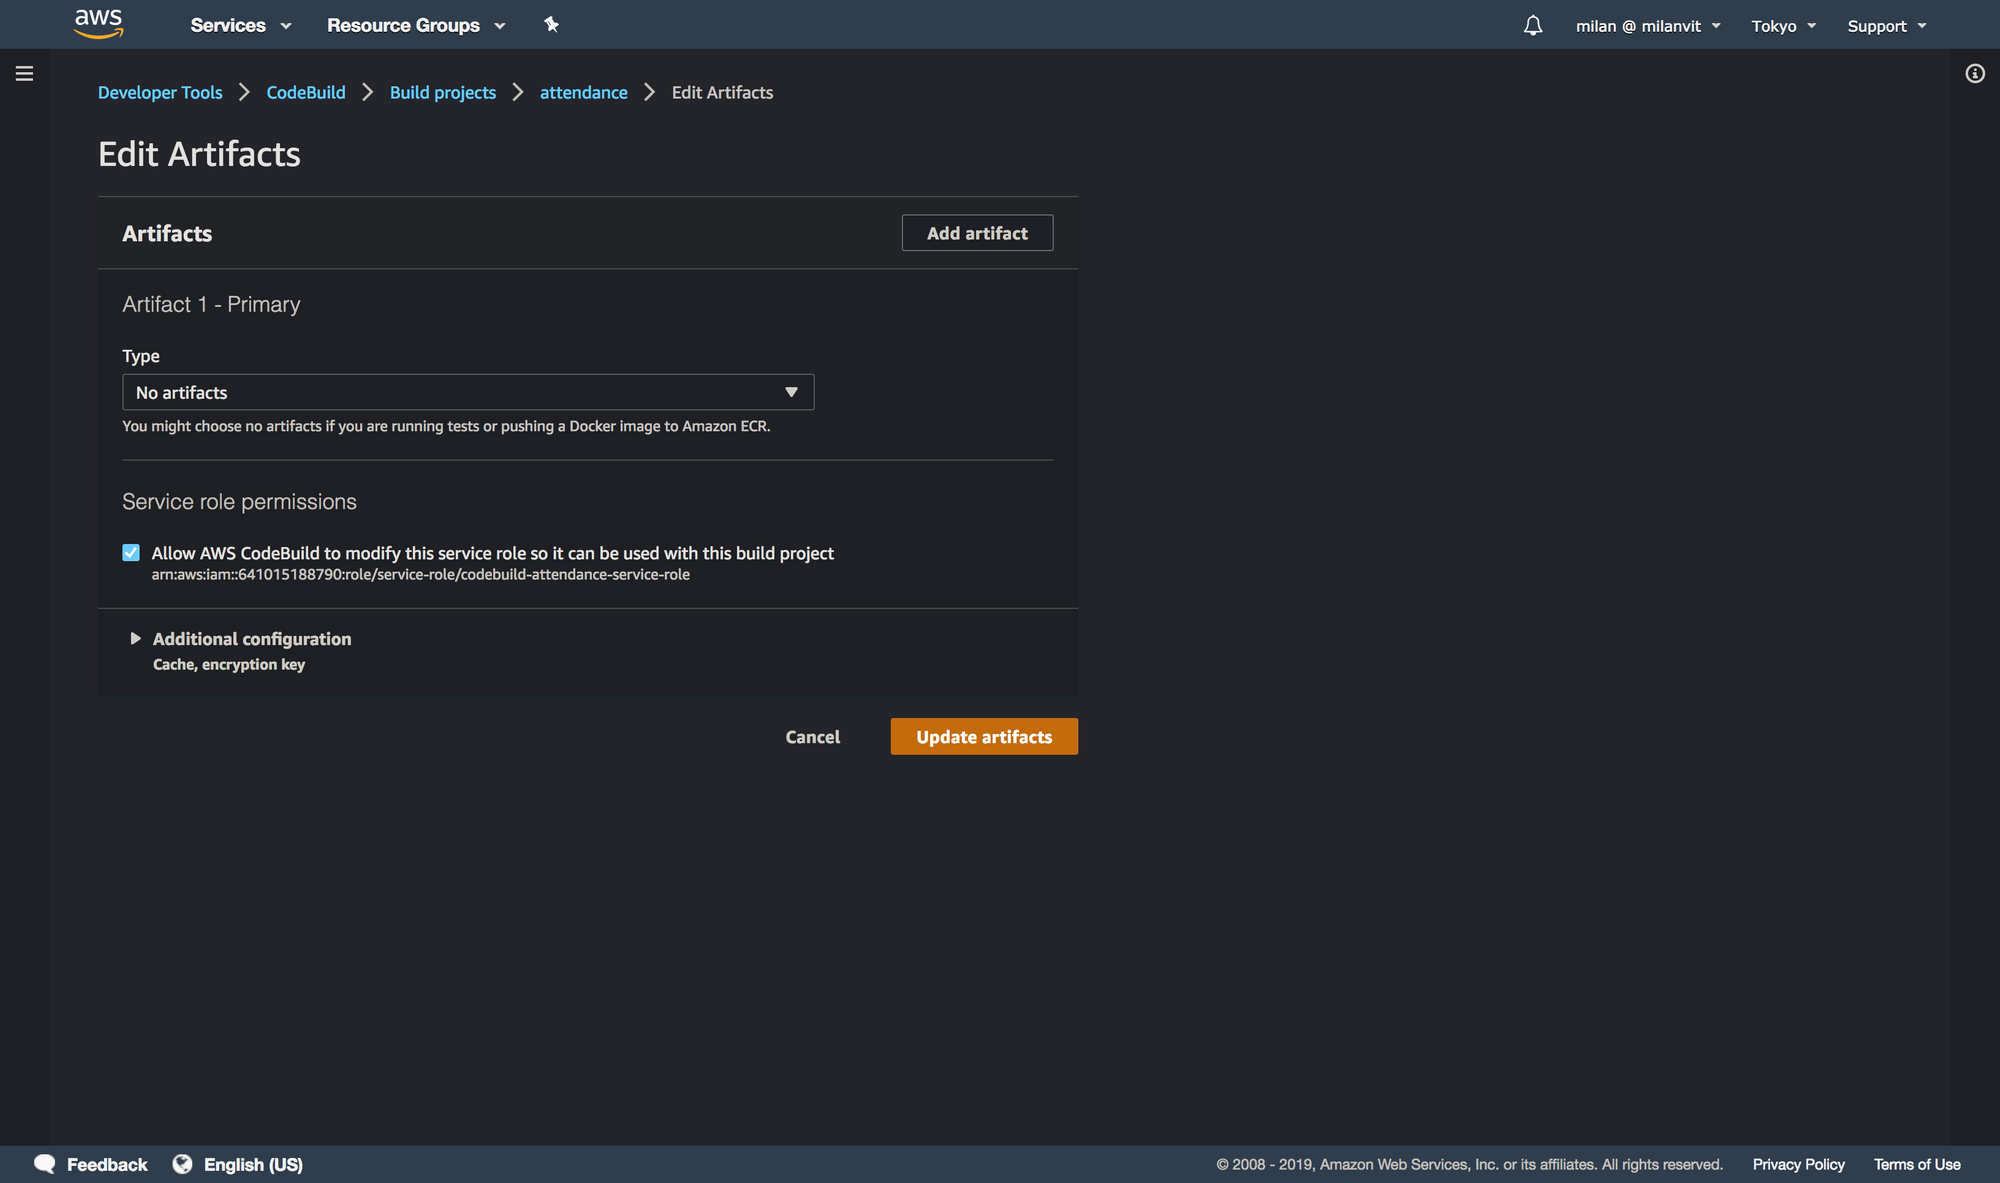
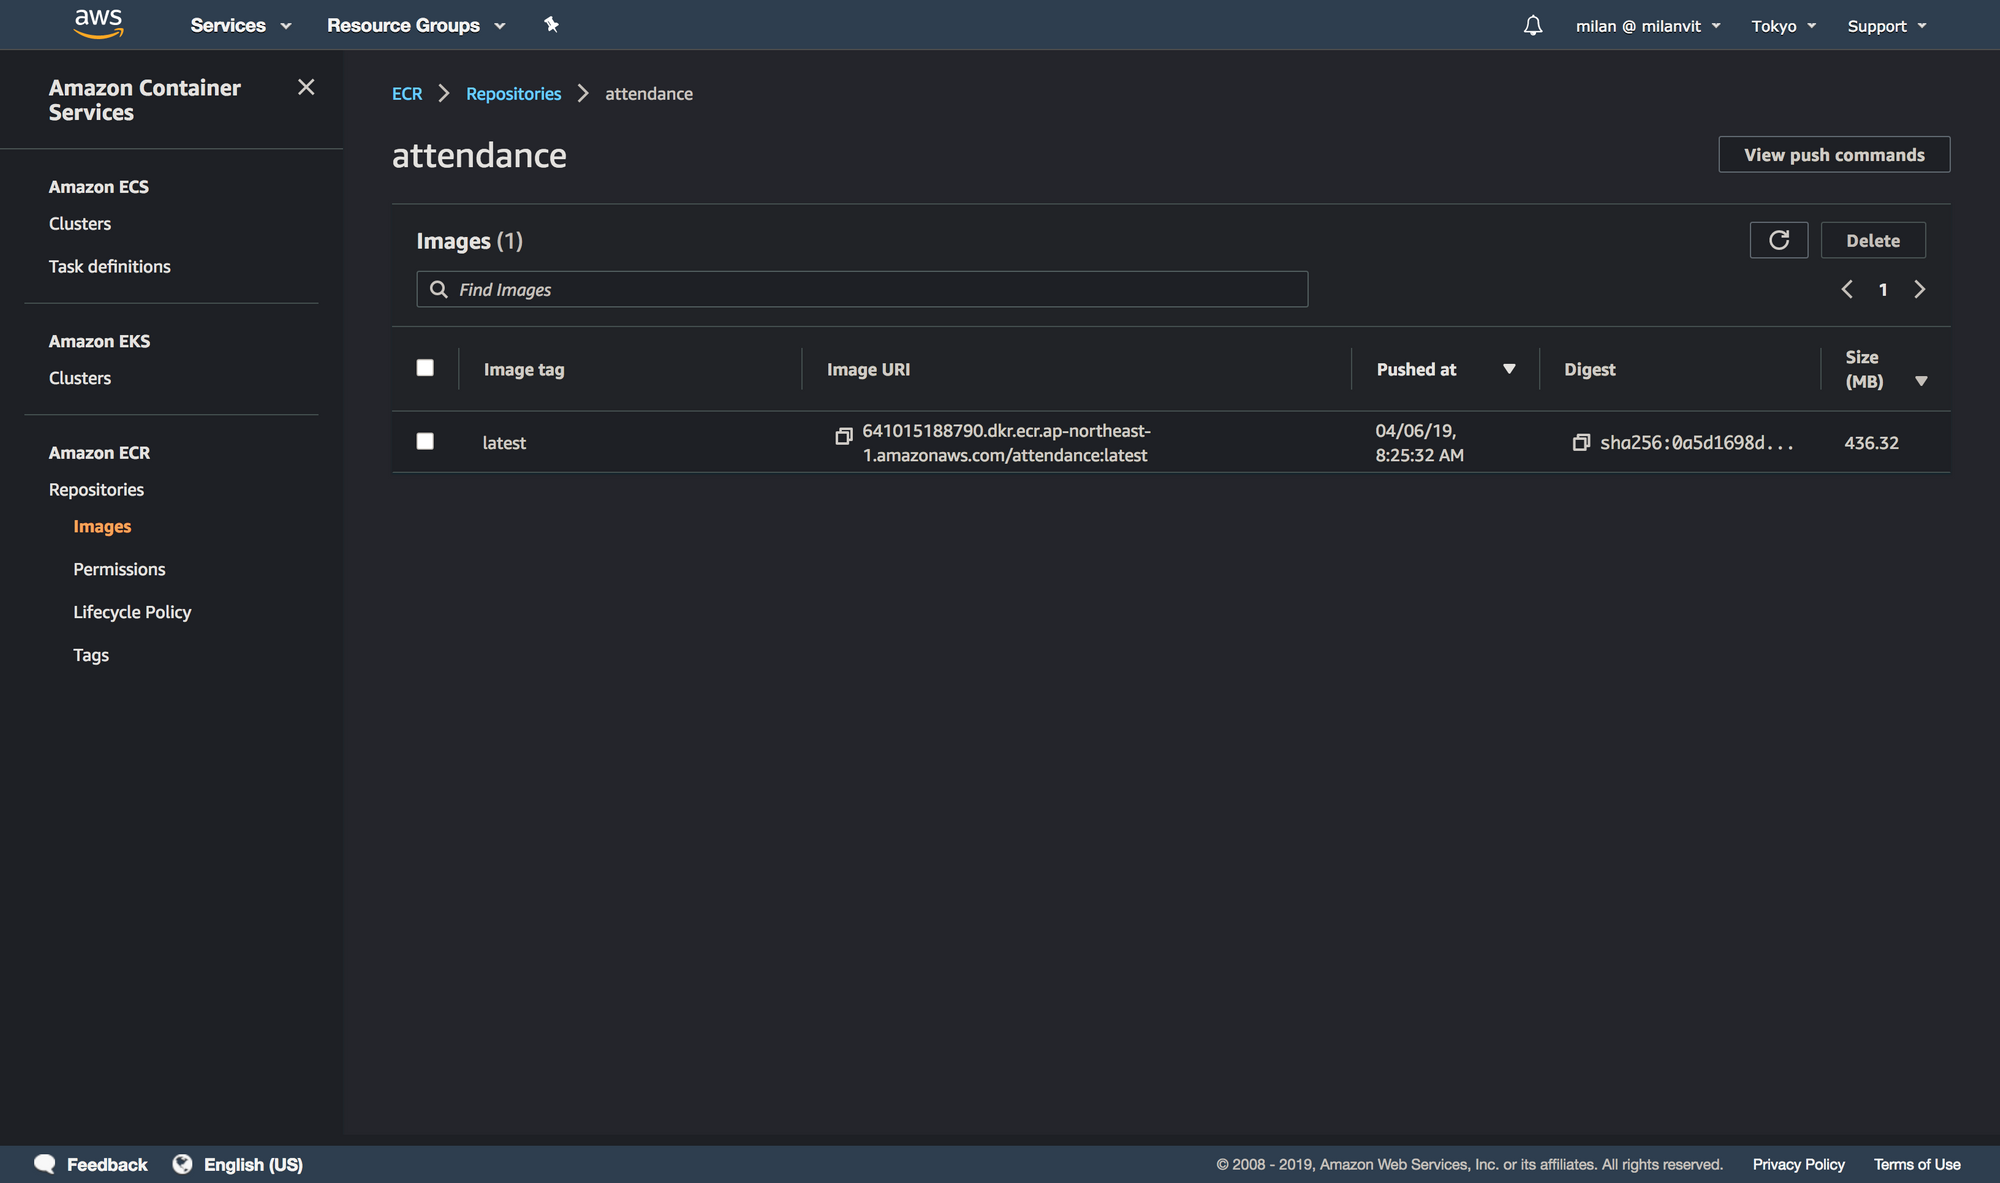
If you followed the screenshots (and their description) closely, you should have a project that is able to build successfully. Feel free to adjust any settings as you see fit, and at the end, trigger a manual build, just to see that things are working. After about two minutes, you should be rewarded with a Docker image pushed to your recently-created ECR:
CodePipeline
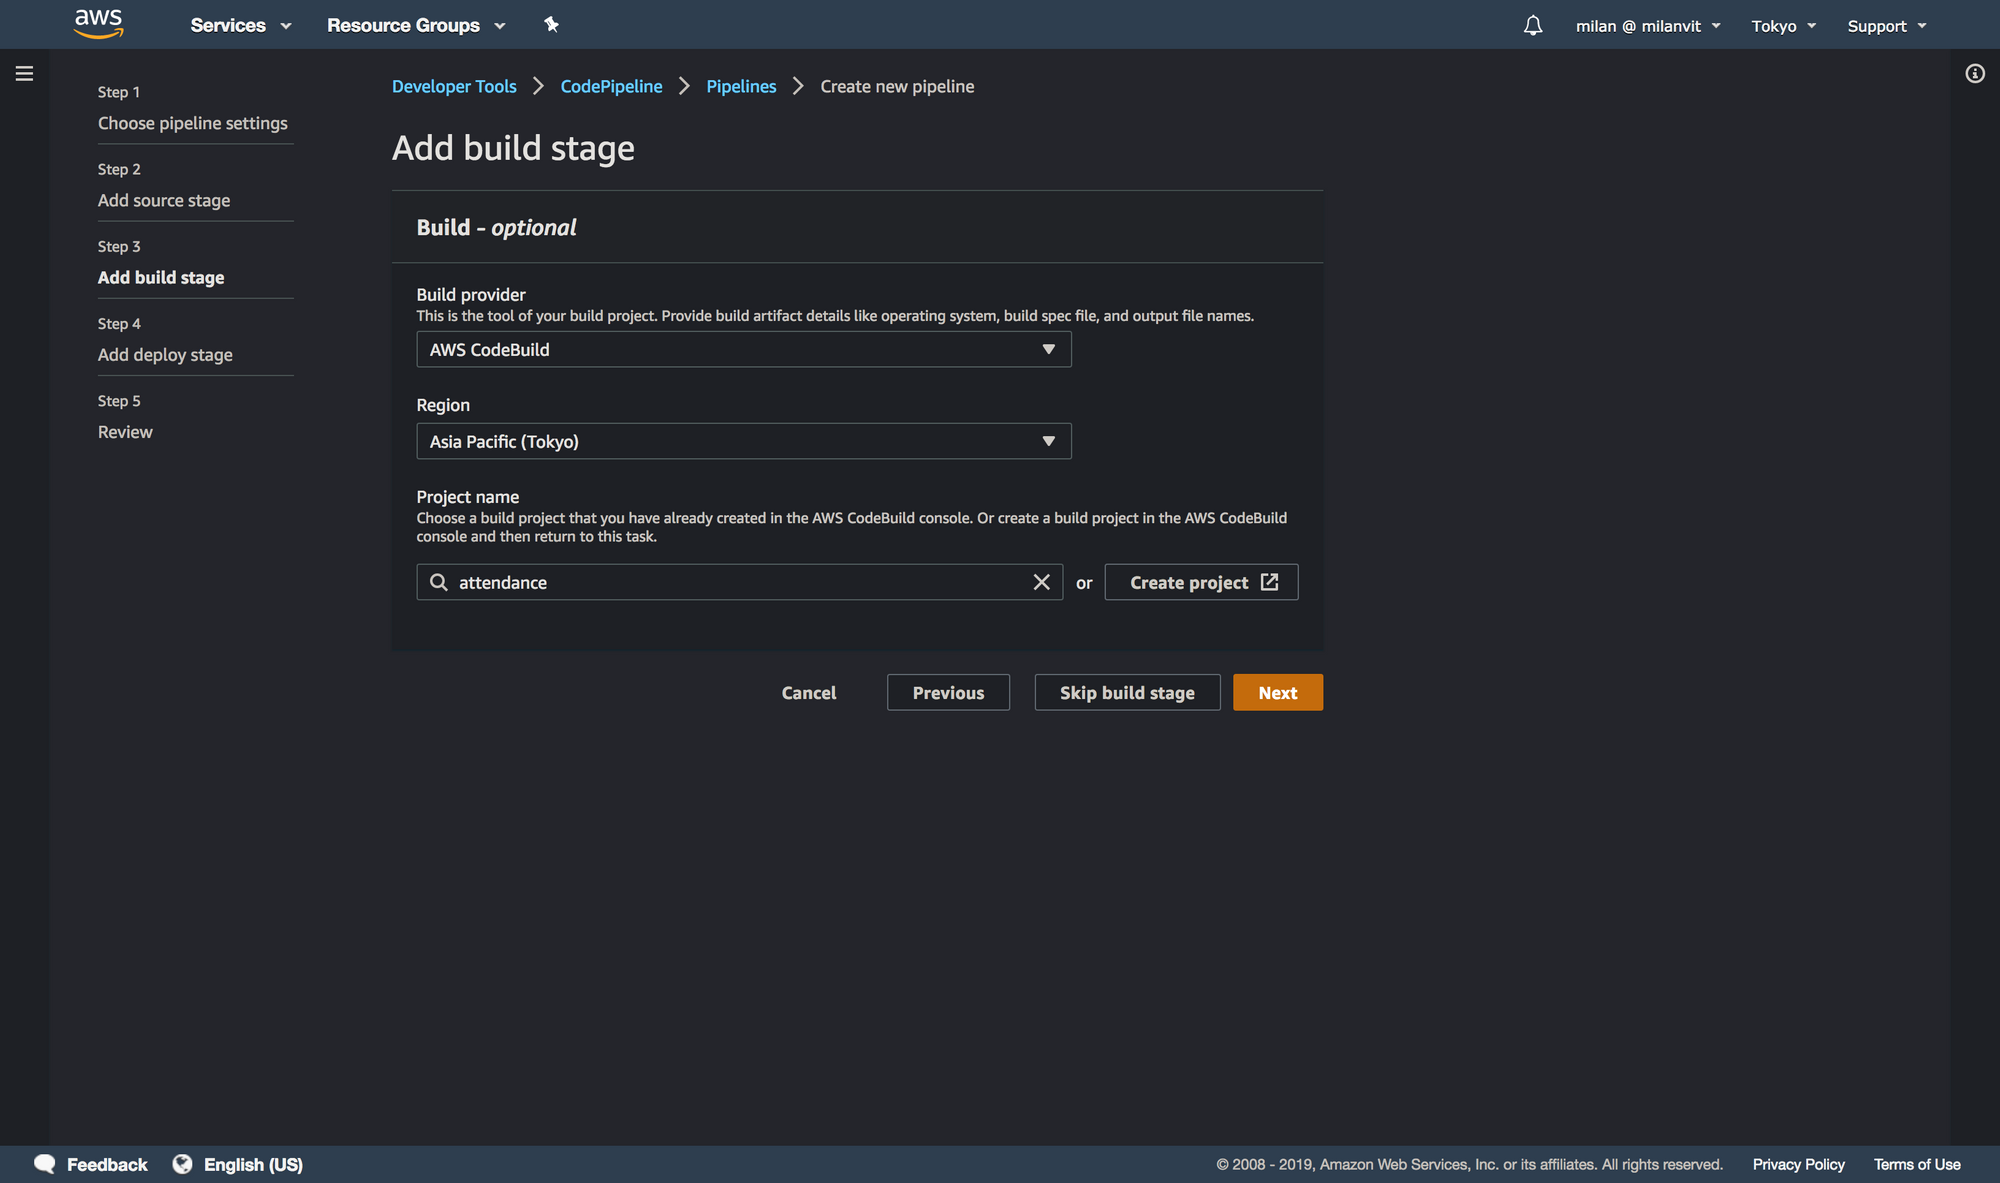
Let’s kick things into a higher gear by triggering a CodeBuild, well, build automatically, anytime there’s a new commit on the master branch. Head over to a CodePipeline management console and create a new pipeline, like so:
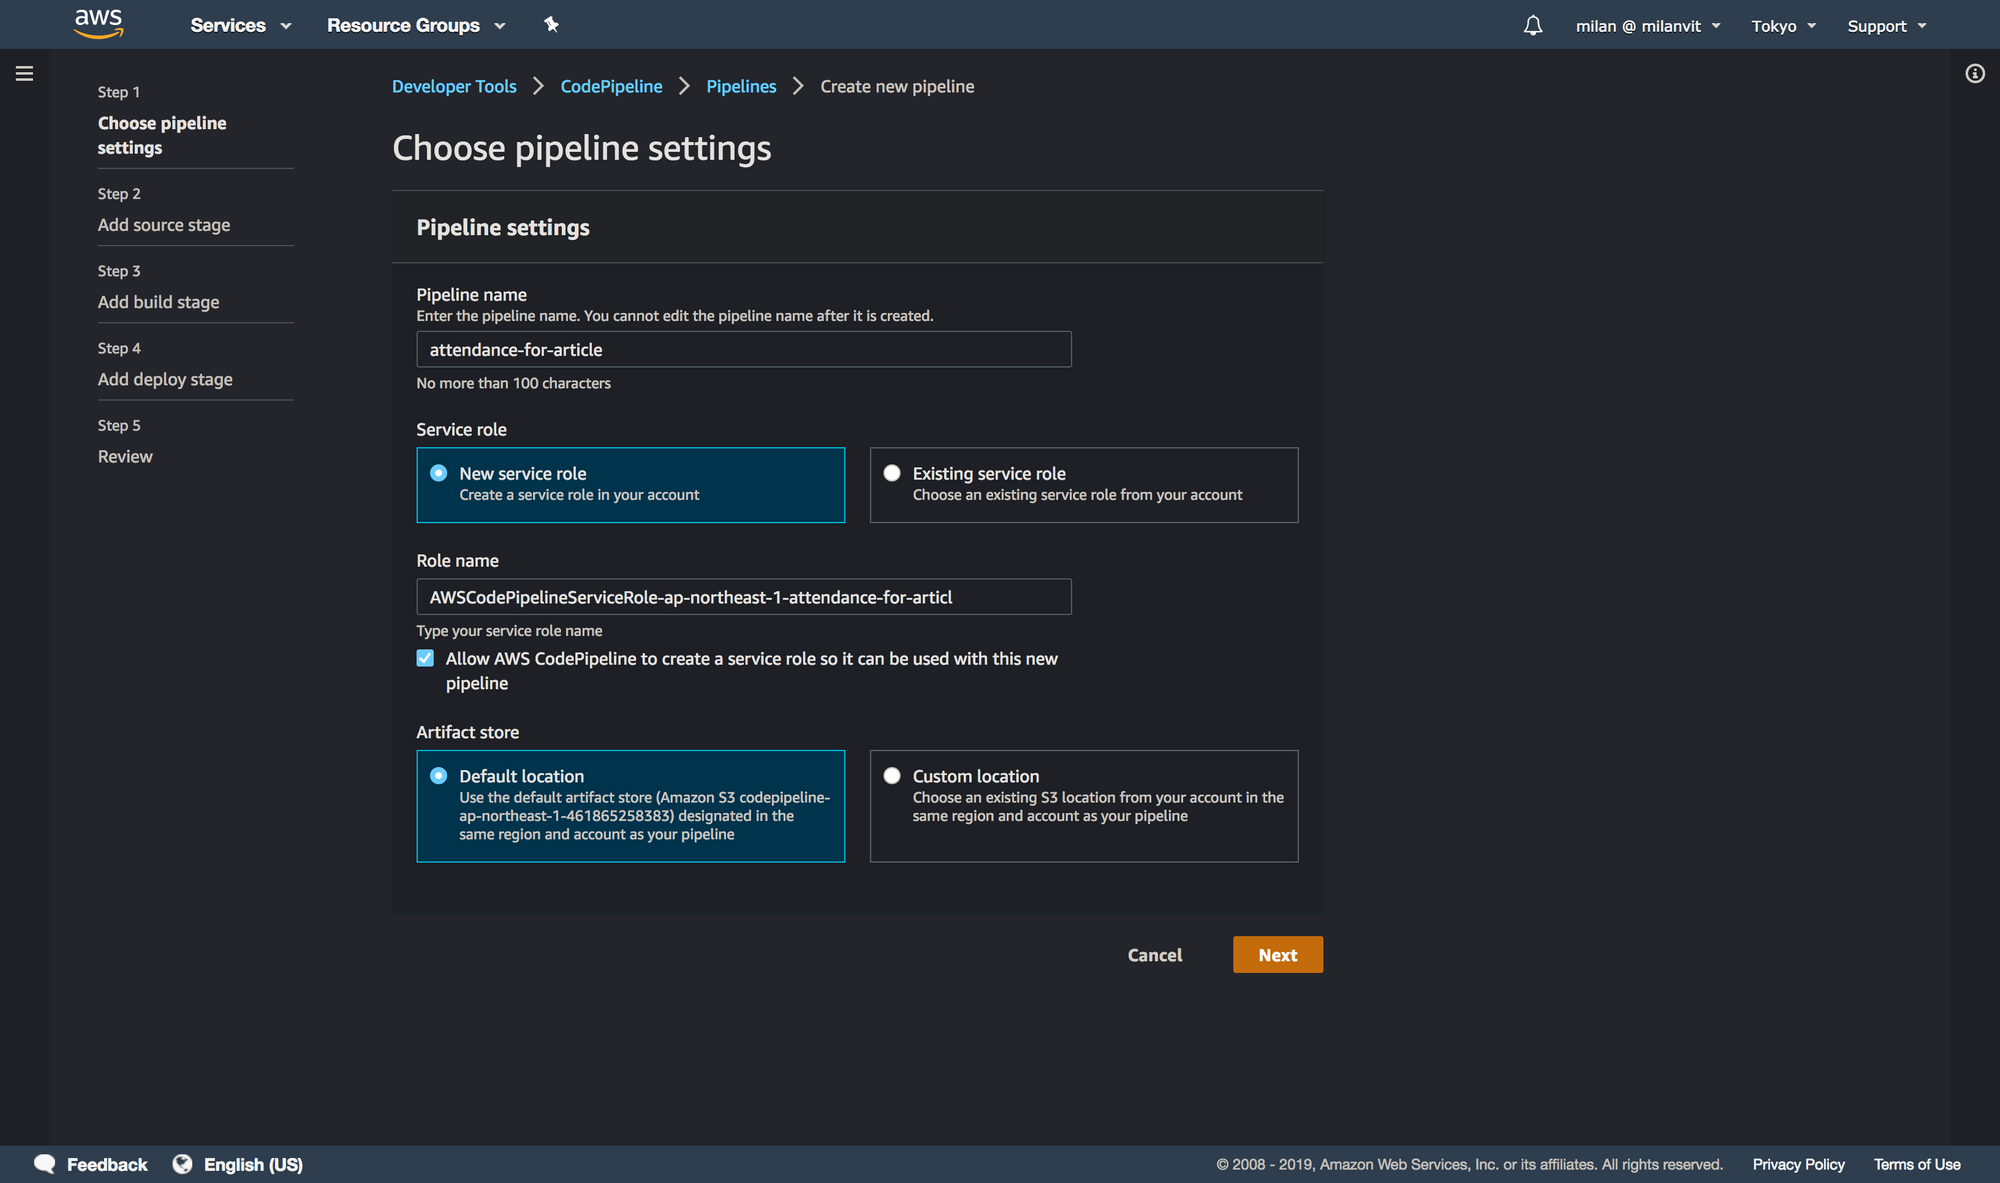
attendance-for-article due to attendance already existing. You can proceed with just attendance.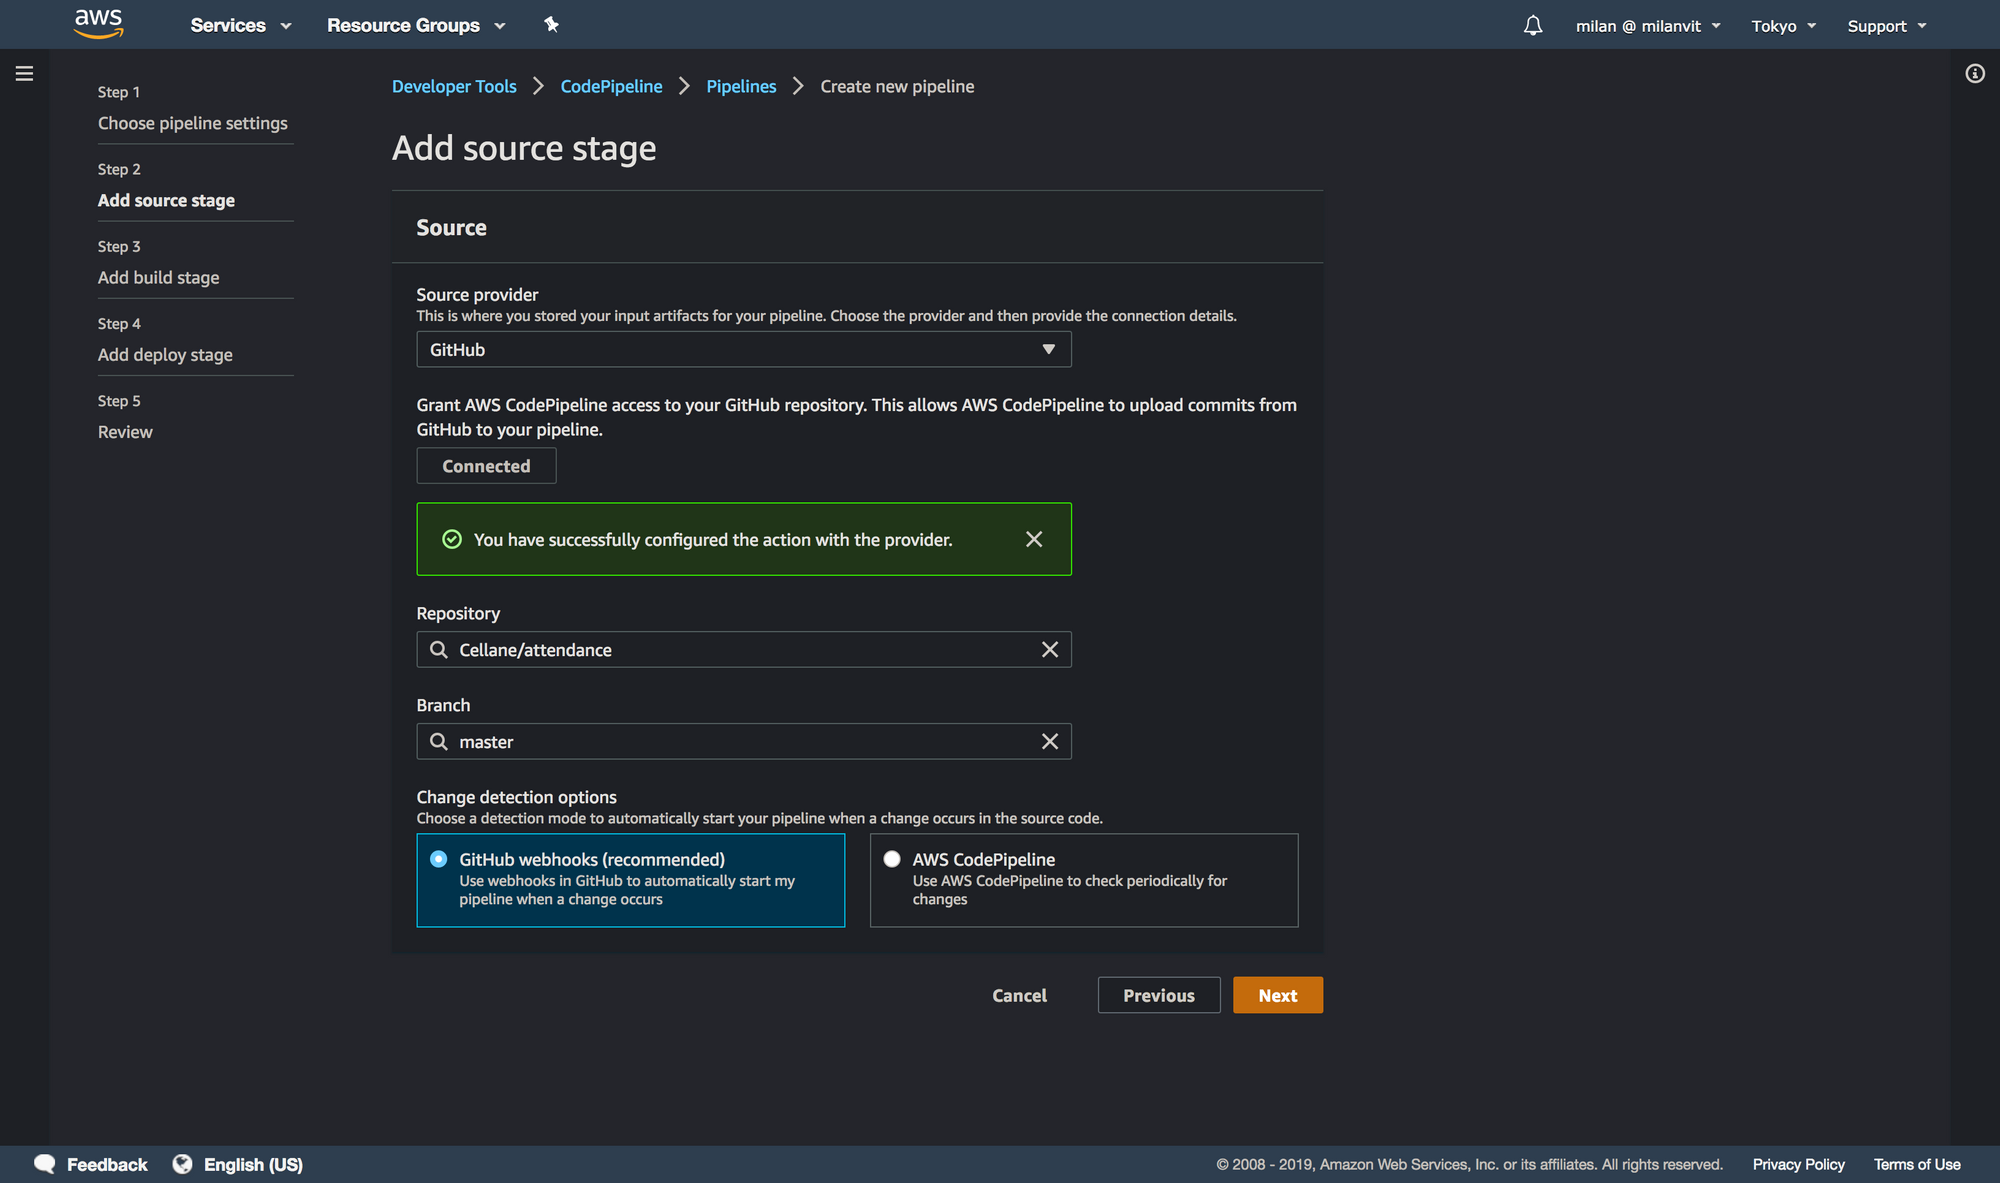
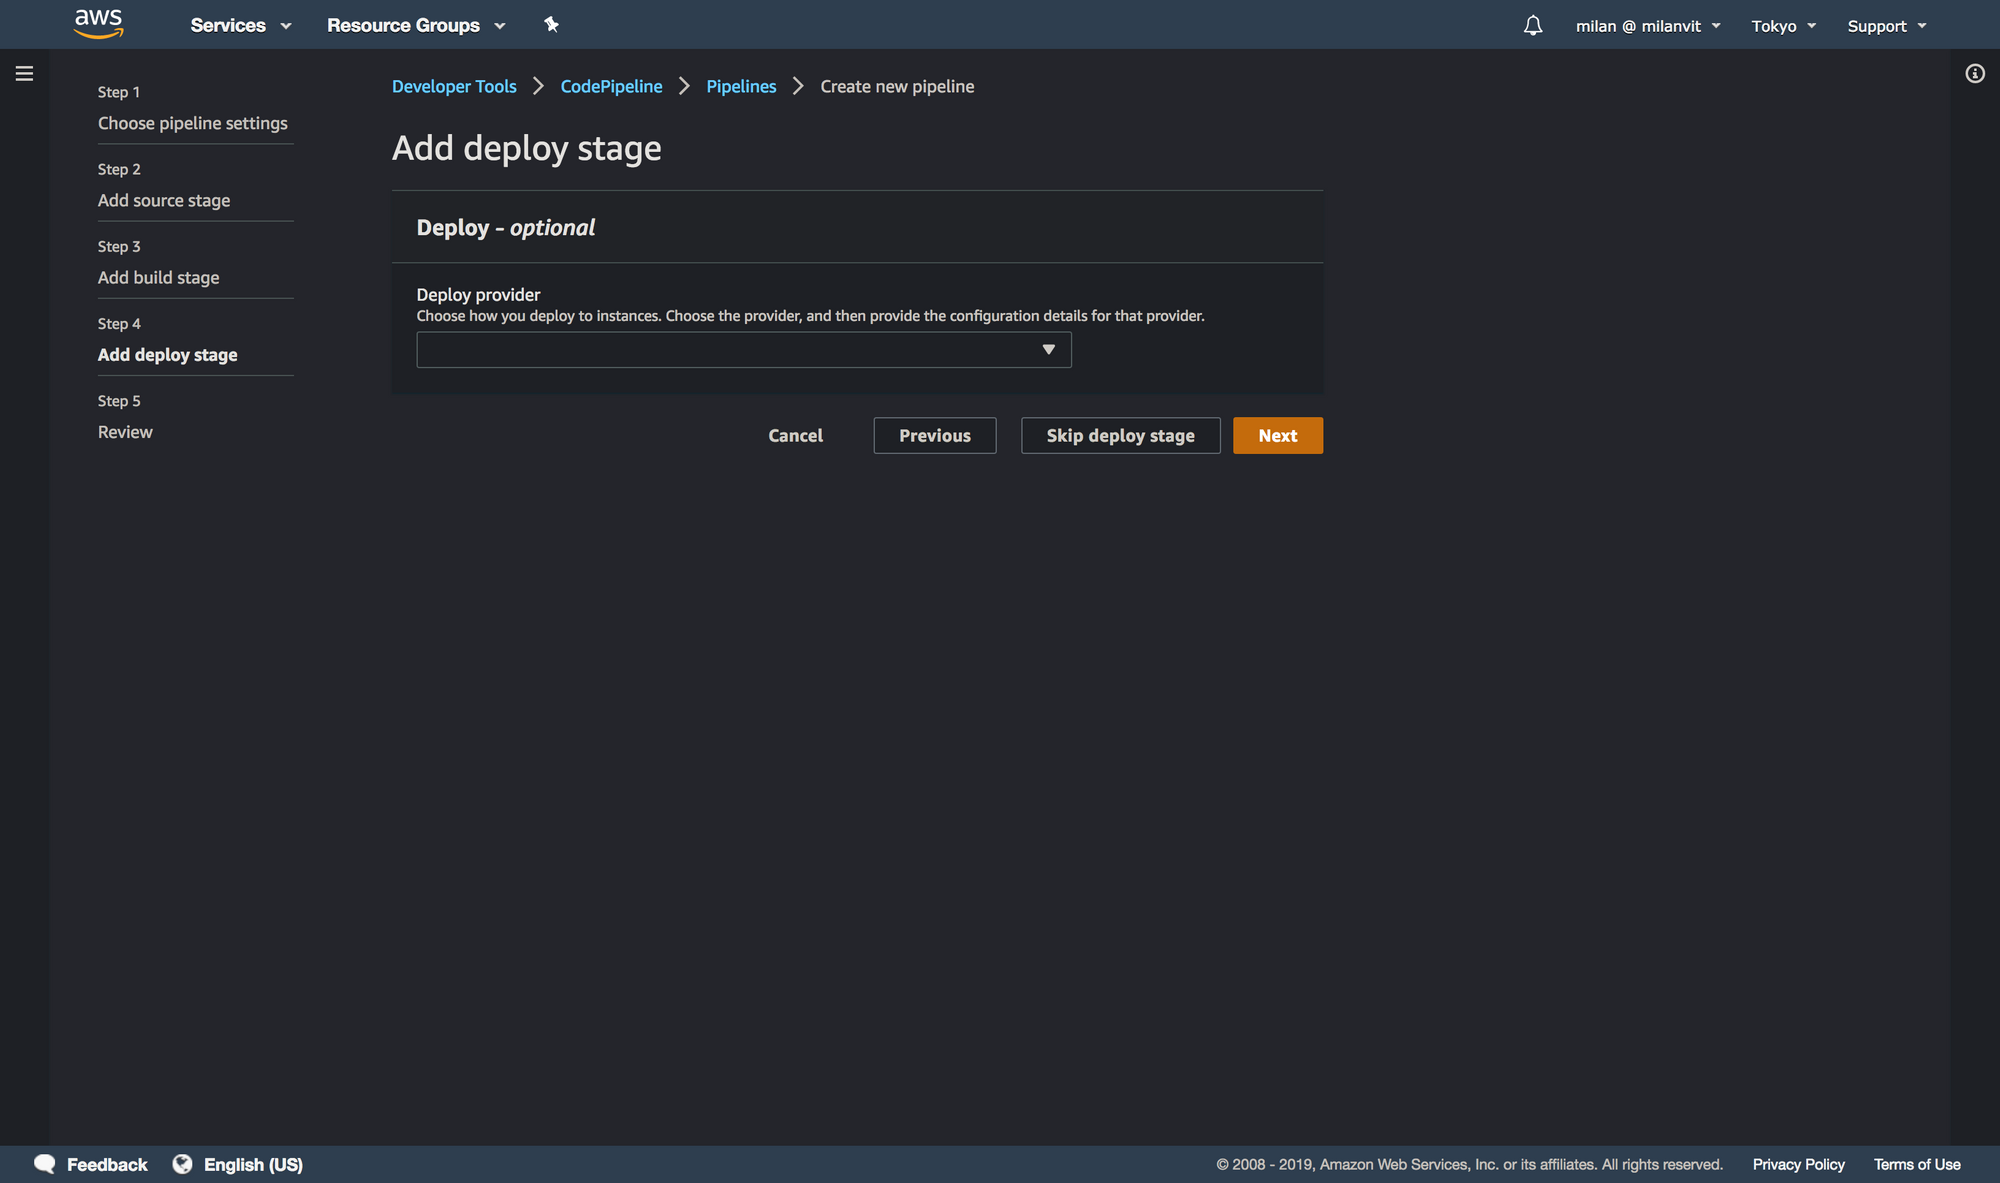
Skipping the deploy stage might feel a bit weird, but it’s actually exactly what we want. We wish for CodePipeline to trigger a CodeBuild build, which pushes the new image to ECR. In this step, however, CodePipeline does not allow us to select ECR as a deployment target (and even if it did, it’s still better and more flexible to perform the push from CodeBuild, since we also run the script to delete old images automatically), and selecting ECS (which we’ll use momentarily) would do us no good: while we will use Fargate in this exercise, we won’t have any ECS service running 24/7, that would be a waste of money. Instead, we’ll run a one-off ECS task anytime we need, and these will always use the latest image available in ECR. I hope this makes sense.
If you are done, you can push a dummy commit into the GitHub repository and you should see the pipeline triggered, as well as a build triggered in CodeBuild console. Good job! We’re done with the deployment stage.
Left lane: runtime
Let’s face it, the previous part was cool and all, but also entirely unnecessary. I mean, if we wanted to be way less cool, we could’ve just built the Docker image locally and pushed it to ECR manually – but where’s the fun in that? 🤣 With that said, things in this section are necessary, so let’s see what needs to be done.
Elastic Container Service
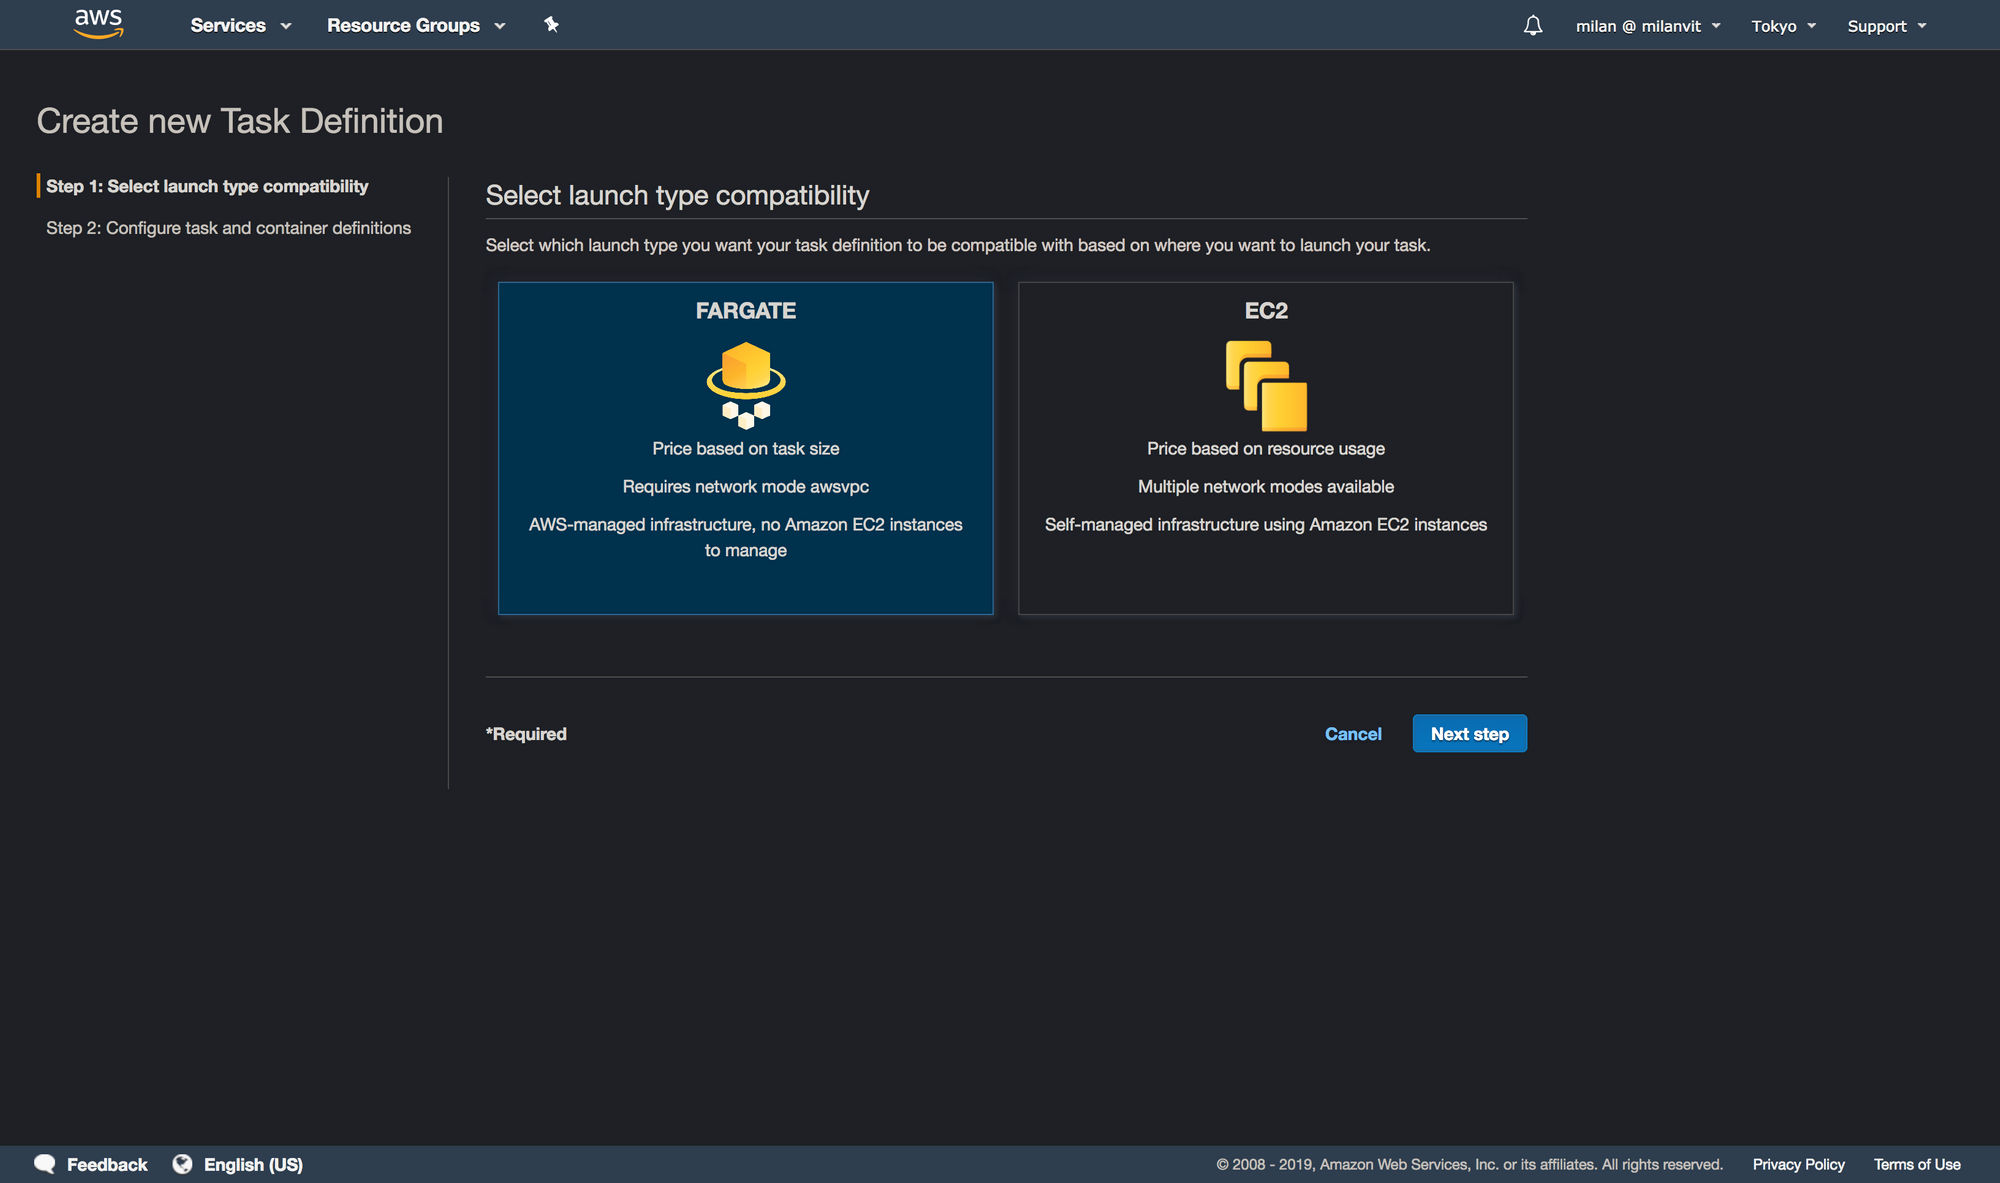
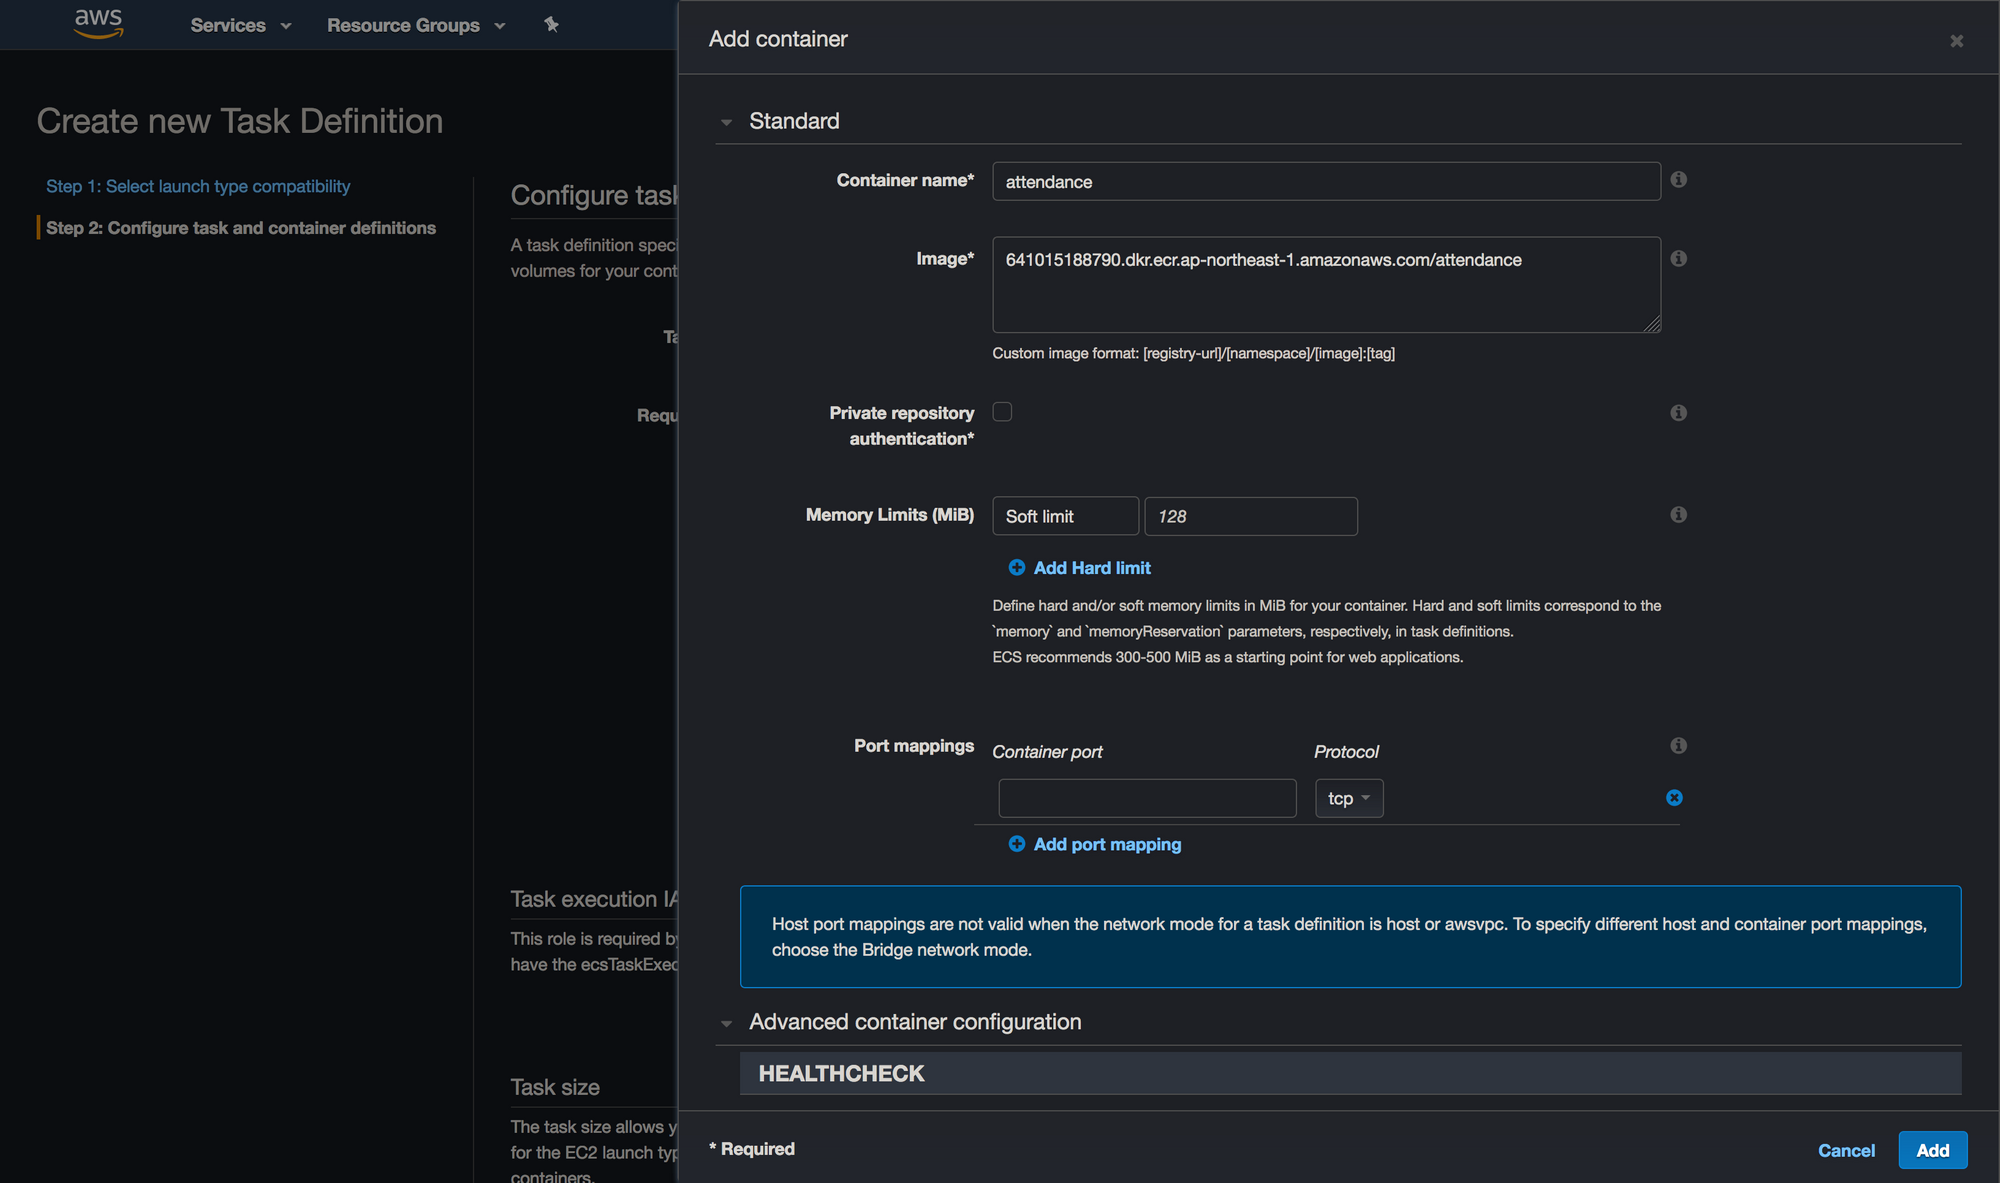
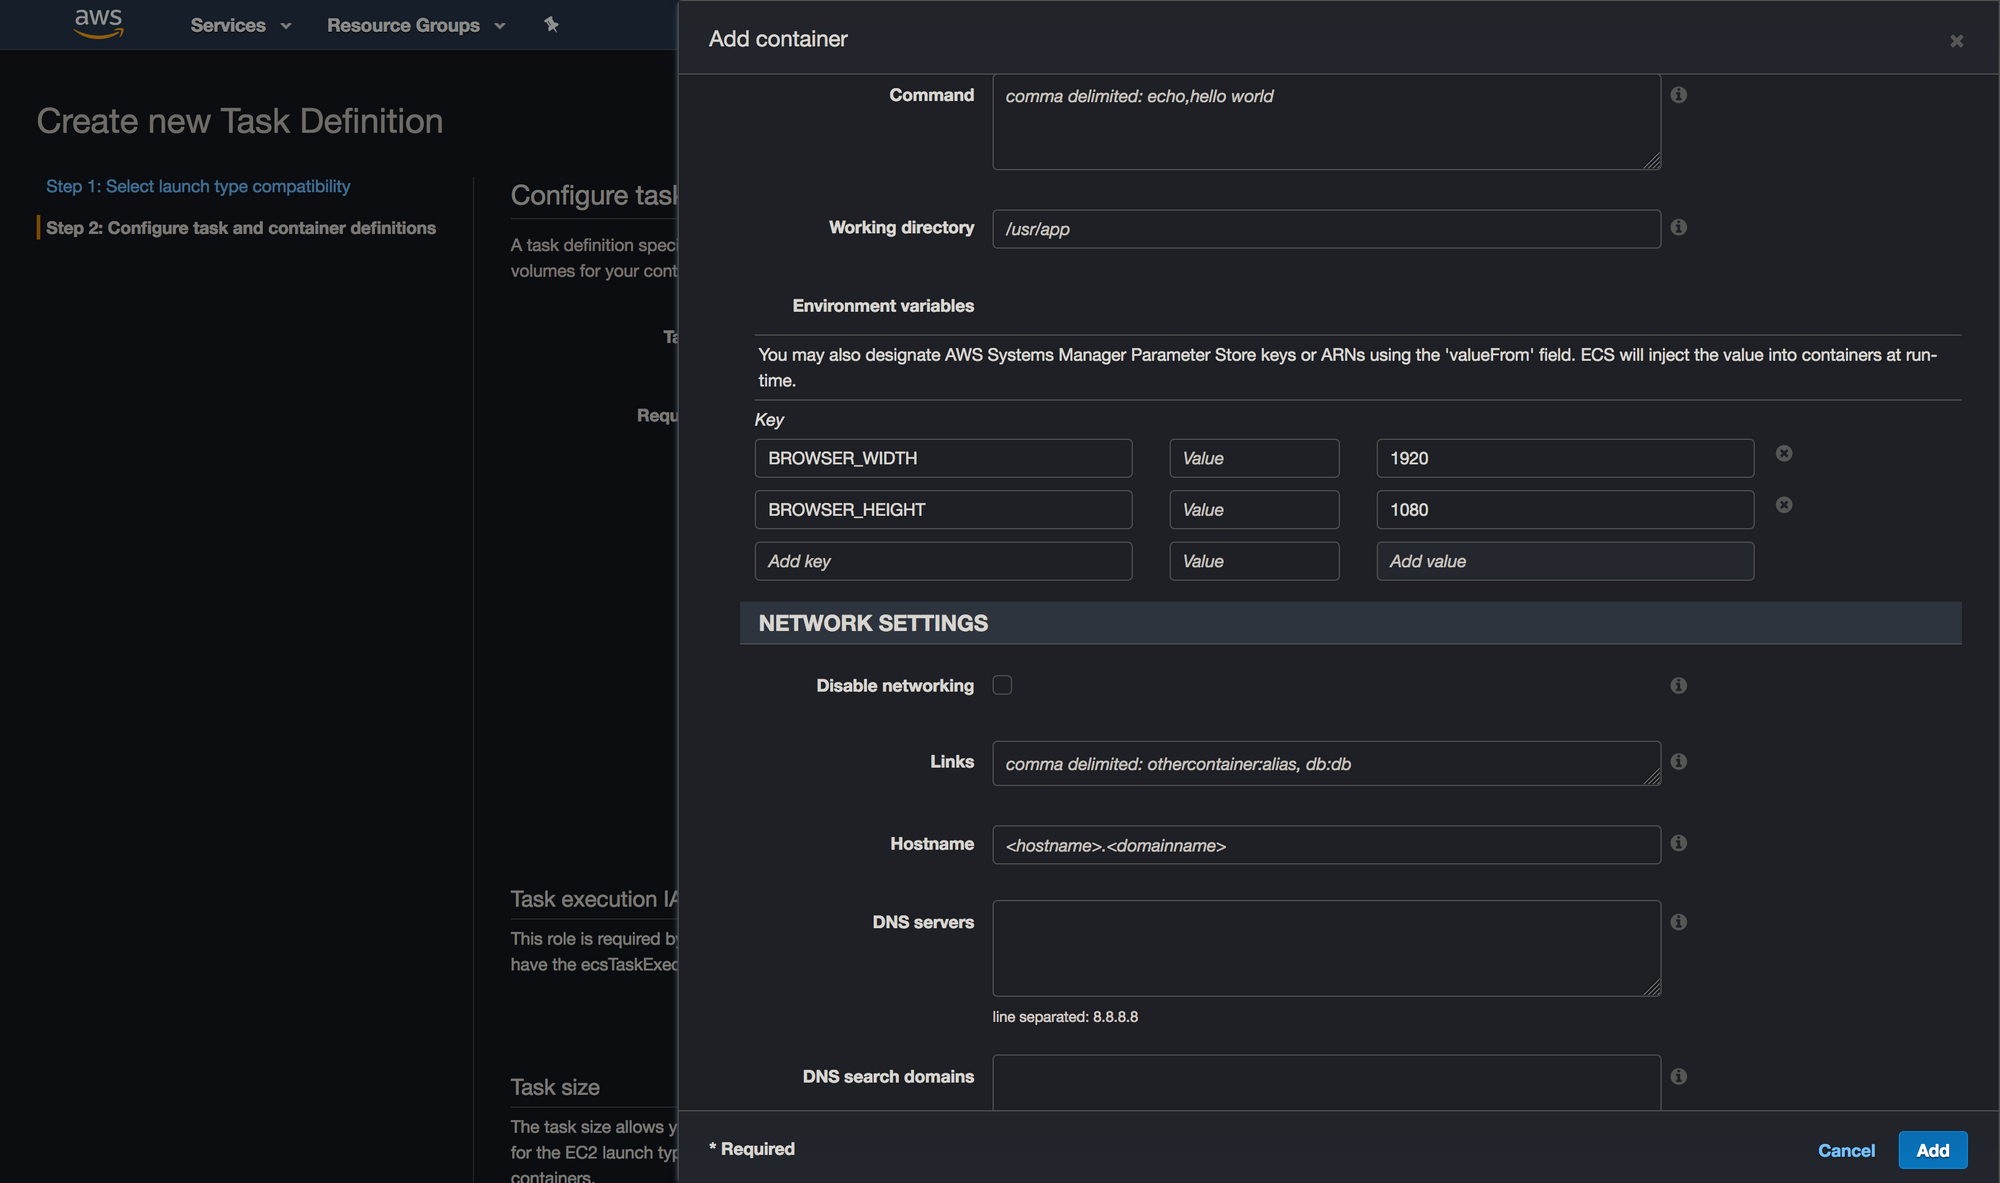
Navigate to ECS management console and if this is mama’s first rodeoECS experience 🐴🤠, ignore the big blue “Get started” button, because that’s where the troubles lie. It will force you into creating an ECS service, and as I mentioned before, that’s not what we need nor want. Instead, select “Task definition” from the left sidebar and create a new task definition, like so:
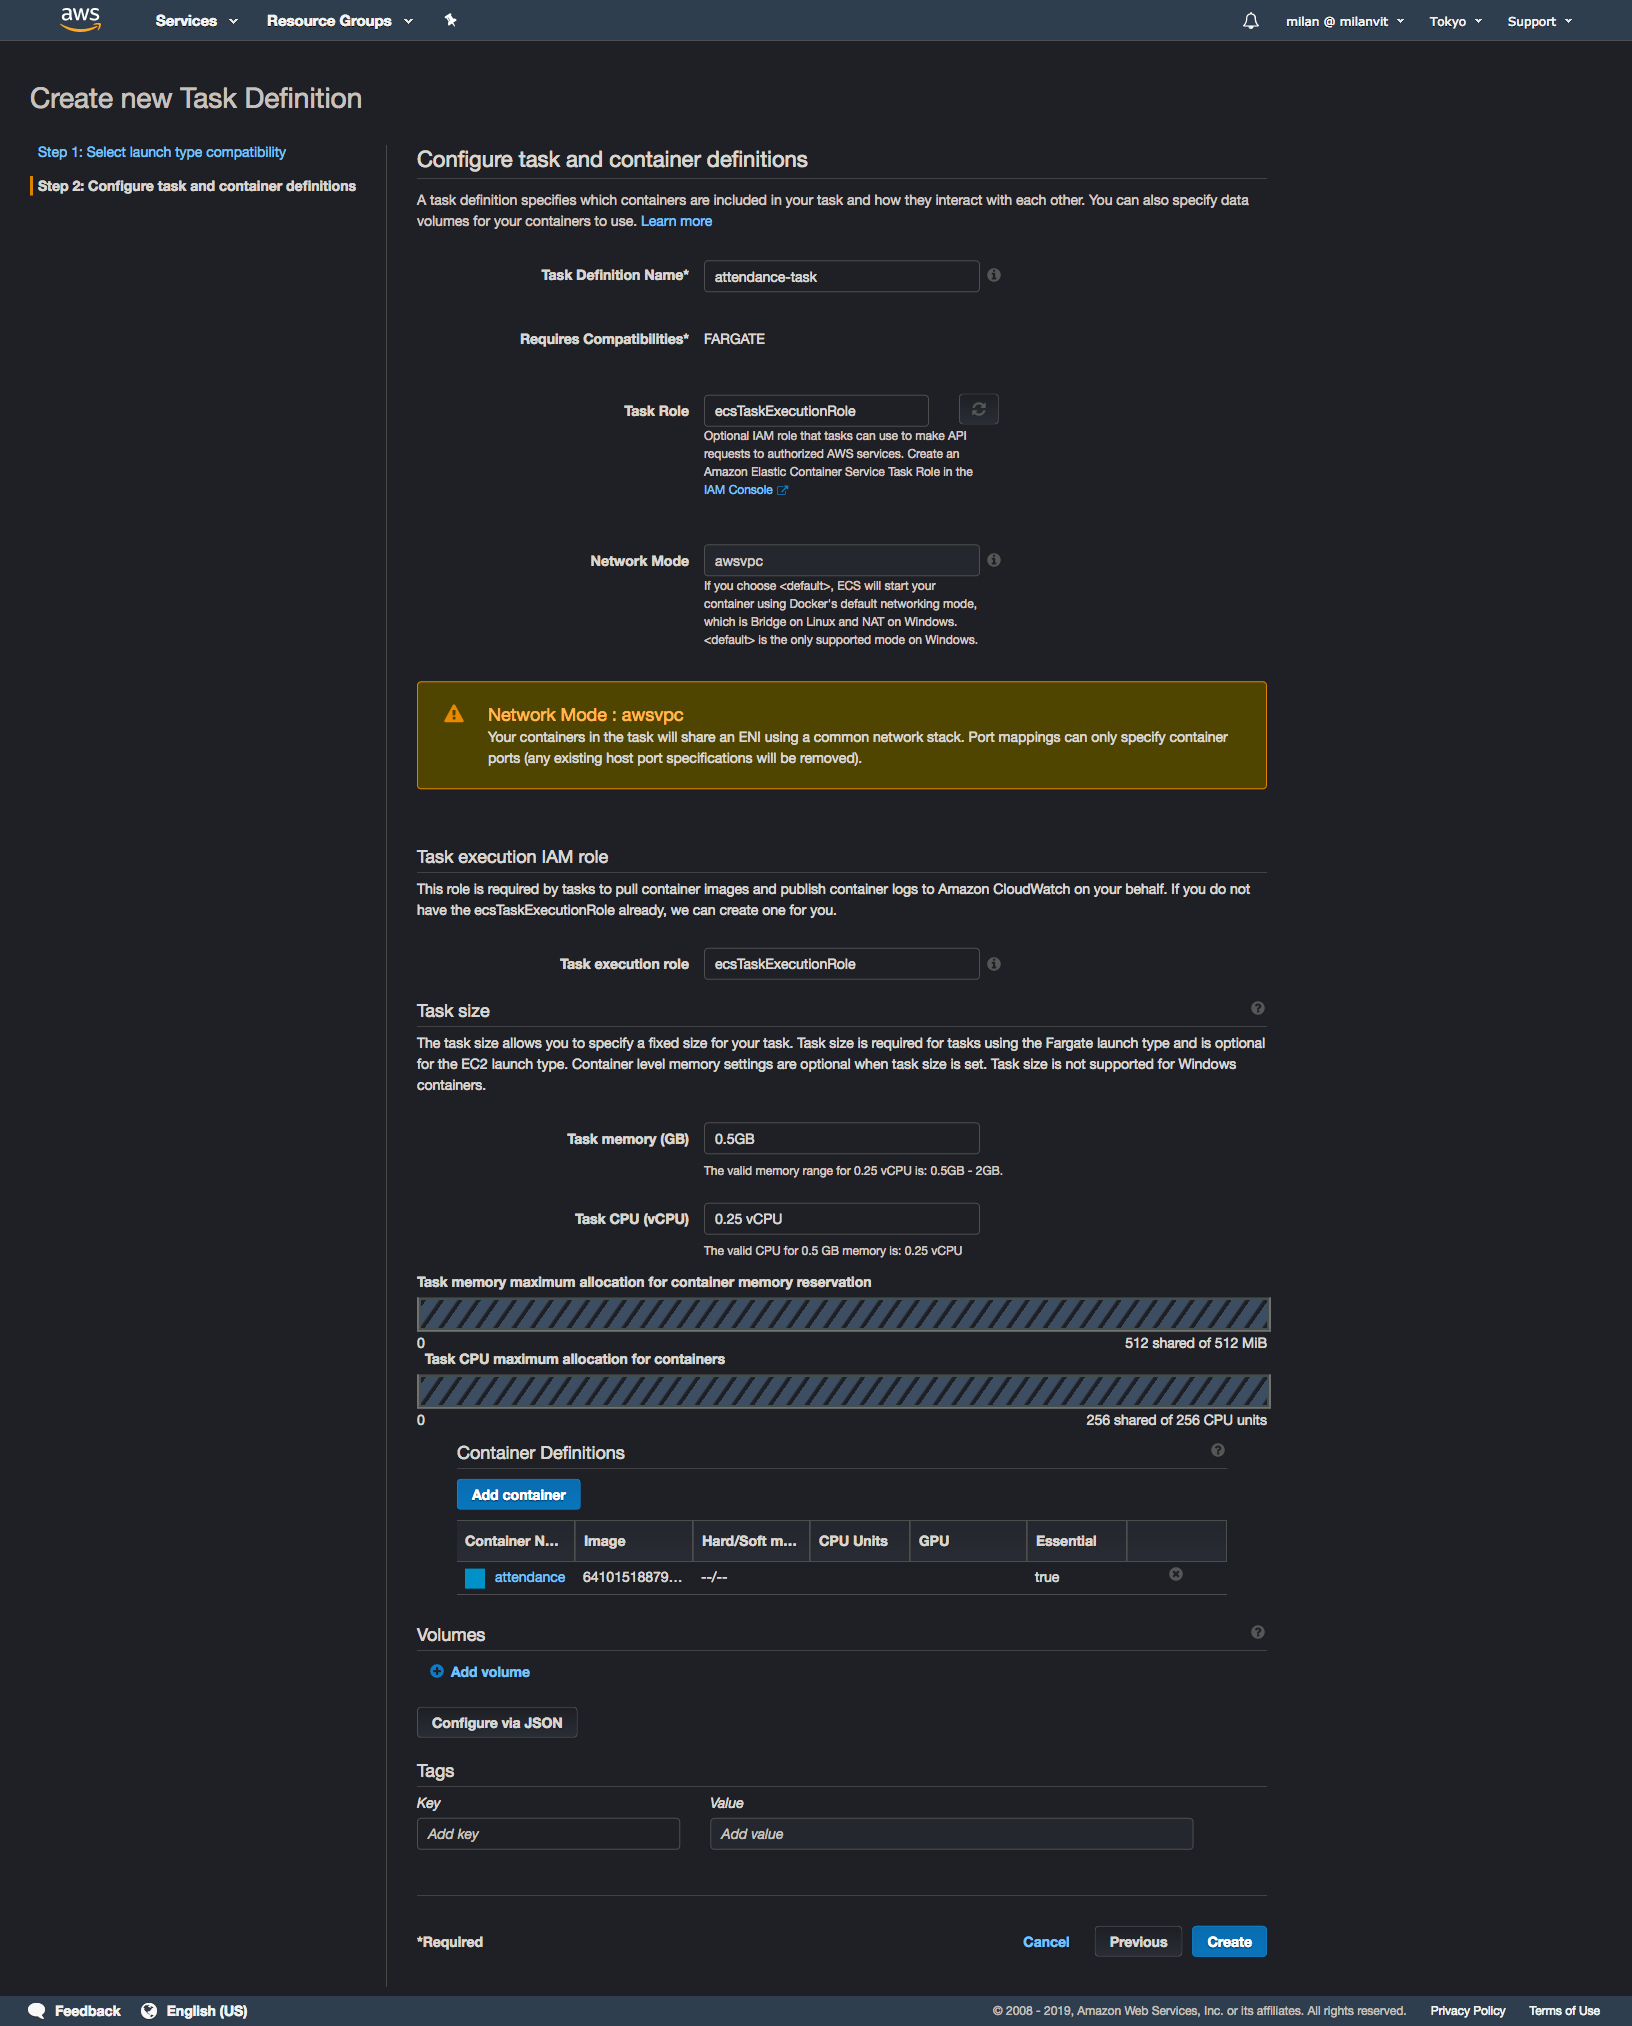
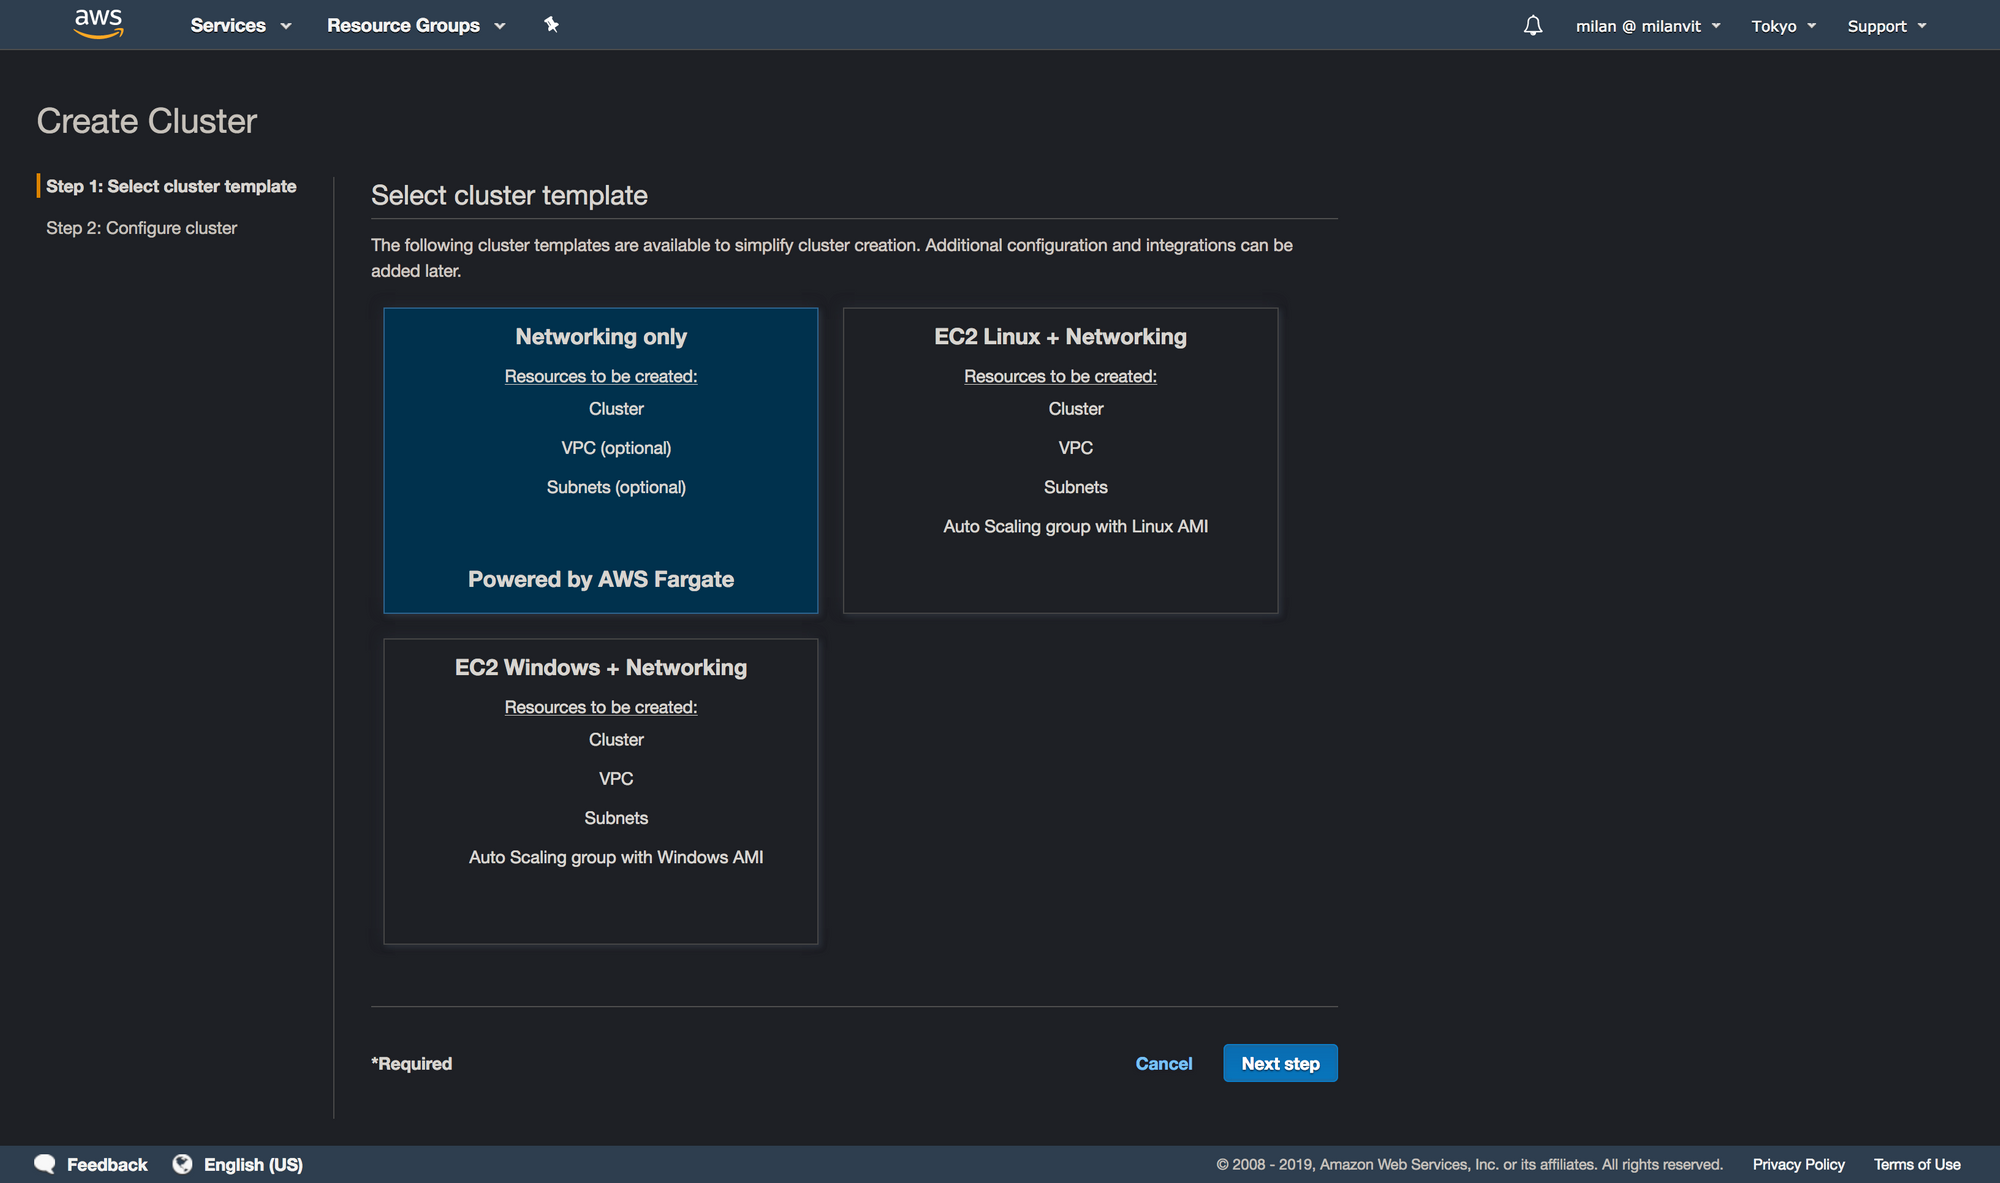
Once you’re done with this, point your eyes upon the left sidebar again, but this time go for the “Clusters” option. Create a new cluster like so:
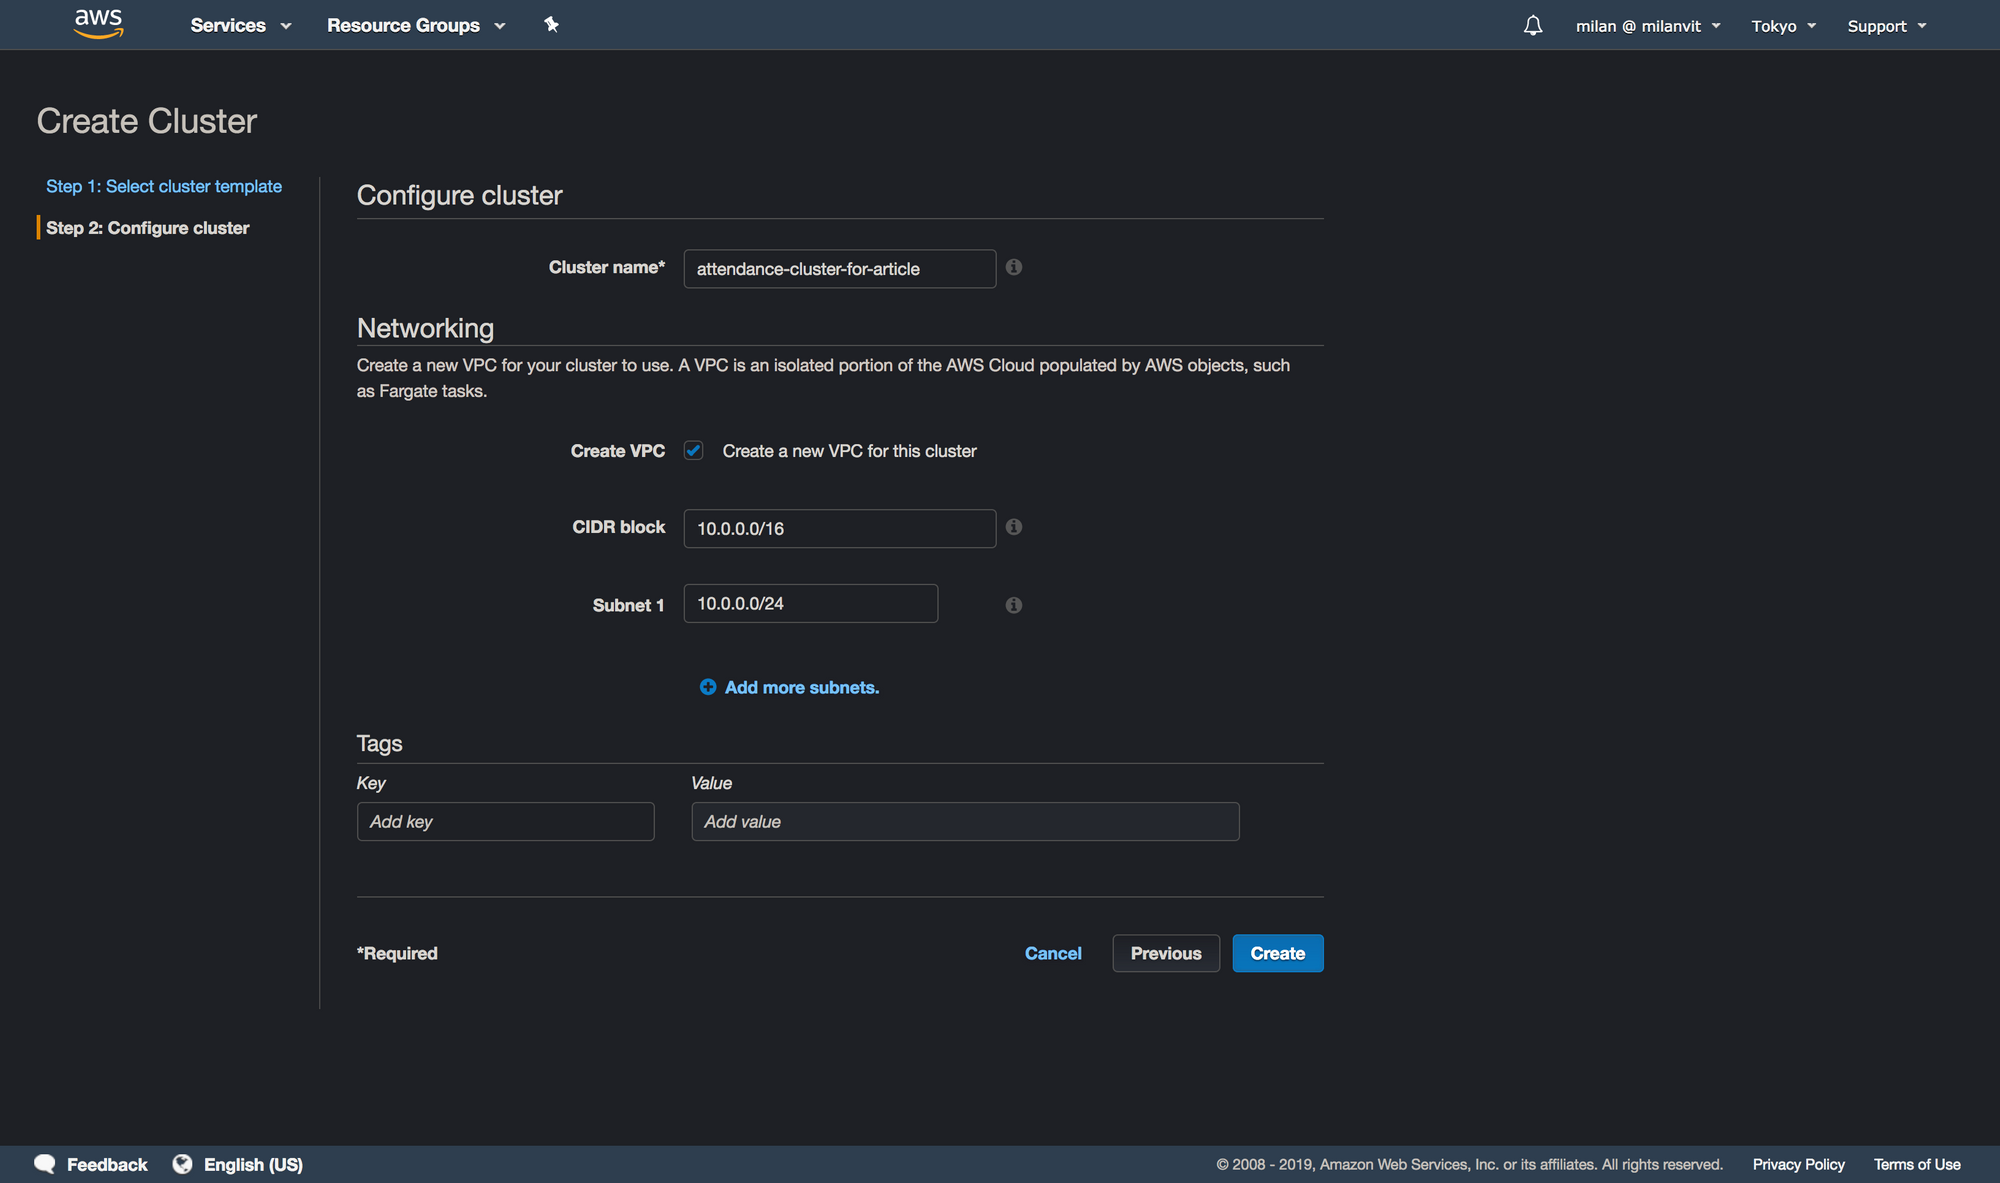
attendance-cluster, I just had to add the -for-article part in order to avoid an error message.Lambda
We’re nearly there, with only two more AWS services left to configure! Go quickly (I said quickly! 🏃♂️) to Lambda management console and create a new function:
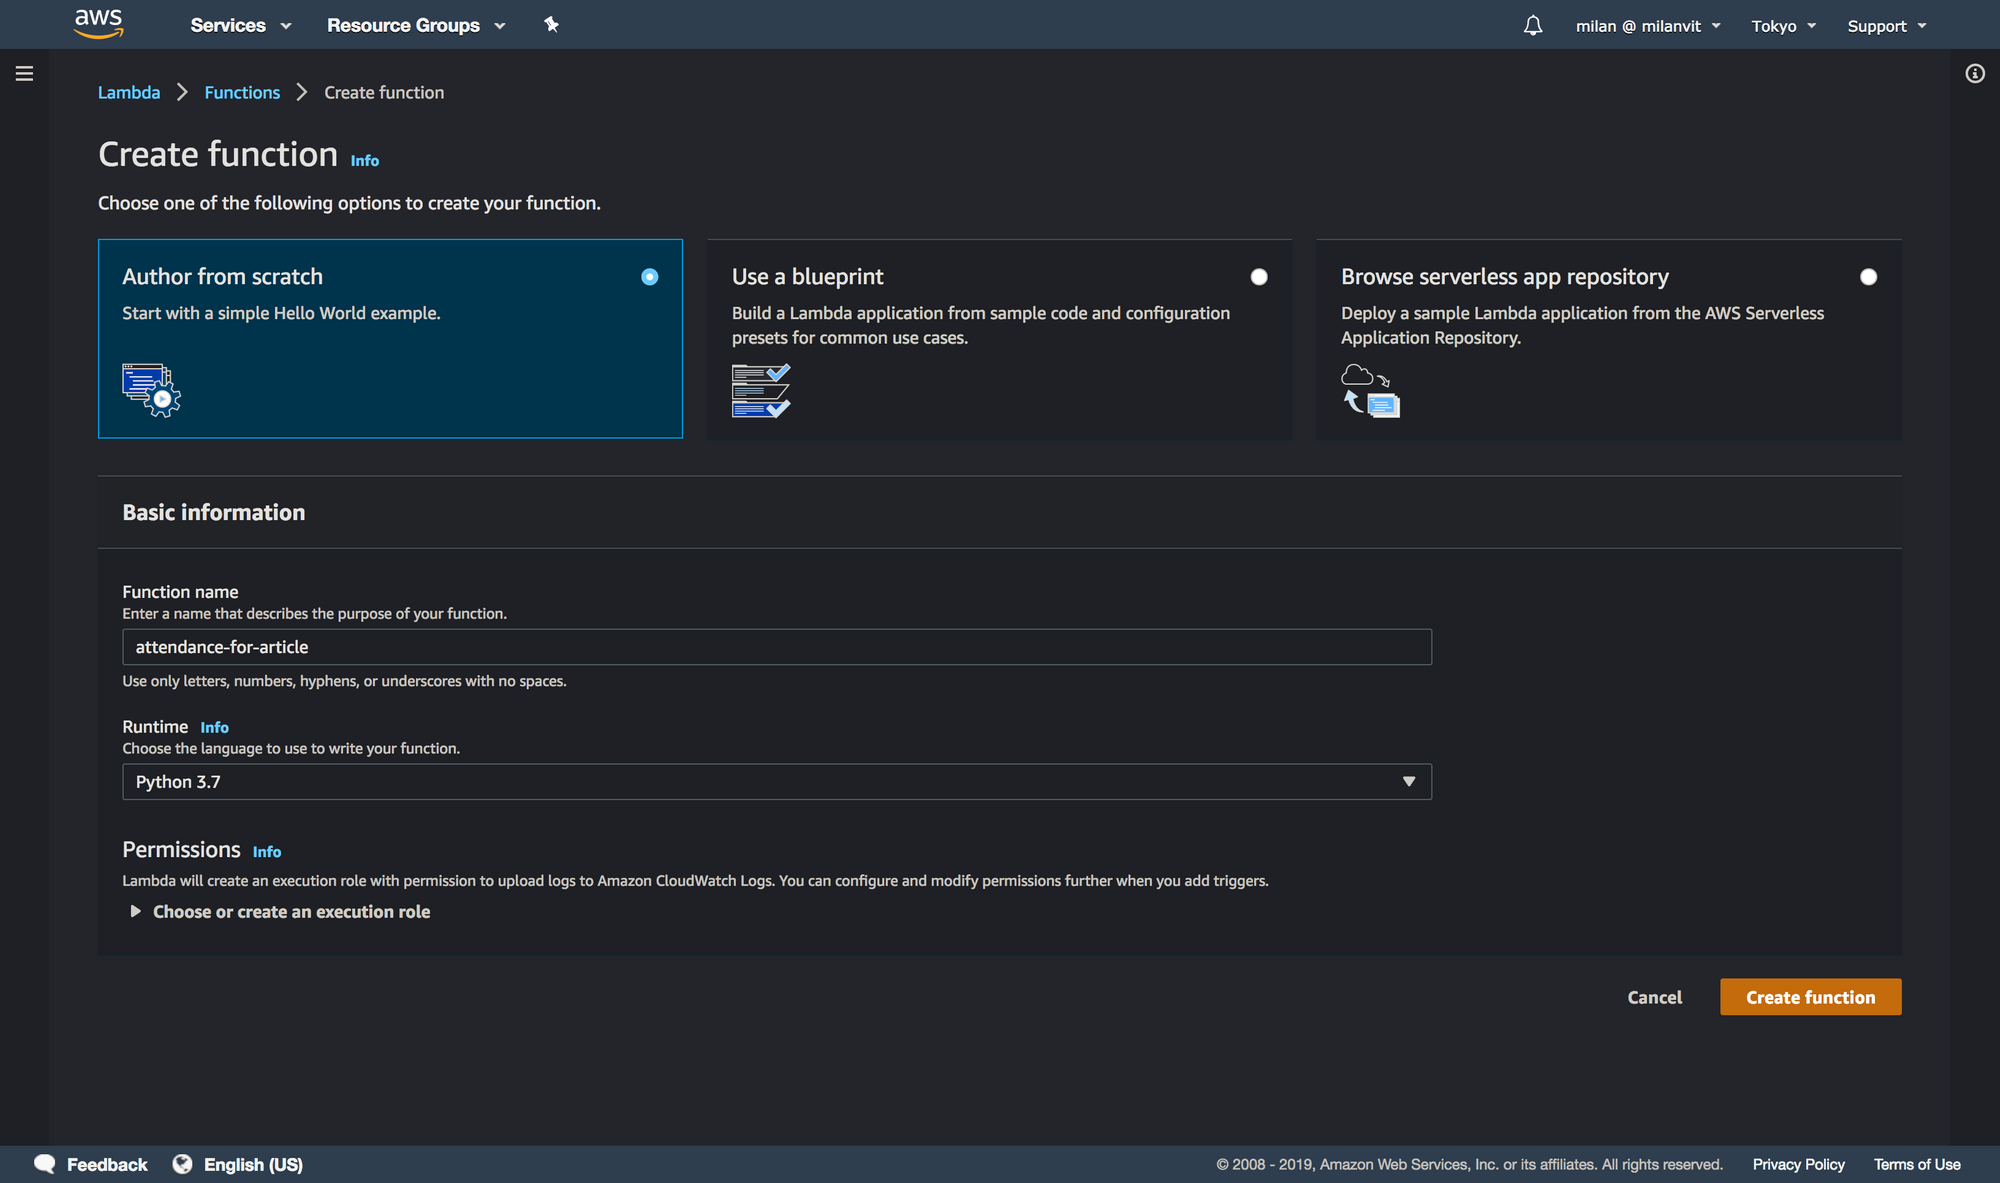
attendance as a name.The default configuration will create a new role for your Lambda function, so before copy-pastingwriting any code, head to IAM and attach an AmazonECS_FullAccess policy to this role. The name of this role is semi-randomly generated but it should start with an attendance-role- string. Finally, here’s the adjusted code for this Lambda function:
import boto3
import json
import logging

logger = logging.getLogger()
logger.setLevel(logging.INFO)

def lambda_handler(event, context):
    req = json.loads(event["body"])
    if "kick_type" not in req:
        logger.warn("no kick_type.")
        return {
            "statusCode": 400,
            "body": "",
        }

    kick_type = req["kick_type"]
    user_id = req["user_id"]
    user_pass = req["user_pass"]

    if kick_type not in ("start", "end", "test"):
        logger.warn("kick_type missmatch.")
        return {
            "statusCode": 400,
            "body": "",
        }

    if kick_type == "start":
        entrypoint = "entry"
    elif kick_type == "end":
        entrypoint = "exit"
    else:
        entrypoint = "test"

    client = boto3.client('ecs')
    client.run_task(
        cluster="attendance-cluster",
        taskDefinition="attendance-task",
        launchType="FARGATE",
        count=1,
        overrides={
            "containerOverrides": [
                {
                    "name": "attendance",
                    "command": [
                        "python3",
                        "/opt/entrypoint/{}.py".format(entrypoint),
                        "--username",
                        user_id,
                        "--password",
                        user_pass,
                    ],
                },
            ],
        },
        networkConfiguration={
            "awsvpcConfiguration": {
                "subnets": [
                    "subnet-xxxxxxxxxx",
                ],
                "assignPublicIp": "ENABLED",
            }
        })
    logger.info("kick {}.".format(entrypoint))

    return {
        "statusCode": 200,
        "body": "",
    }
There are two things you need to check and one you need to change. Make sure cluster="attendance-cluster" and taskDefinition="attendance-task" are the exact names of your ECS cluster & task definition, and then search for subnet-xxxxxxxxxx and replace it with your subnet ID. You can find it in the VPC management console, in the Subnet section (duh! 🤪).
As an exercise, you may want to test your lambda function, just be aware that we’ll use API Gateway in proxy mode, so your test request should probably look something like this:
{
  "body": "{\"kick_type\":\"test\", \"user_id\":\"email\",\"user_pass\":\"password\"}"
}
Well, I say exercise but I wrote almost the entire solution… 😅 Anyhow!
API Gateway
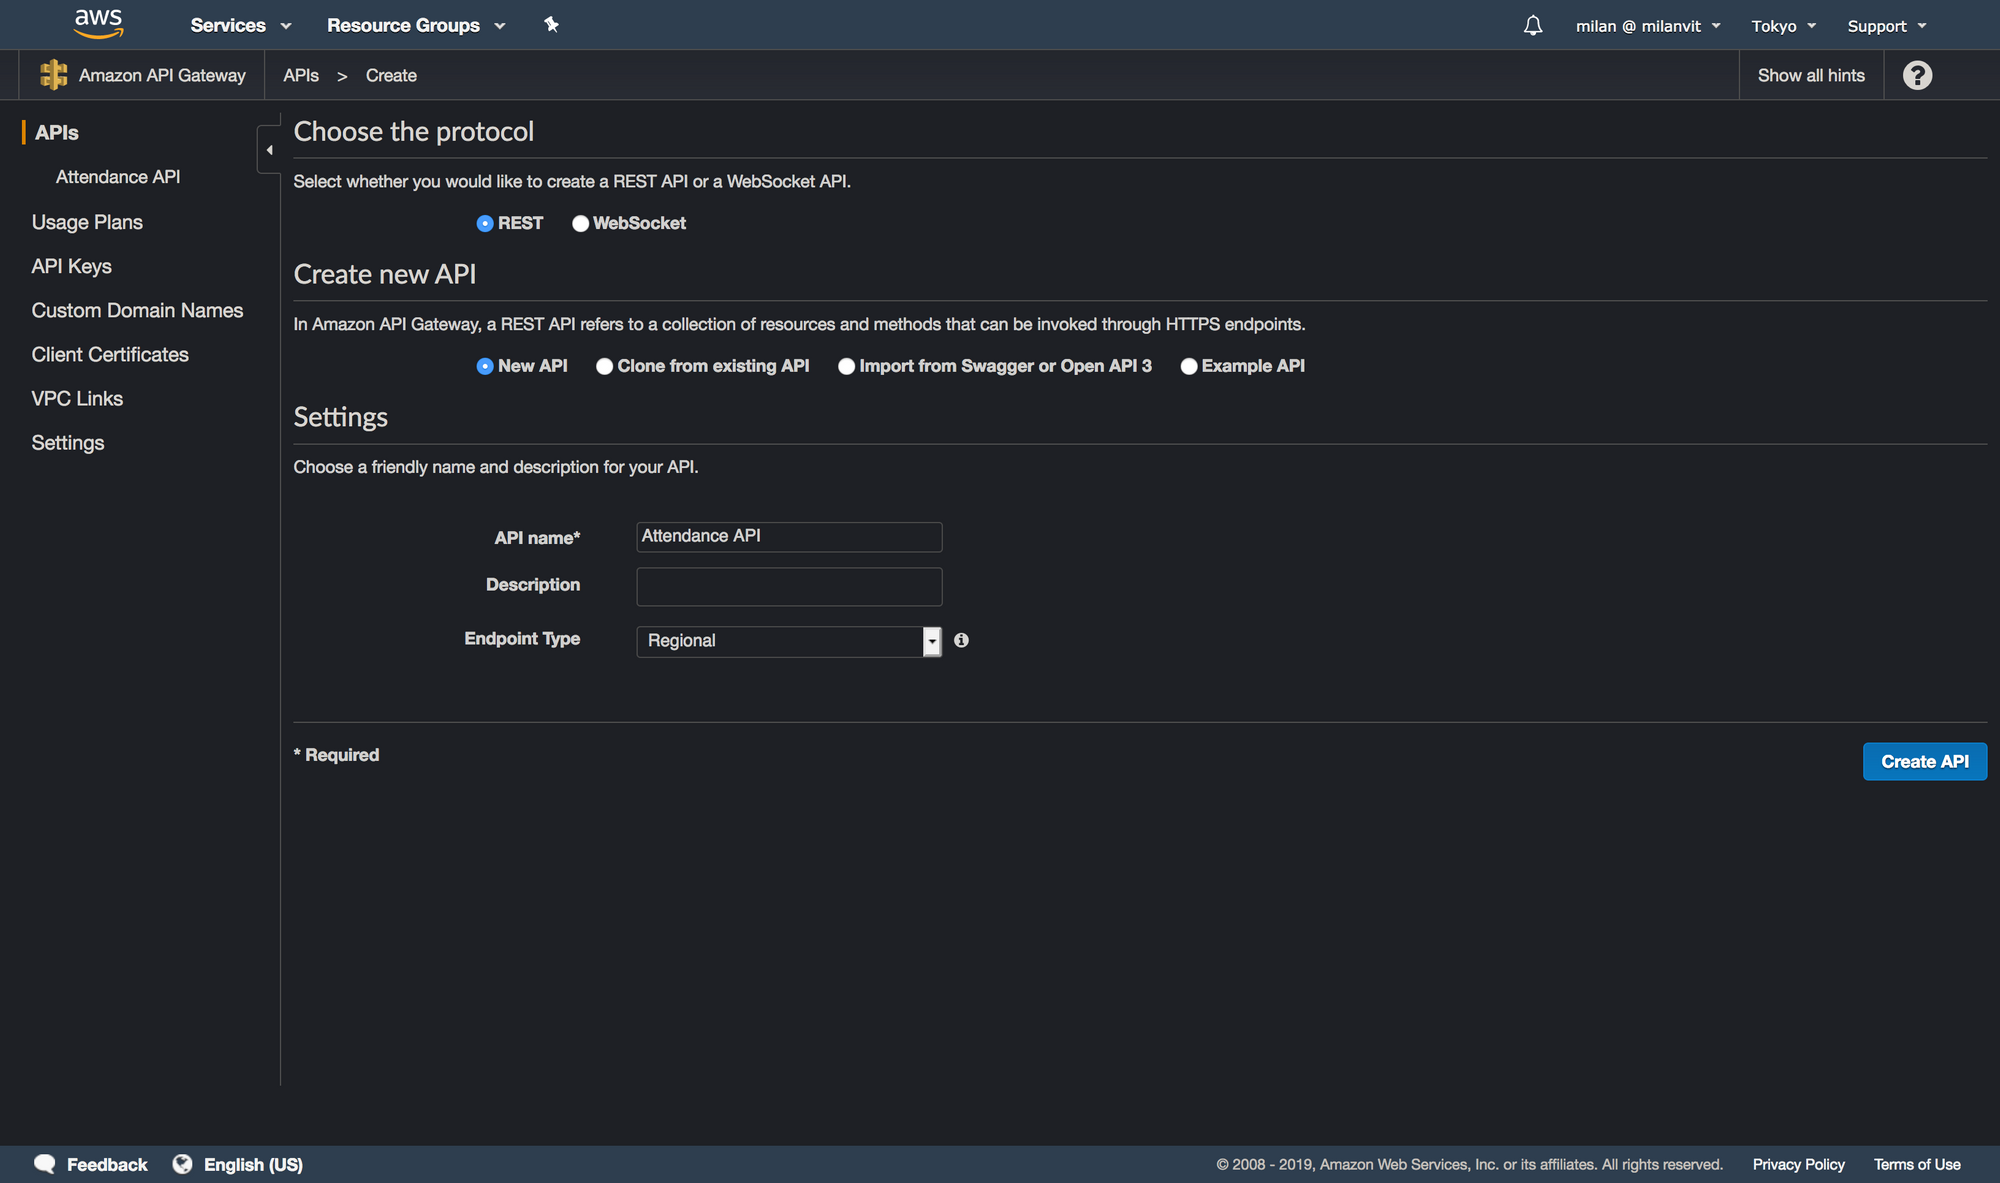
It’s time to expose… definitely not ourselves, but our Lambda function to the world. And by “world”, I mean “us”, because we definitely don’t want other people to run ECS tasks on our behalf. Navigate to API Gateway management console and create a new API:
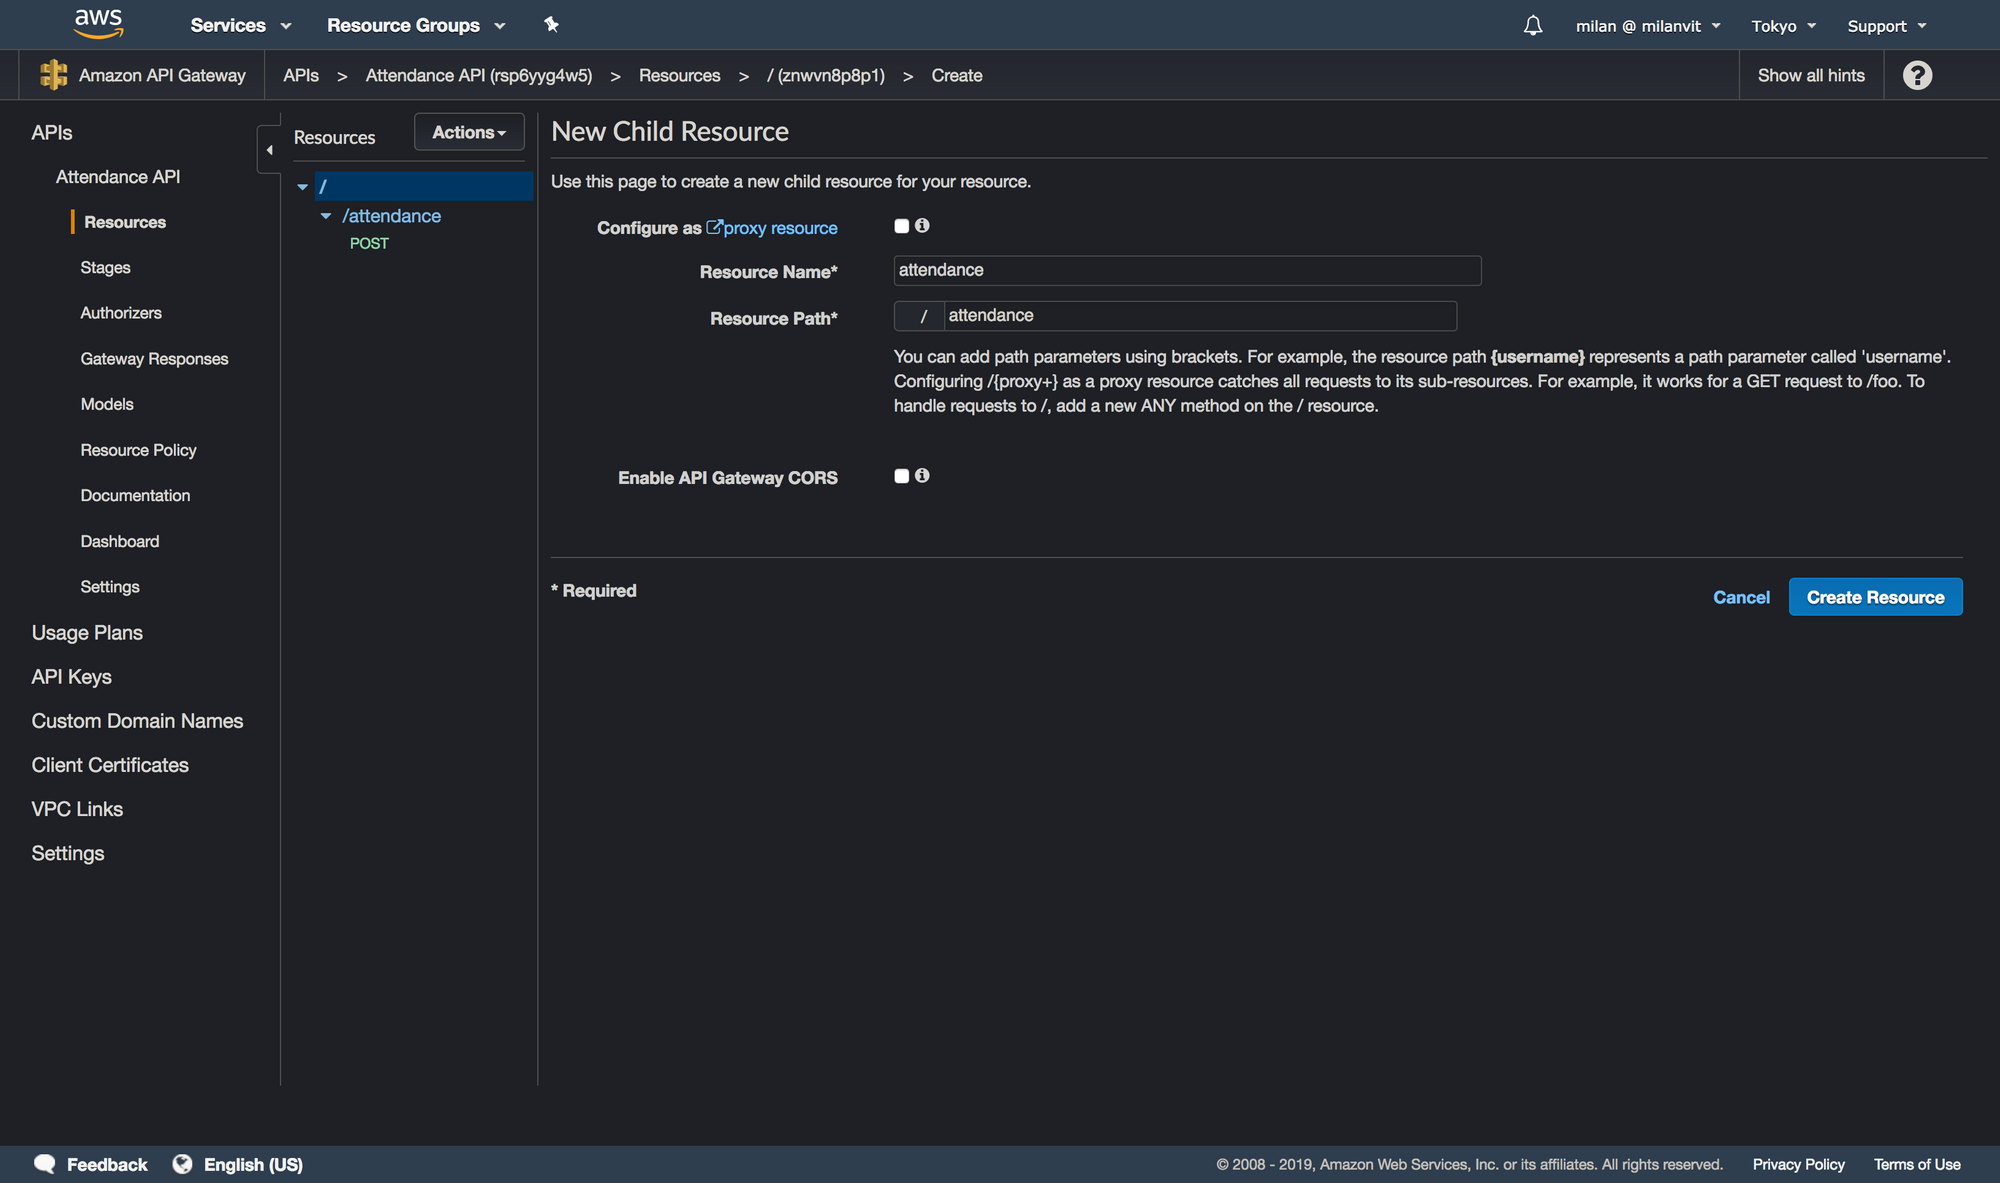
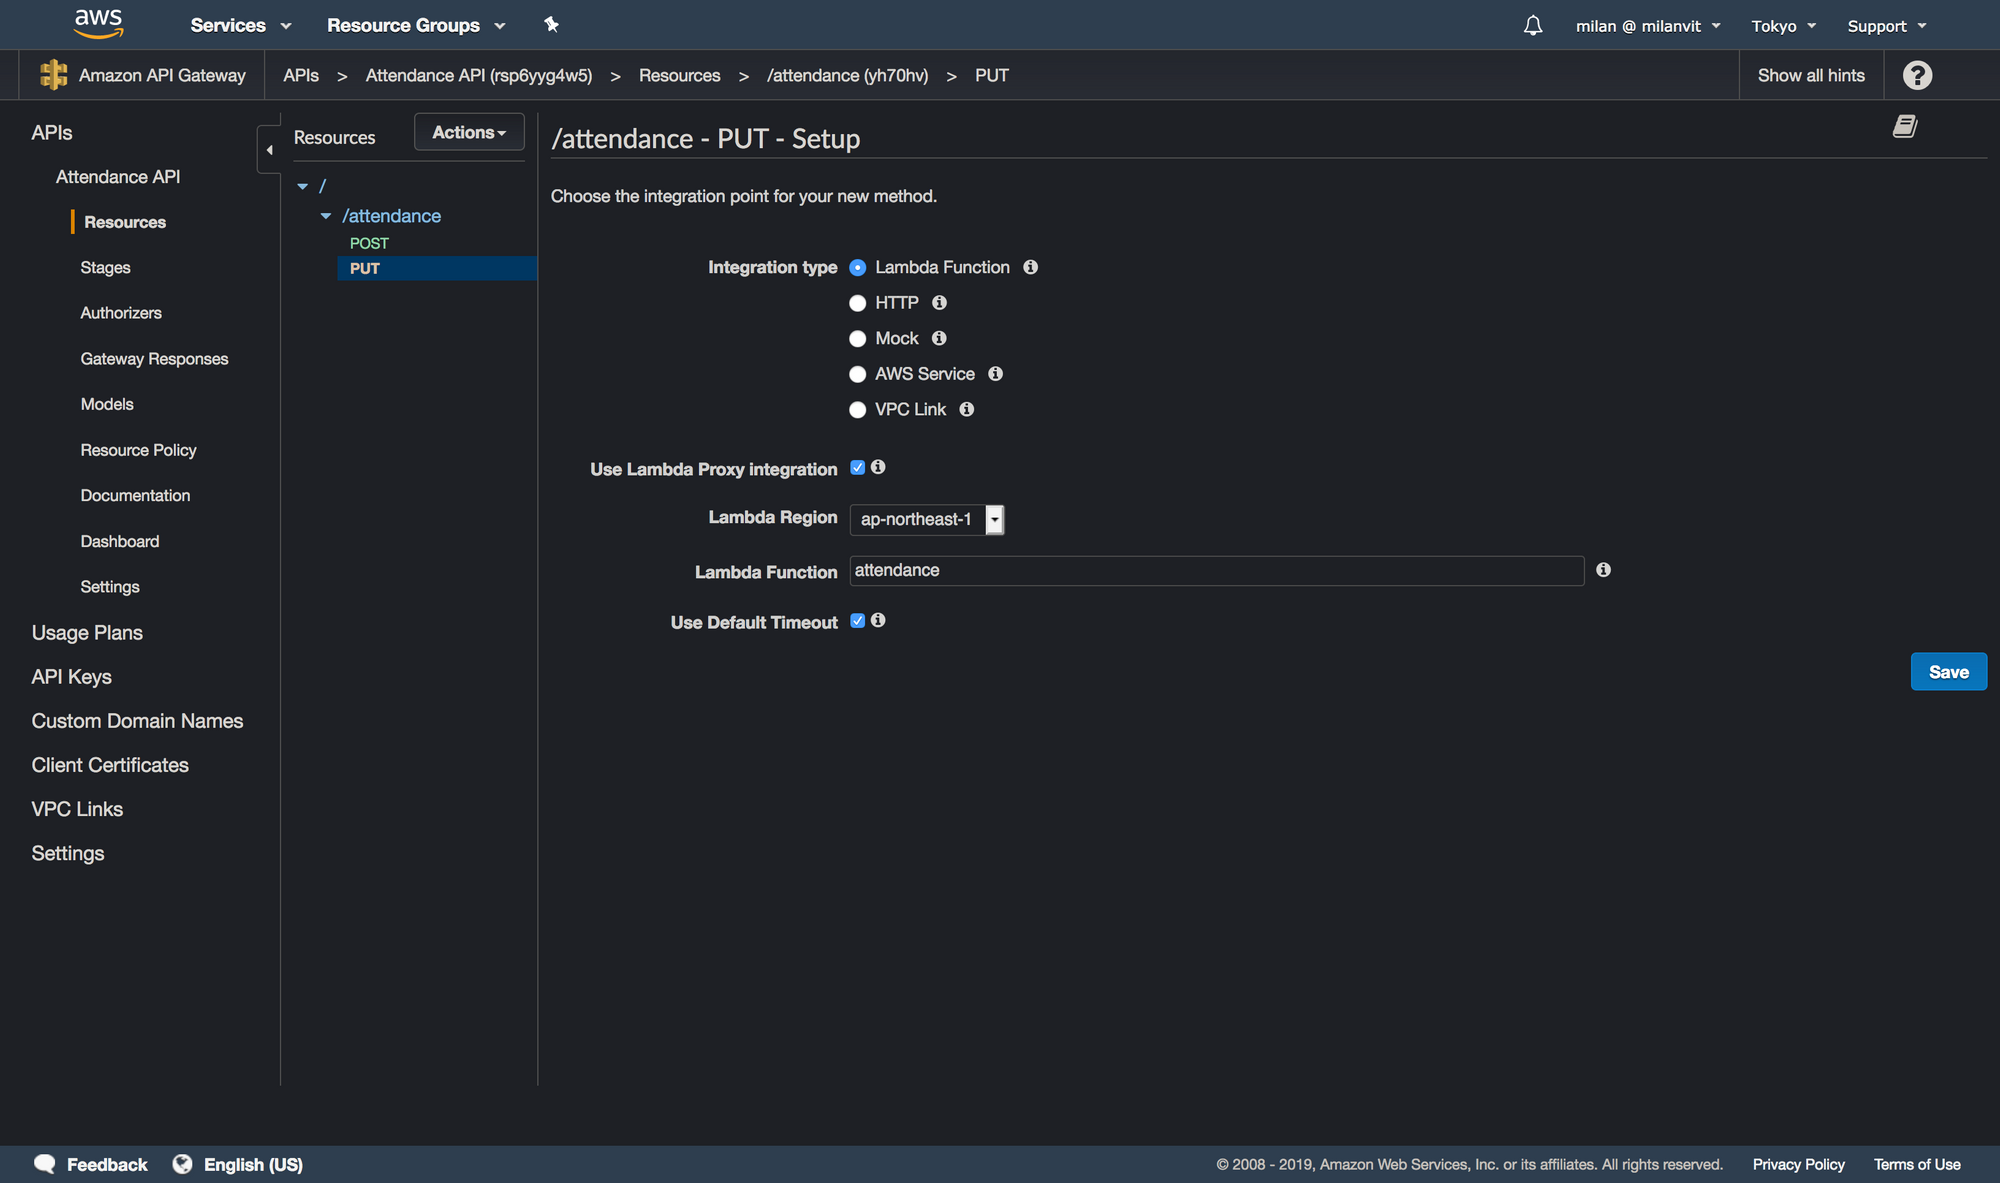
Then, create a new resource with a POST method (for the sake of screenshots and not-deleting-work-that-is-already-working, I’ll create a PUT method, so please bear with me 🐻), by selecting Actions ↝ Create Resource and Actions ↝ Create Method respectively:
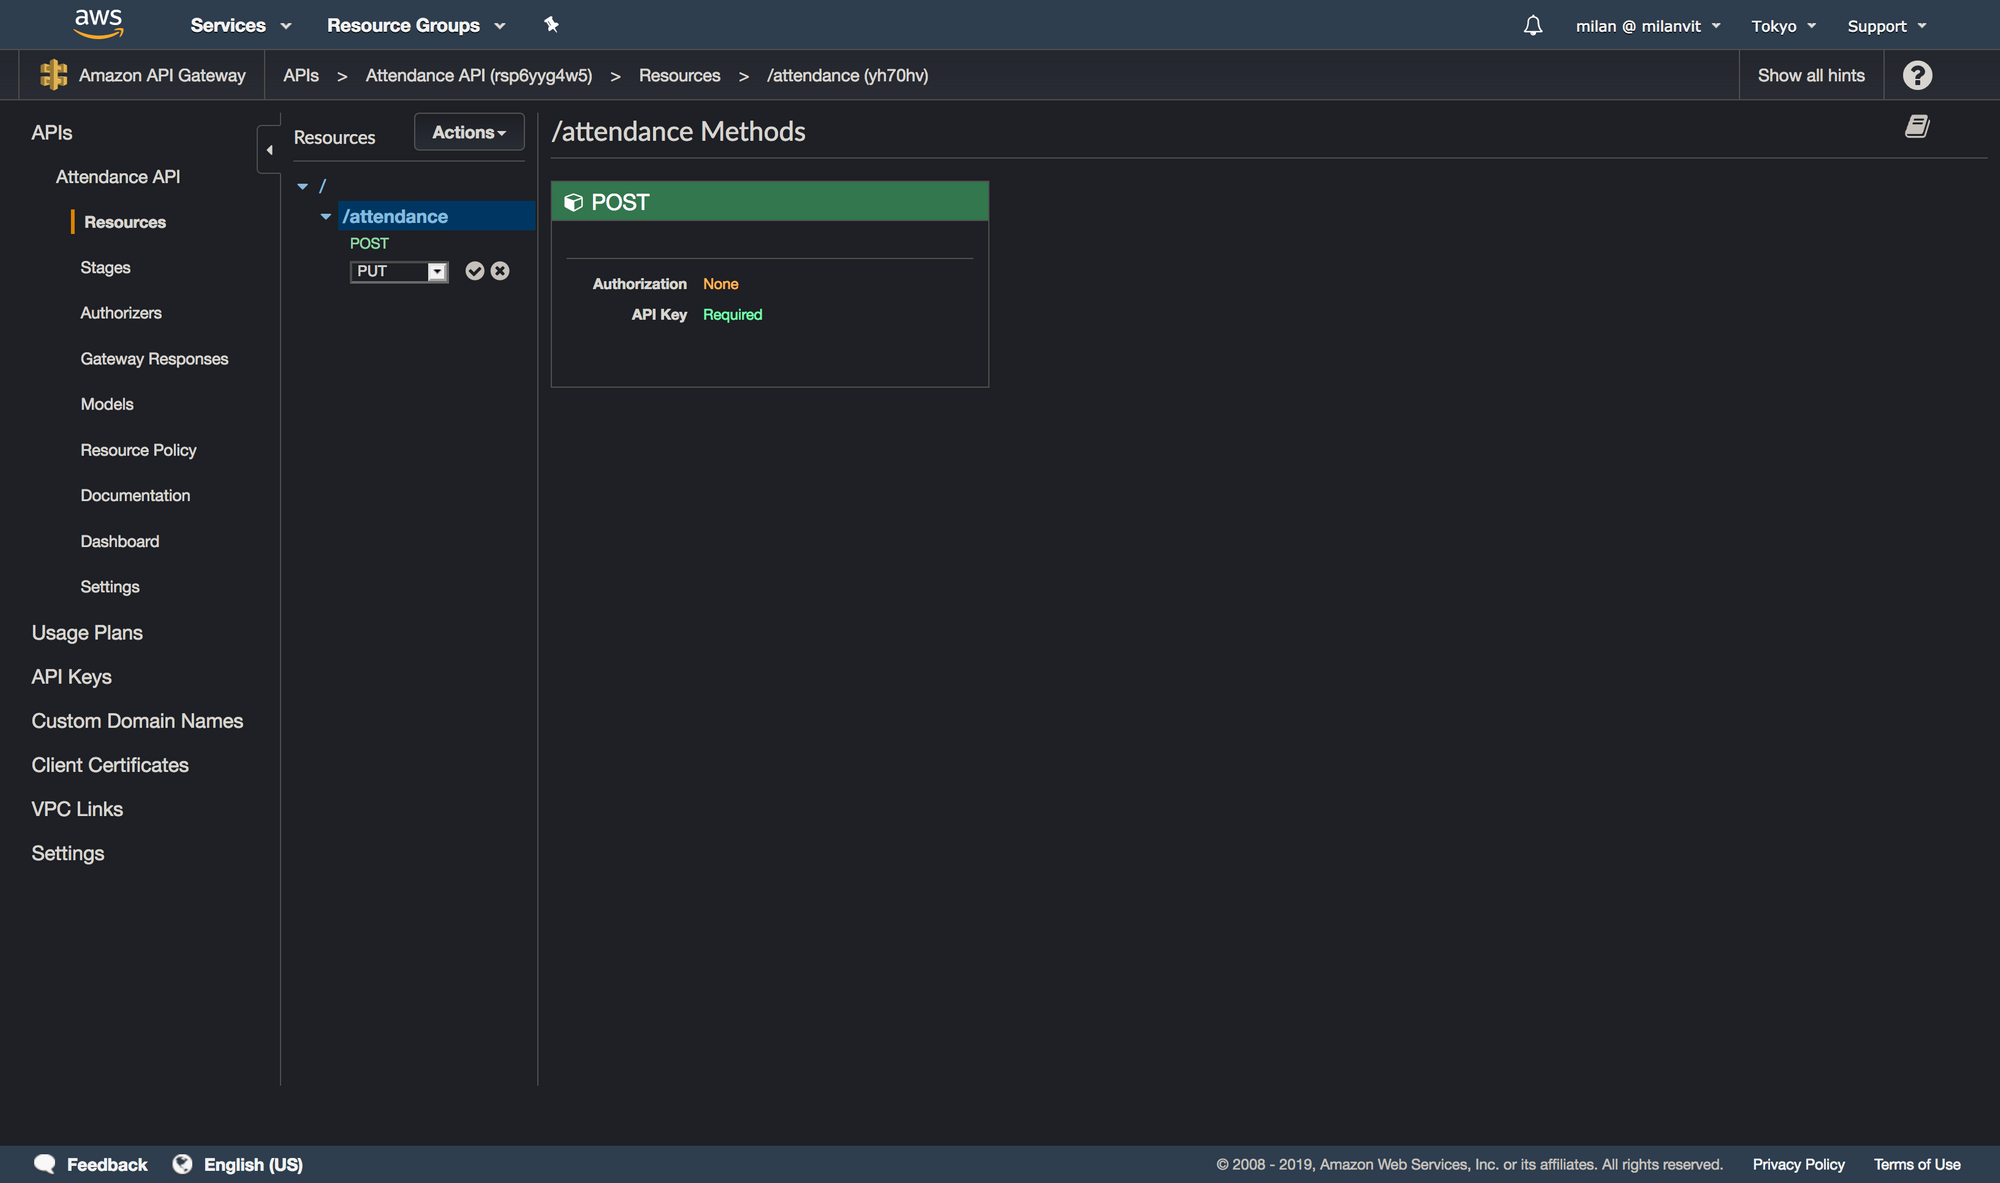
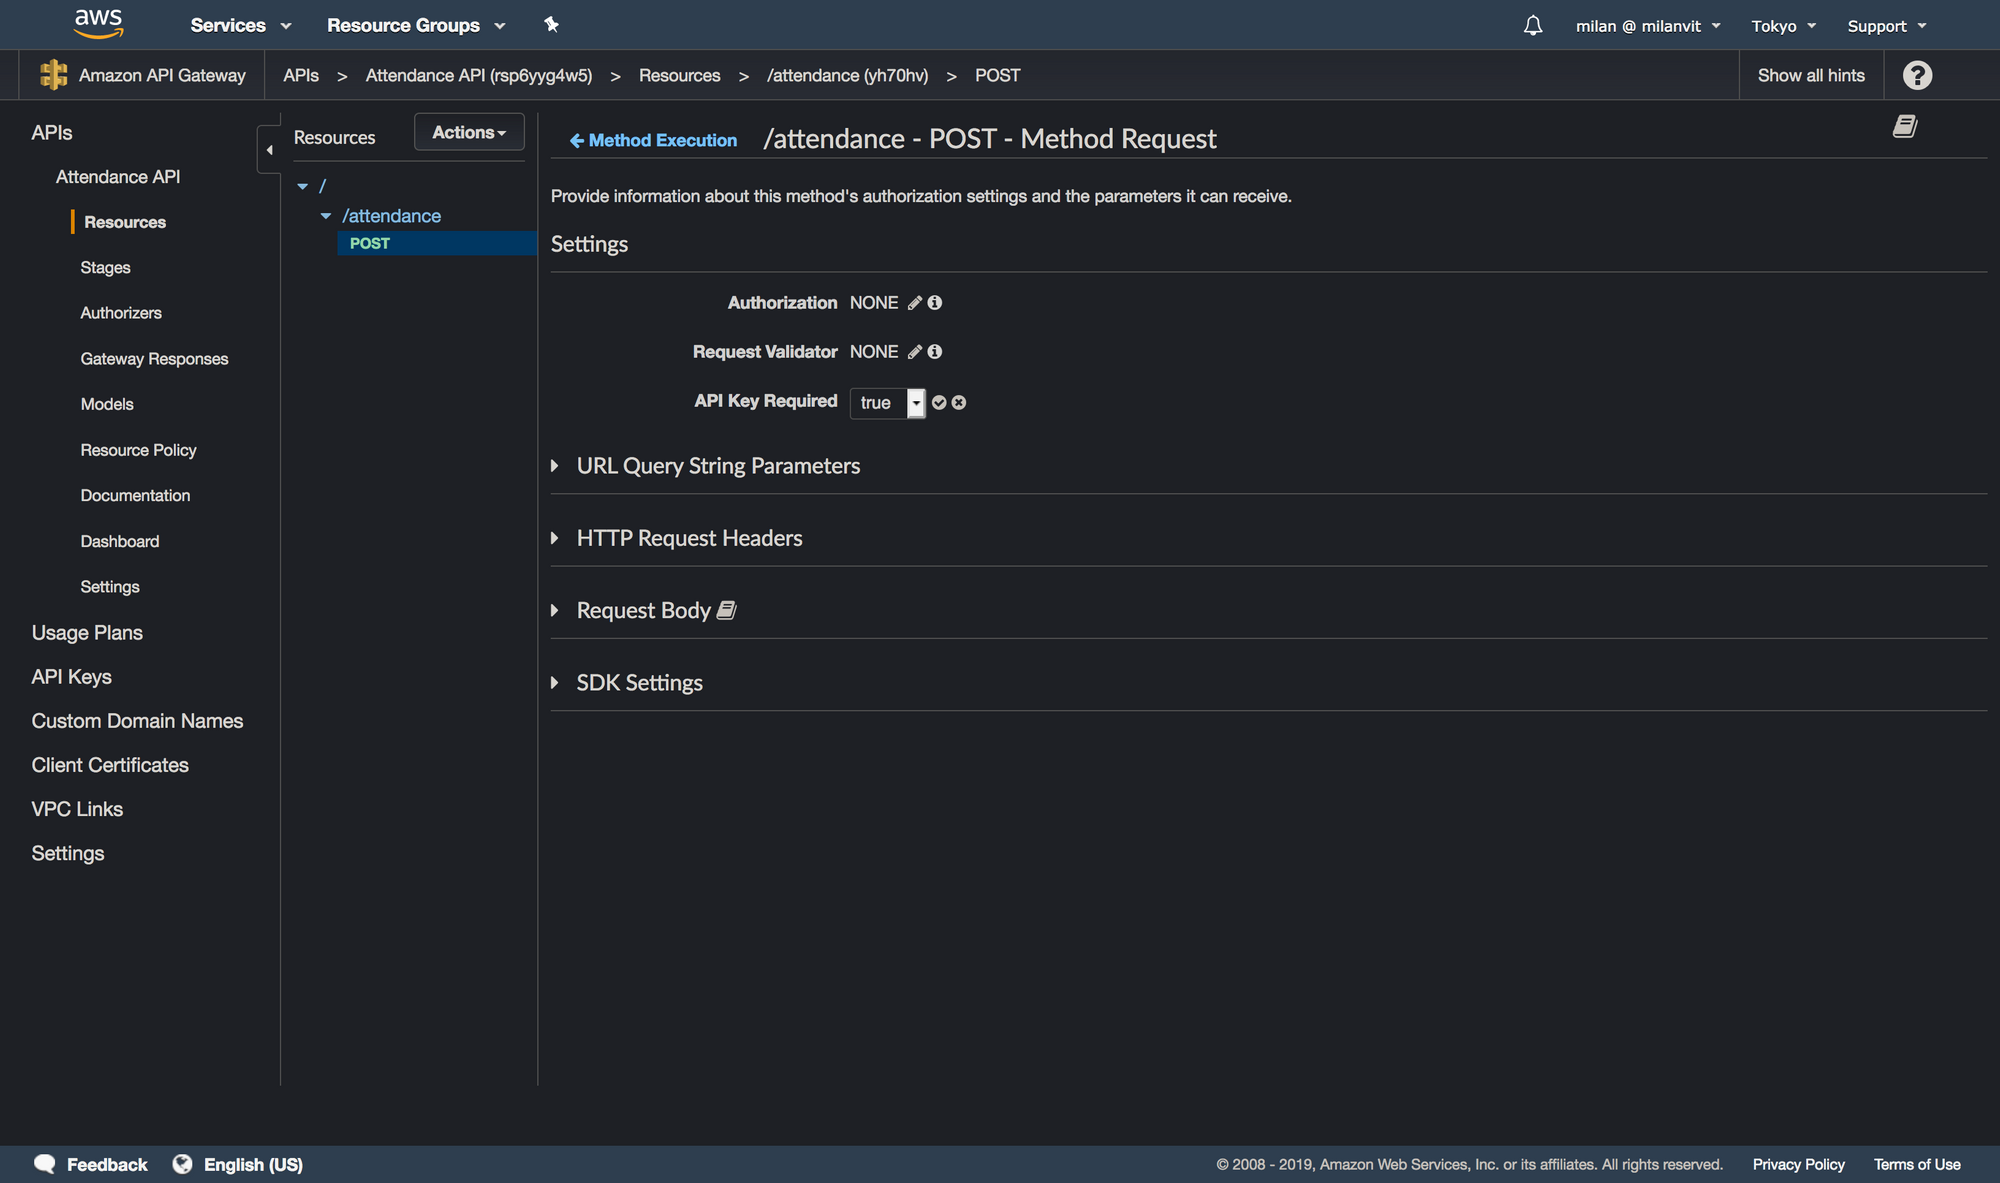
Okay, last piece, a requirement for an API key. Click on the “Method Request” link and change the request settings to require an API key:
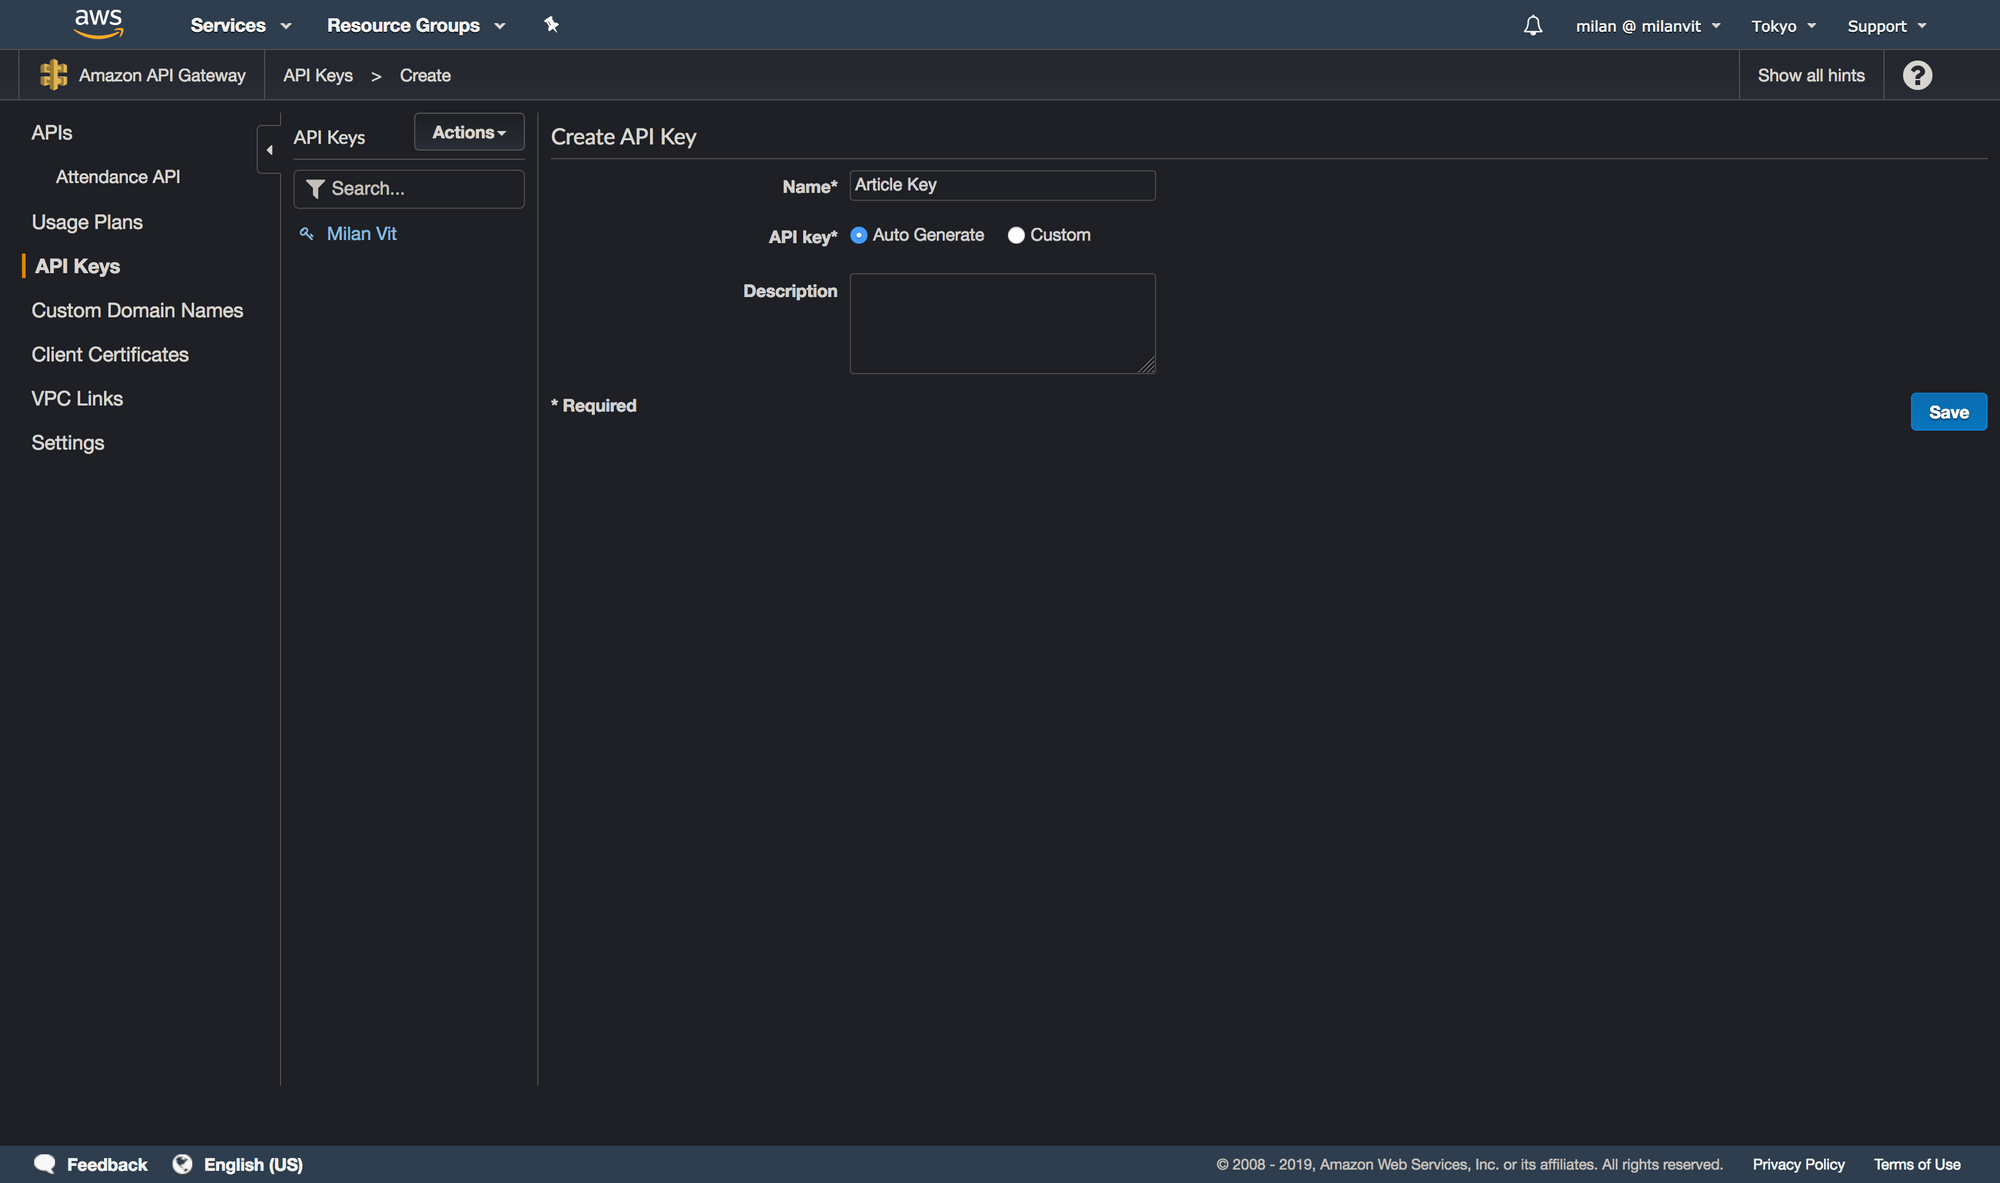
At this point, our API is well-defined and we can deploy it by choosing Actions ↝ Deploy API. Select a new environment (I named it production) and confirm. Now switch to the “API Keys” section and generate a new key:
Once it’s created, copy it and save it somewhere – we’ll need it in a moment. Finally, you need to create a “Usage Plan”. The process is extremely straightforward, so I’ll leave it up to you: just pick reasonable values for throttling and quota, attach API stage we just created & deployed and associate an API key with it. Done! 🎉
Let’s test it! 👏
Testing it
In API Gateway ↝ Stages ↝ production, you can find the URL of your API. Grab it and append /attendance at the end of it – that’s the URL of our endpoint. Open Paw/Postman/httpie/curl/any other software capable of issuing an HTTP(S) request, and try to fire one that looks like this:
- URL:
${yourAPIInvokeURL}/attendance - Headers:
Content-Type: application/json&x-api-key: ${APIKeyFromBefore} - Body:
{ "kick_type": "test", "user_id": "email", "user_pass": "password"}
If you get 200 OK back, you can prepare for celebrating. If you see the following in the ECS management console, you can double prepare for celebrating:
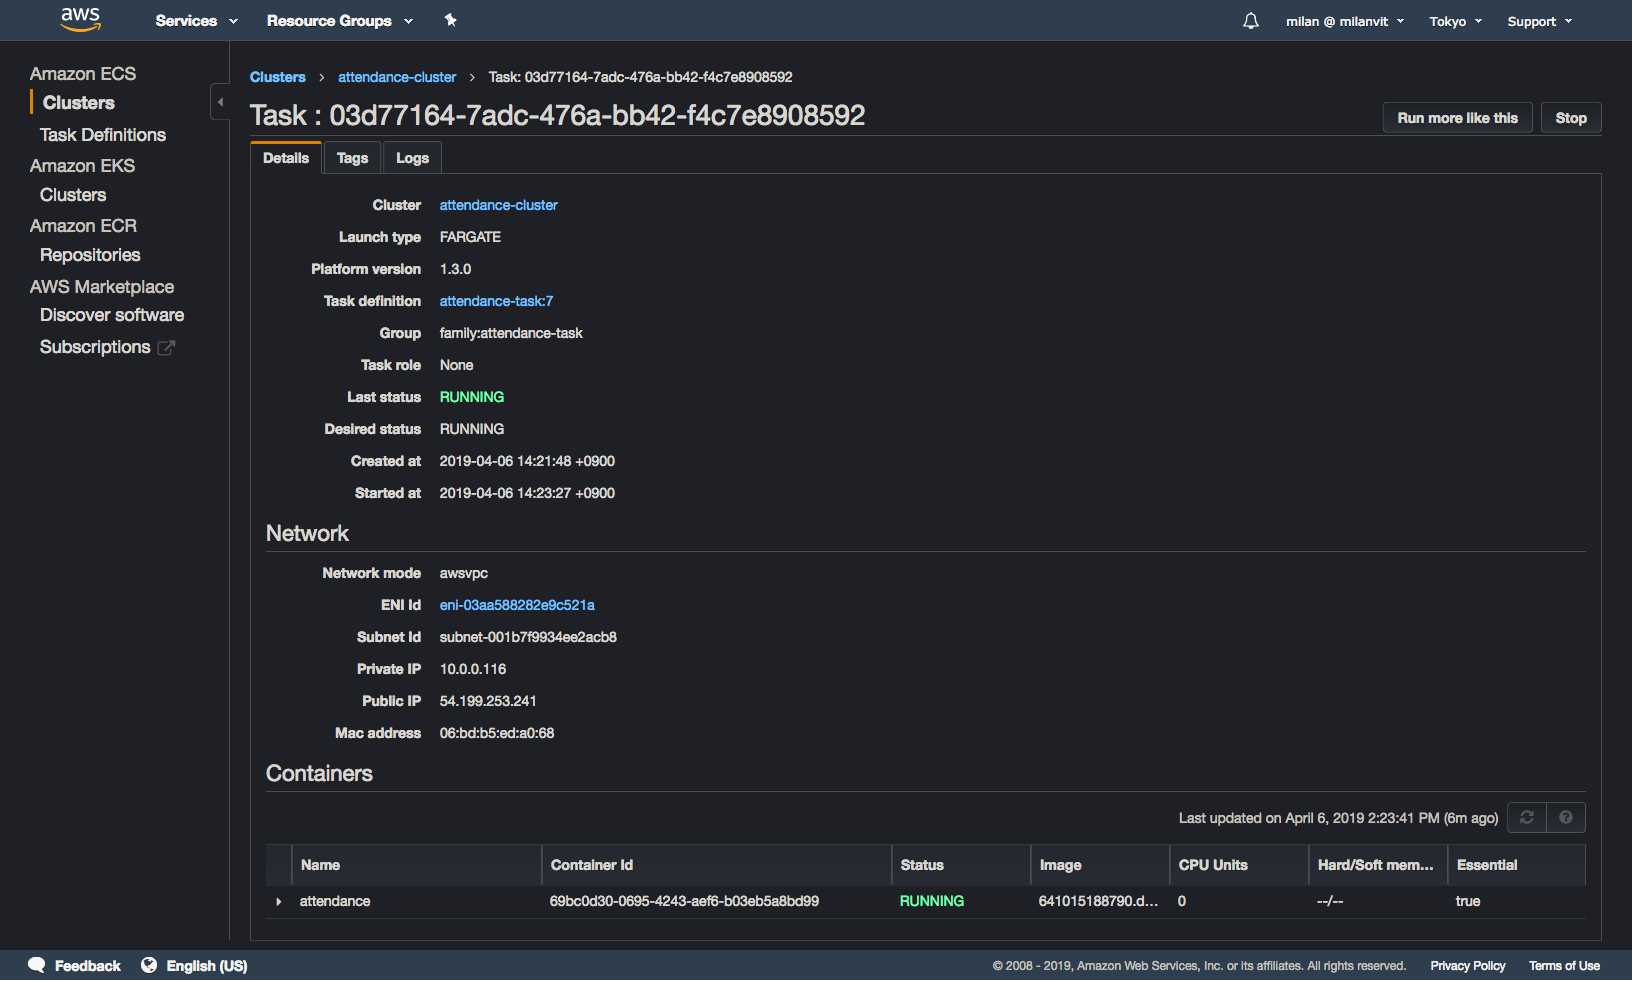
Finally, if you see no errors in your task log, you can stop preparing and start actually celebrating 🎉🎊
Of course, there’s a good chance that either I or you forgot something, so I have a few leads for you to try:
- If API request gave you a 403 forbidden, verify the API key value & configuration, and try to re-deploy the API.
- If API request gave you a 500 error, try running Lambda function in isolation (or from API Gateway test environment!) and see its error message (in particular make sure Lambda role has appropriate privileges, and you changed the subnet value).
- If you went ahead and tried different values of
kick_type, got no errors but also got no result in TeamSpirit, you might have a fun time ahead of you – clearly, your TeamSpirit is configured differently from our company’s, and you need to adjust theentry.pyandend.pyscripts accordingly. When I was doing this, these were the commands to help me:cd attendance-repository; docker image build . -t attendance:latest; docker container run -it attendance:latest bash, then runpython3in the container and copy-paste the script up to the point of it failing. You will need to replace the part that parses command line arguments, of course, but that should be trivial. See Selenium documentation on how to query the driver for elements by ID, page source, current URL, etc. Find the difference, change the scripts, push & wait for re-deploy. Try again!
Taking a shortcut
Hopefully, you were able to get it working in the end, and we can leave AWS Management Console and instead fire up the Shortcuts app in iOS – after all, we’re not done yet, we want to activate all of this by using Siri!
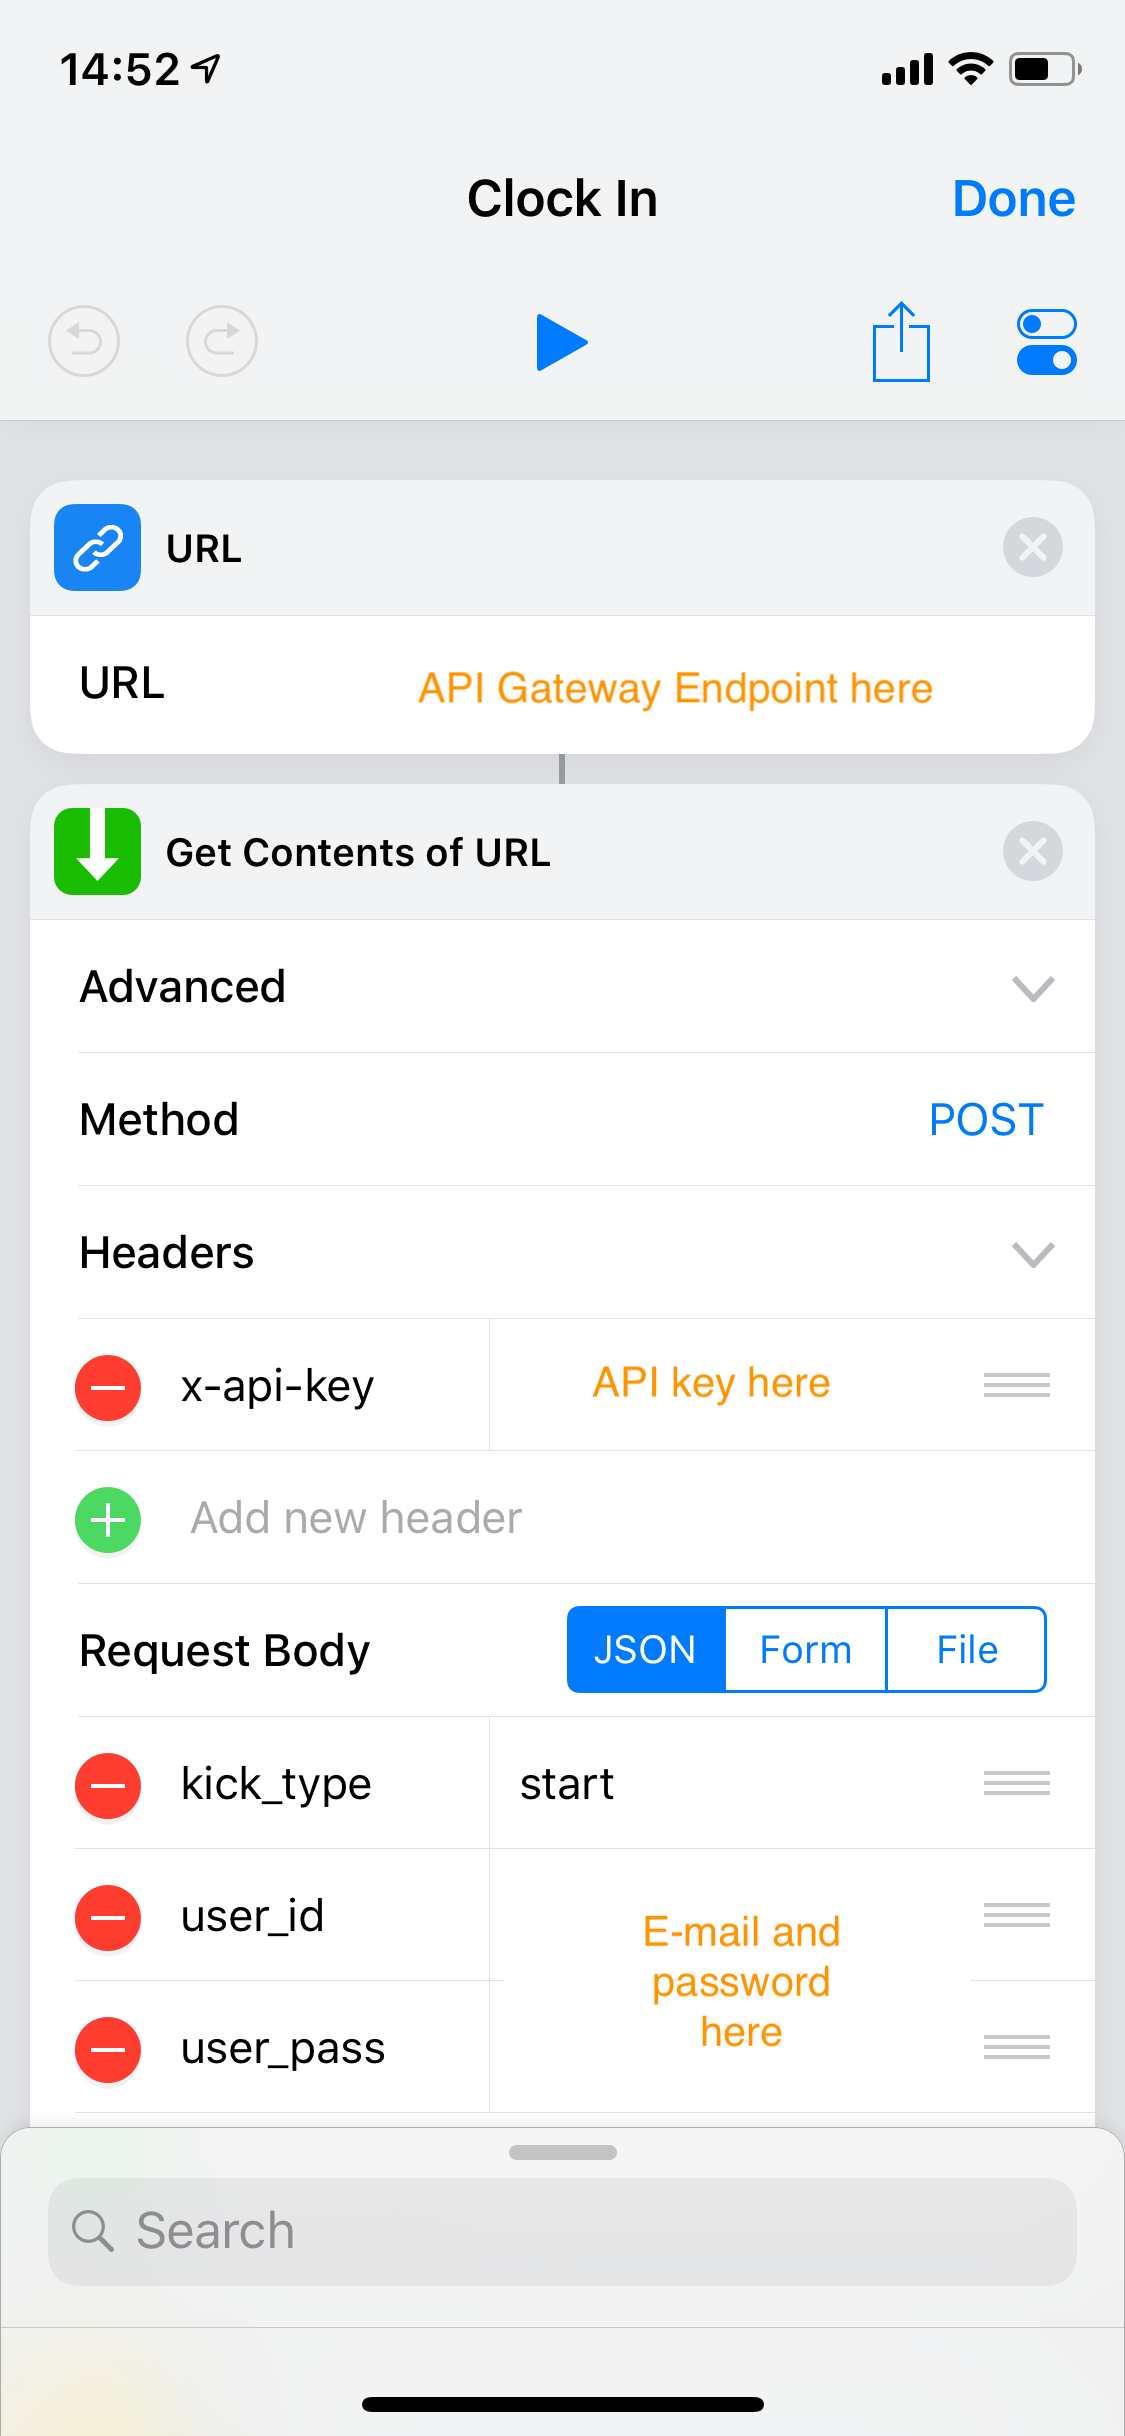
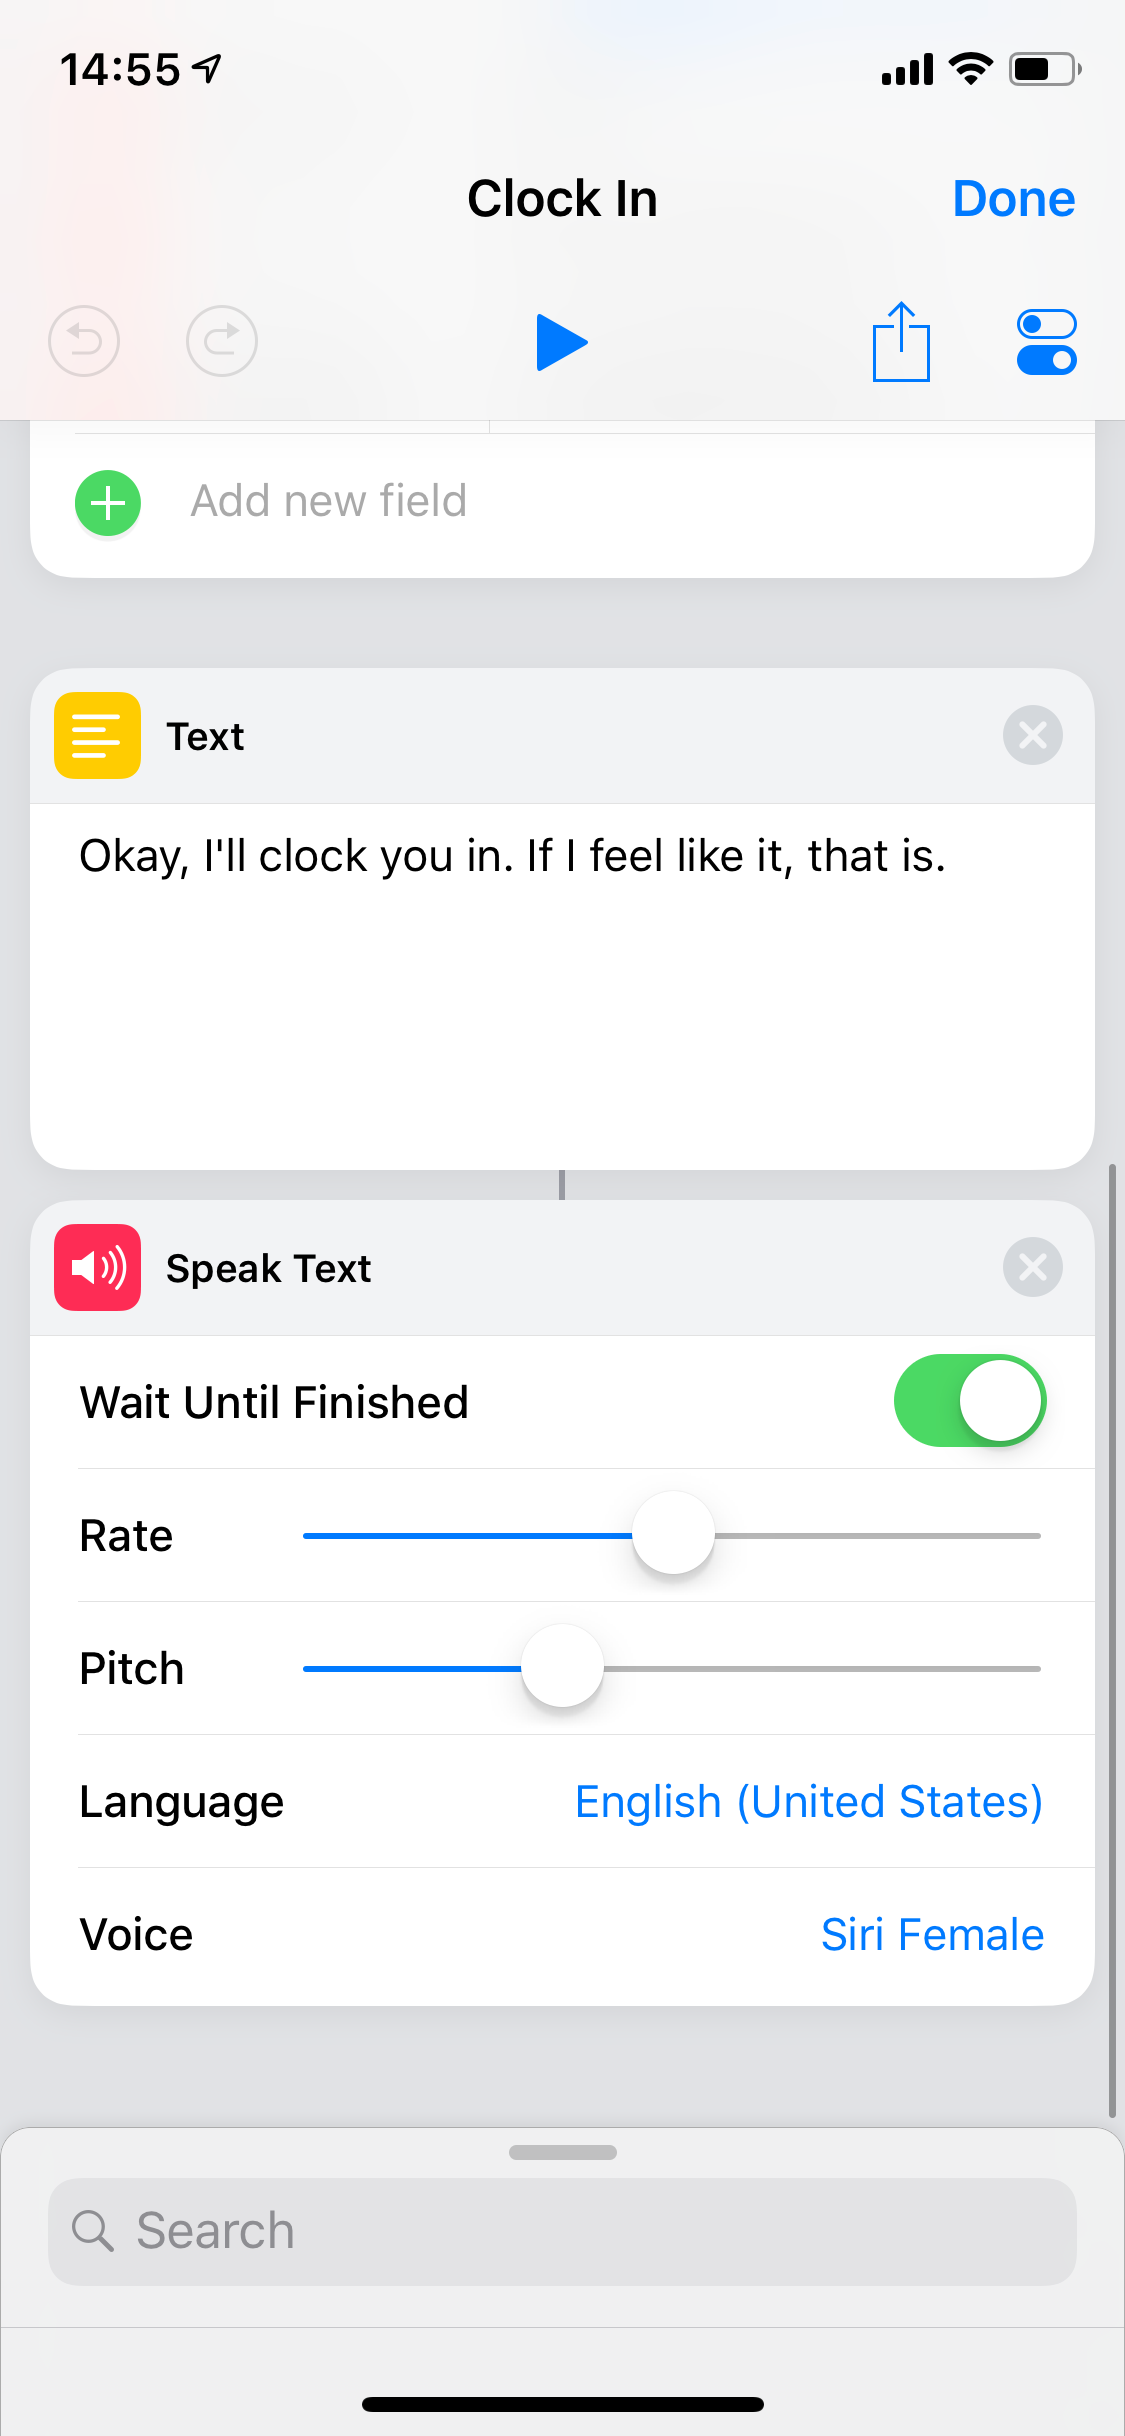
Creating a clock in shortcut was fairly straightforward, here’s how mine looks like:
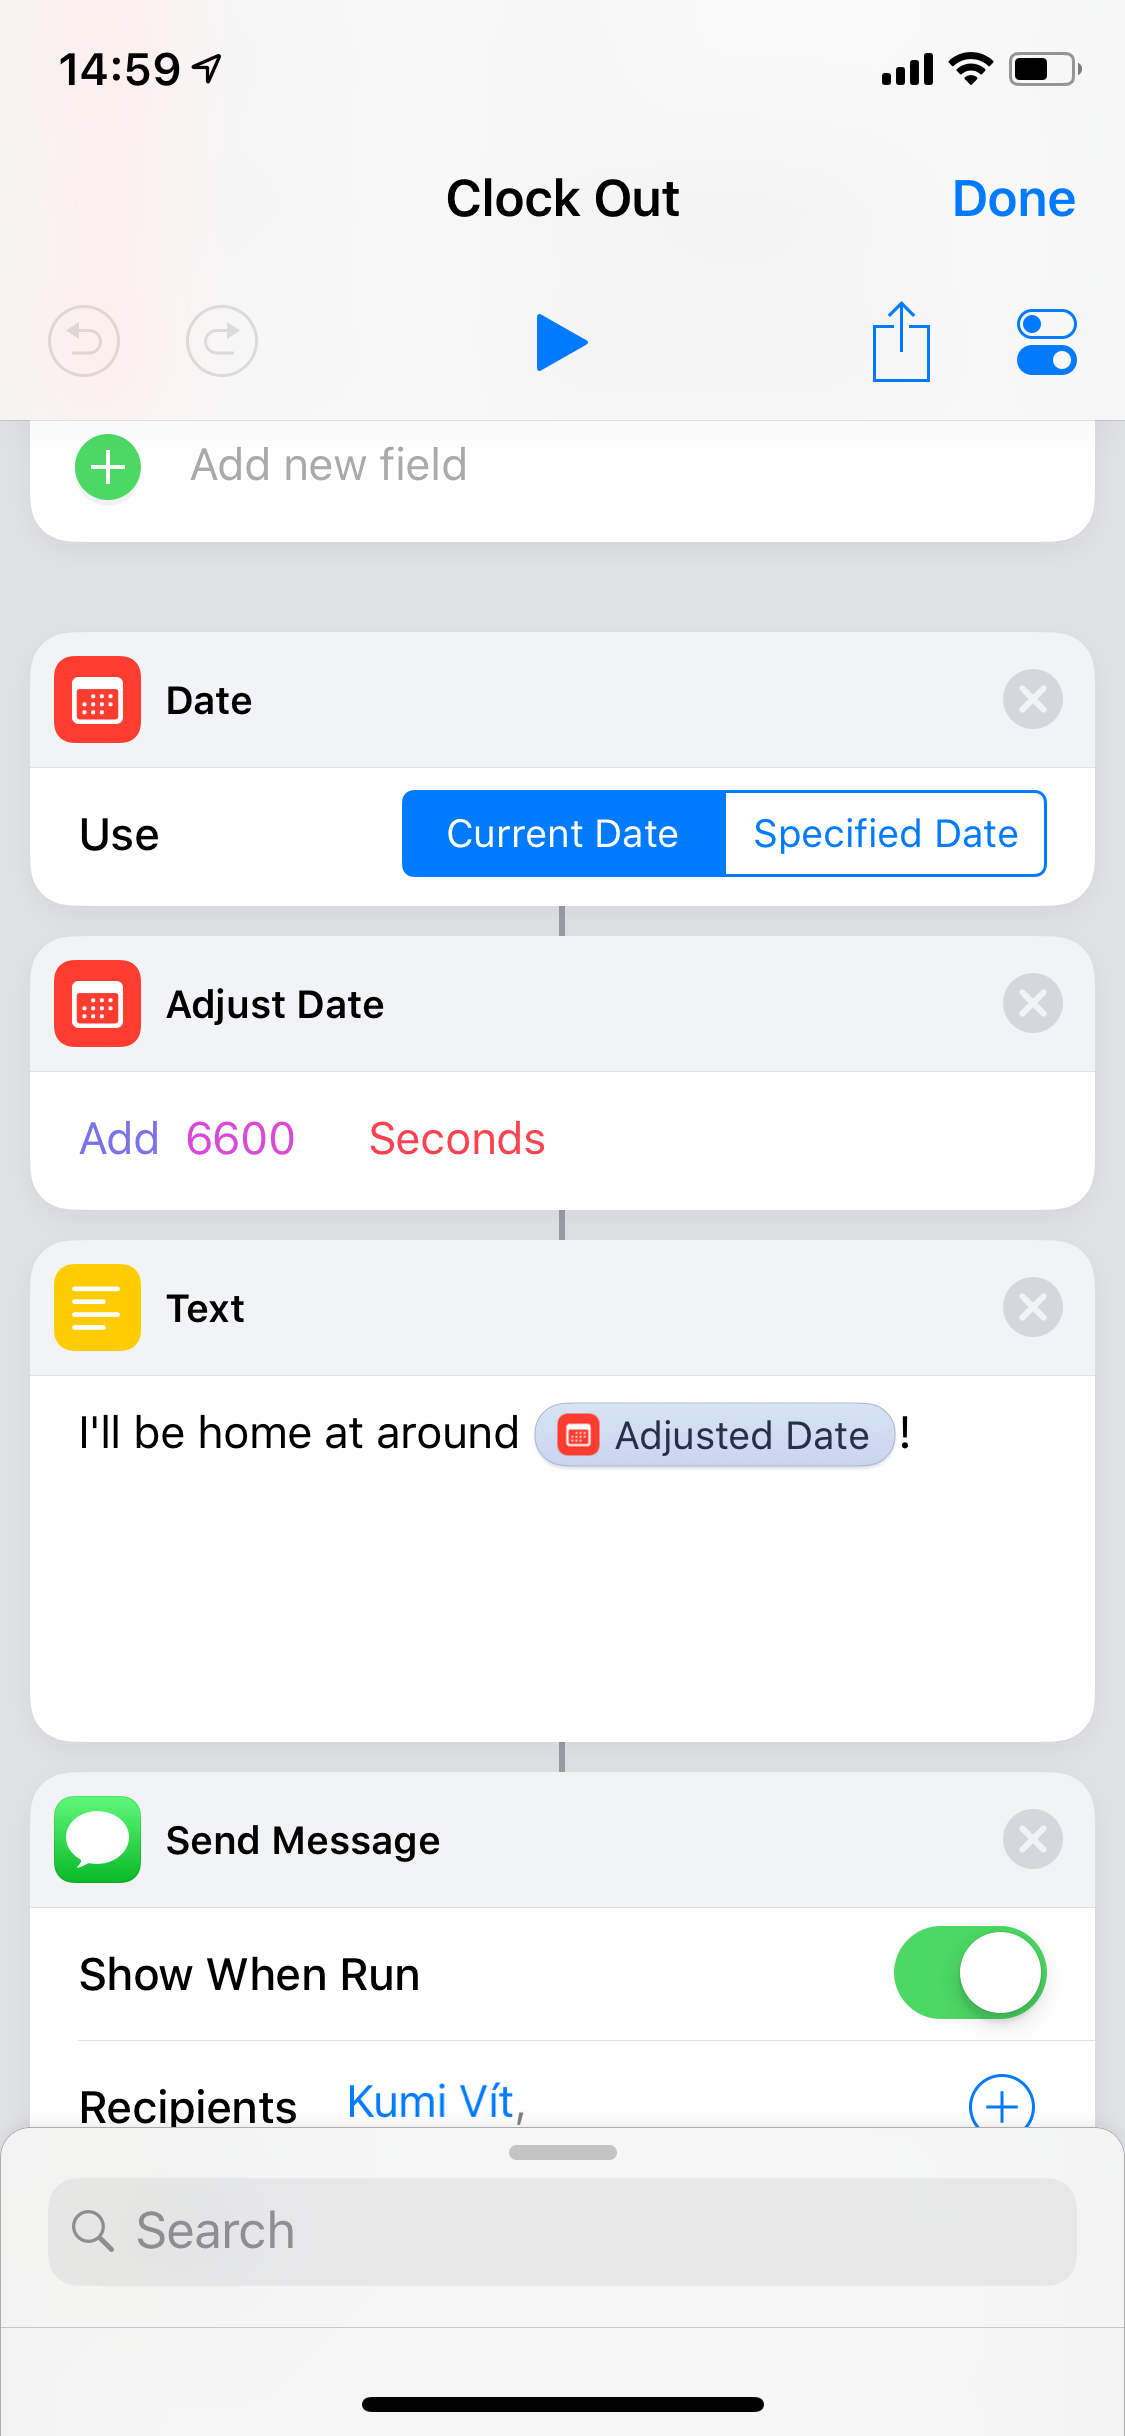
The clock-out shortcut… I wanted it to be beautiful. Amazing. To calculate current commute time and send a message on LINE to my wife, with a precise arrival time. But Apple maps said “🙅♂️️, the best we can do is driving time, not commute time”. Then LINE said “🙅♀️, this is Japan and we’re weird, so we don’t support Siri Shortcuts”. So I calculated my average evening commute time and just went with this (shown just the part after calling our wonderful API):
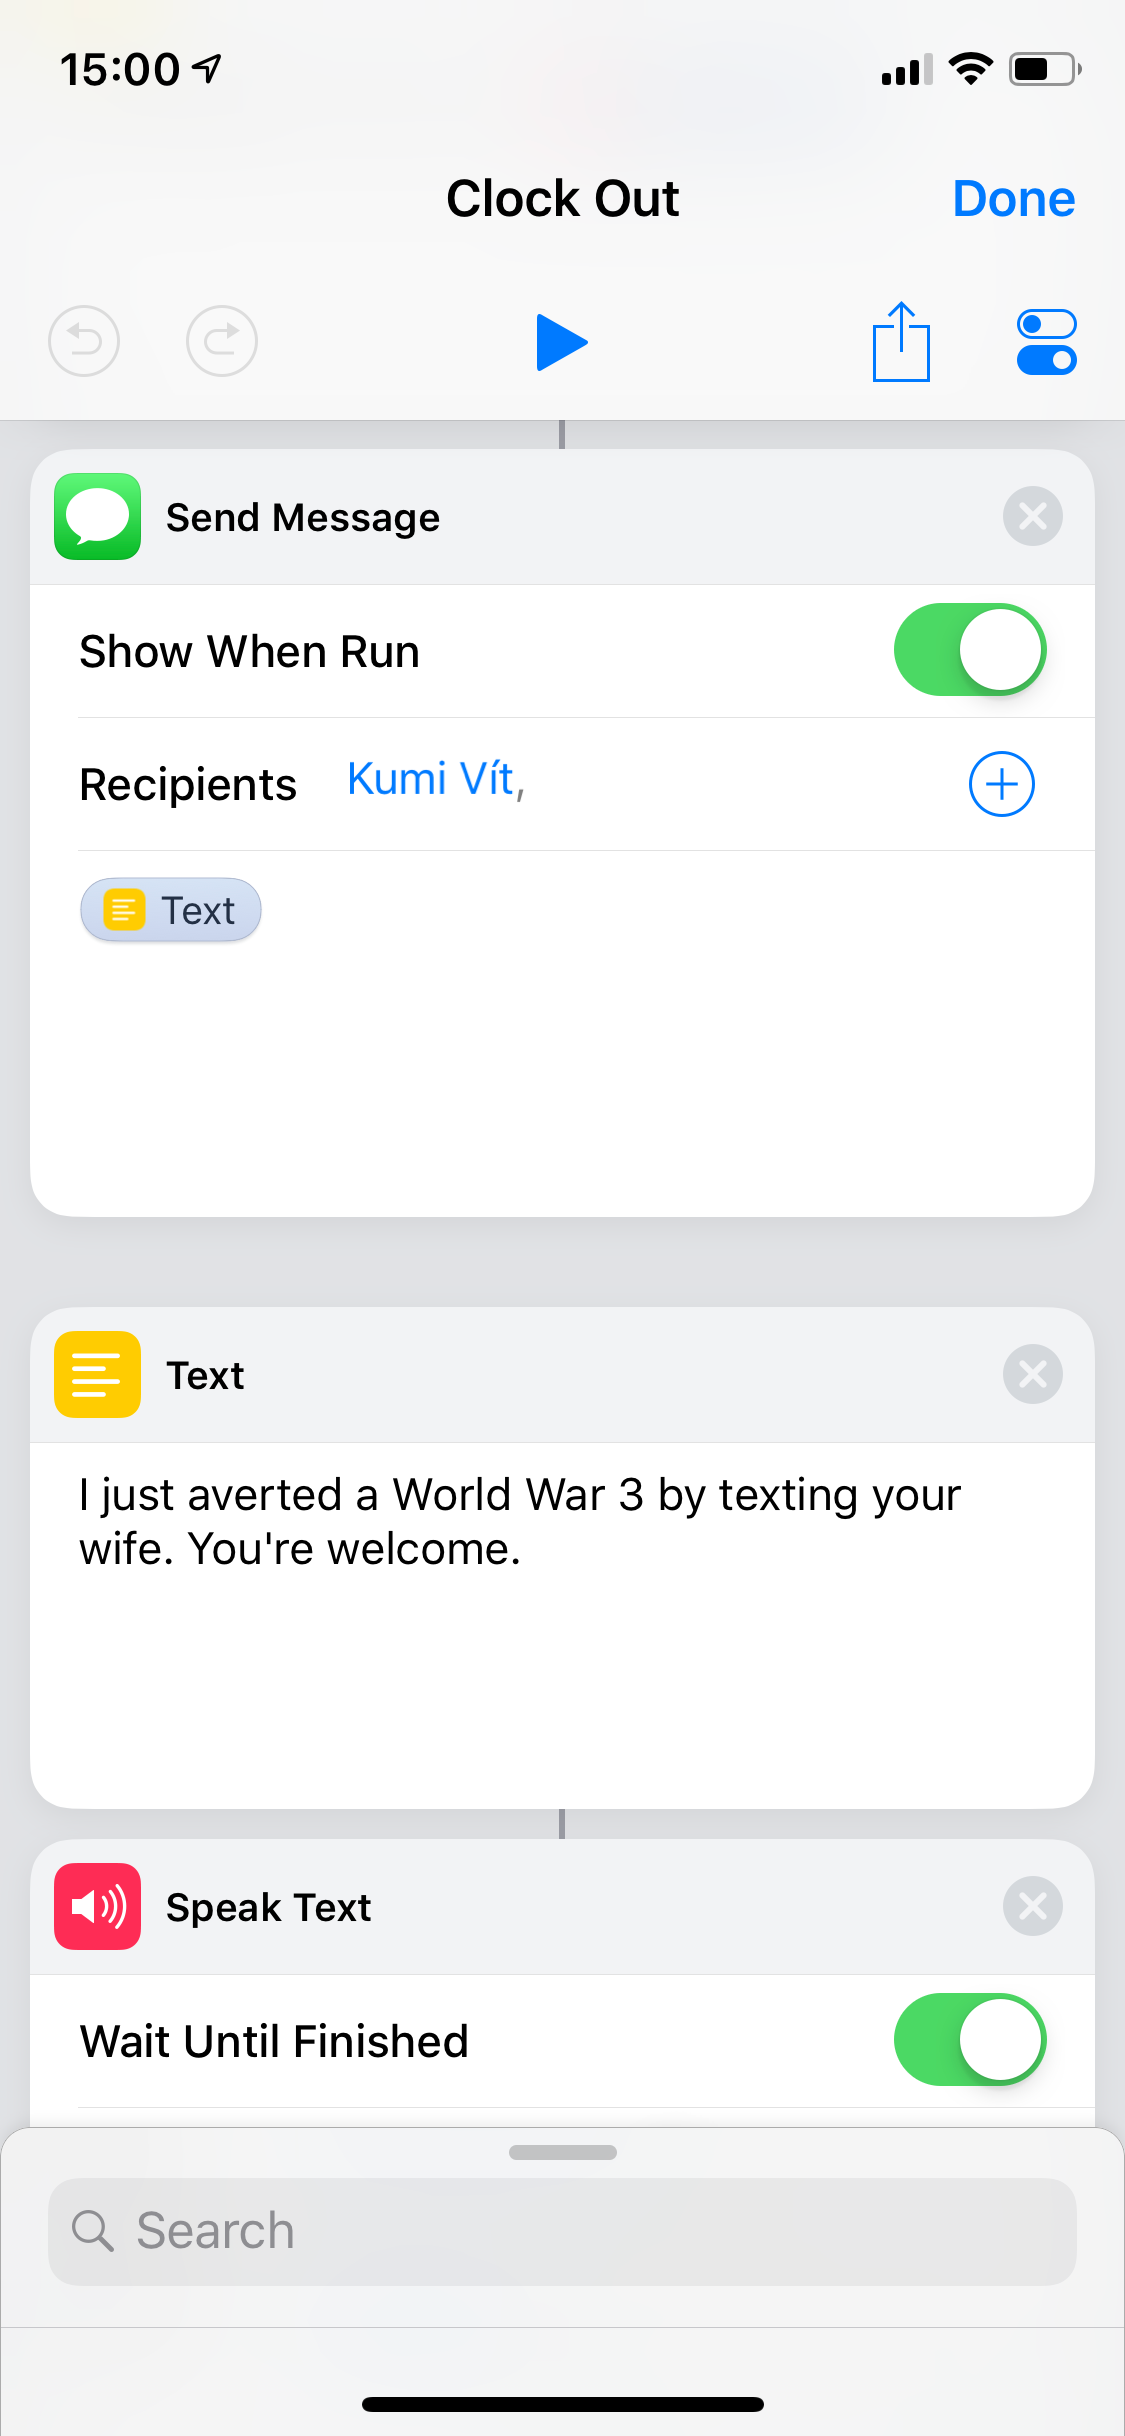
And that’s it! If I was smarter, I’d have created this a week earlier and published as a half-serious fully-working April Fool’s joke. But since I’m not, let me just close today’s article with expressing my endless impatience of wanting to see my co-worker’s reaction on Monday 🤣