Making my dumb A/C smart with Elixir and Nerves


As the scorching Japanese summer creeps ever closer with each passing day, I kept thinking about my yesteryear idea of remotely controlling my bedroom A/C over the Internet. With a simple click of a button ten minutes before bedtime, I could kick-start the A/C unit, ensuring my bedroom is a cool and comfortable oasis by the time I brush my teeth and make my way upstairs. Last year, it remained an idea; this year, I brought the idea to fruition.
While the idea of remotely controlling an air conditioner is not entirely novel – many have trodden this path before me, serving as inspiration and encouragement – I believe my approach is somewhat unique in its execution.
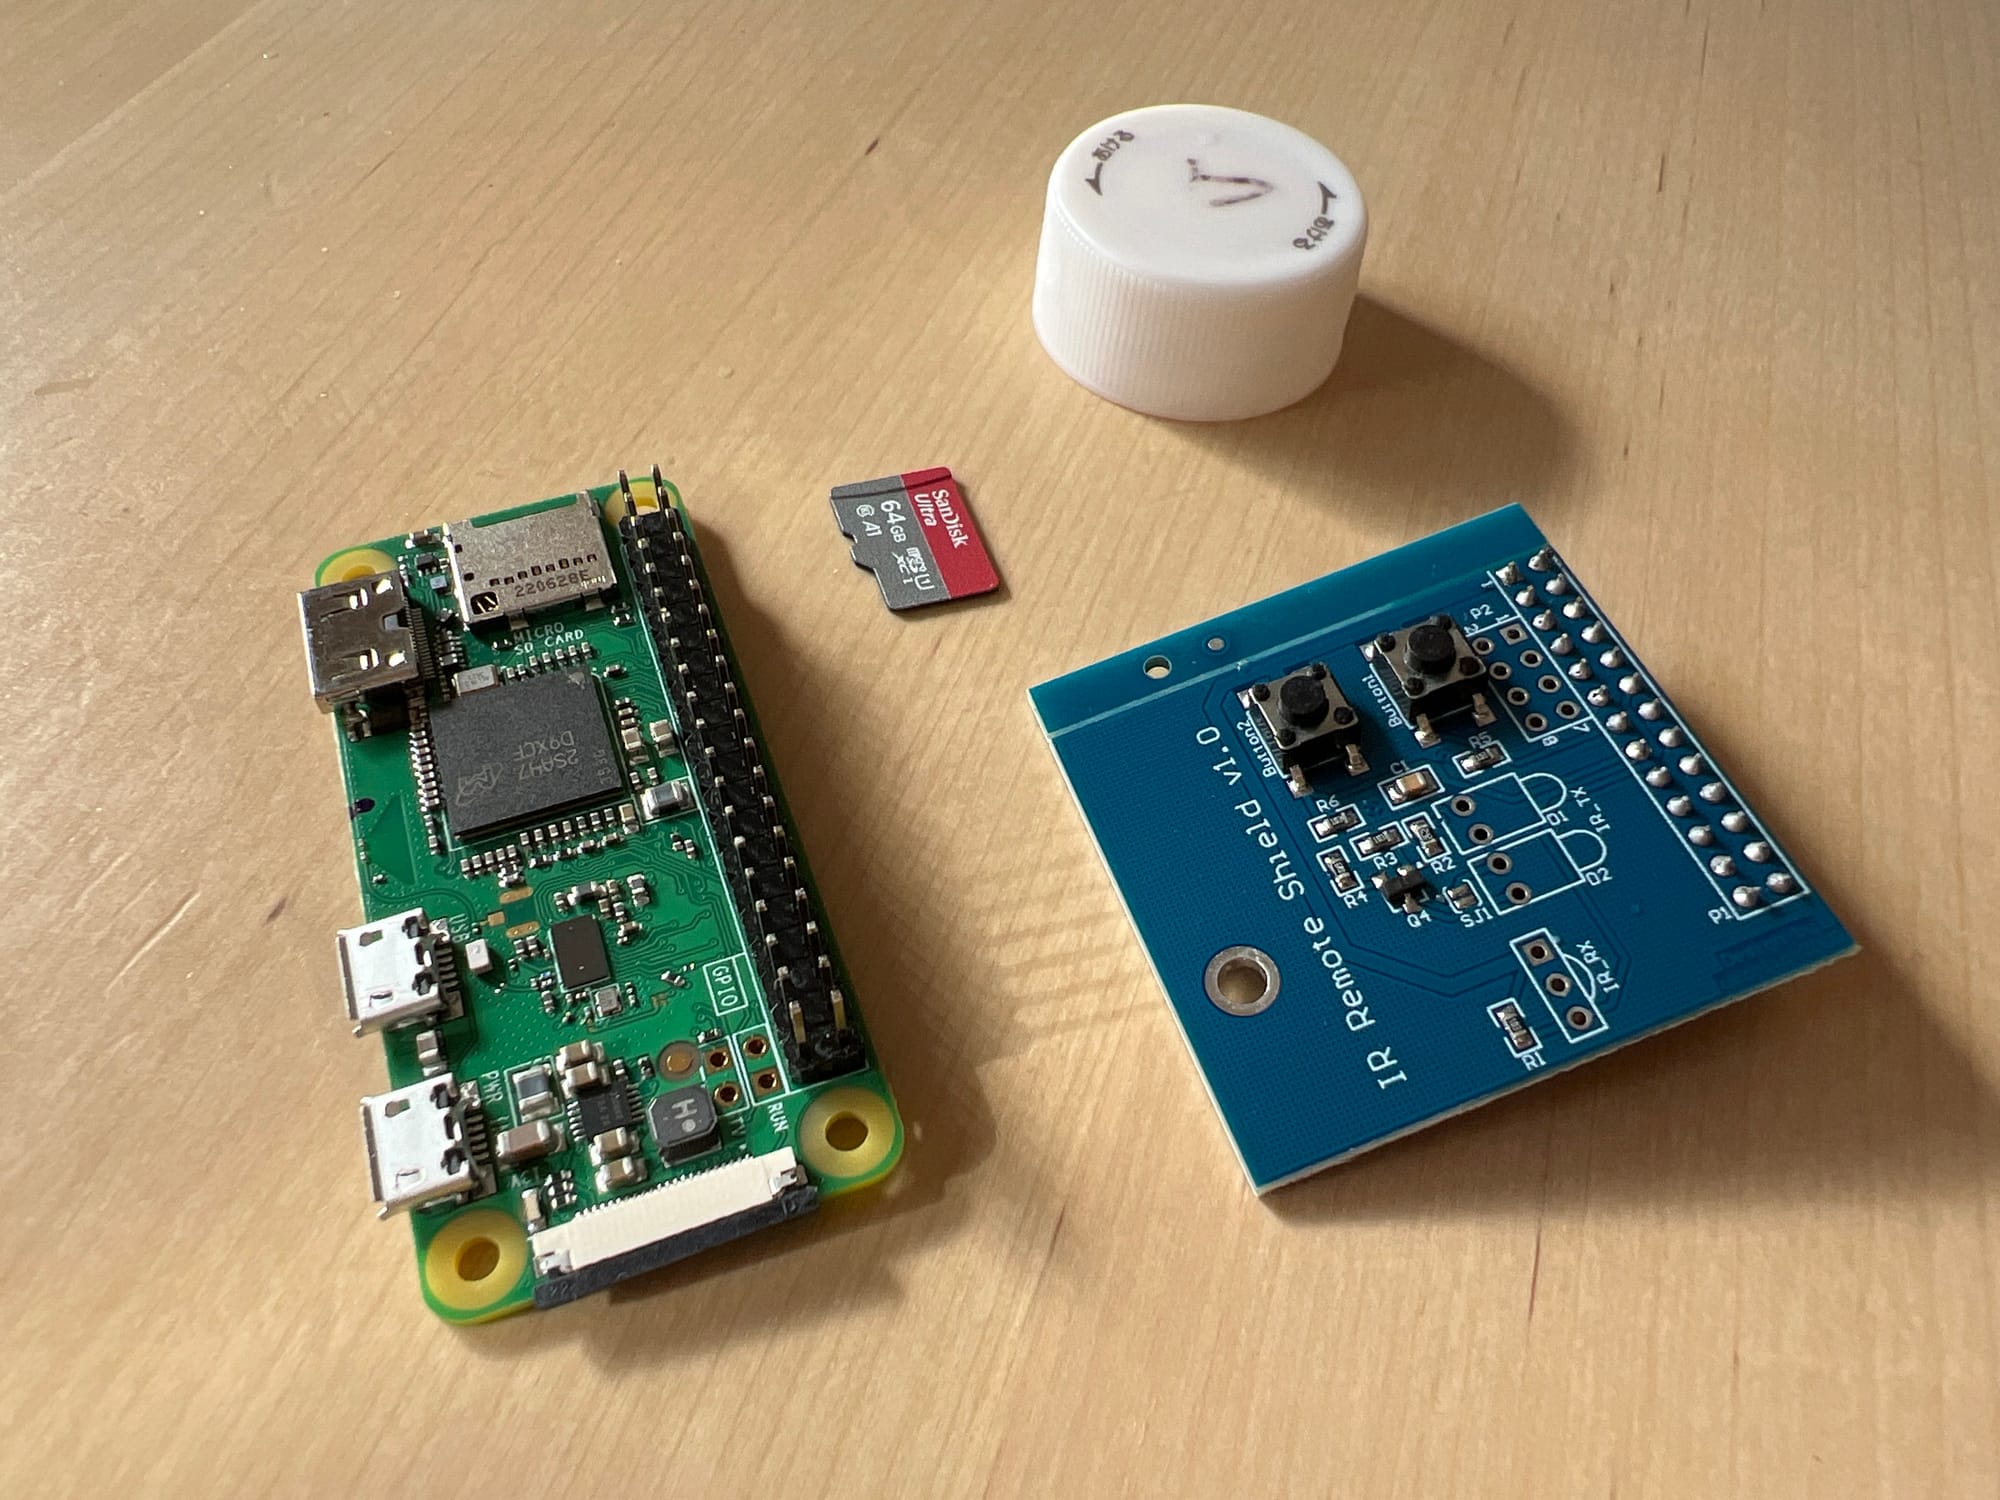
Purchasing the necessary components, a Raspberry Pi Zero WH and an Infrared Transceiver Hat, was the easy part; impatiently waiting a week for delivery, not so much.
Realizing that the transceiver hat arrived without the actual infrared sensor and infrared diodes was heartbreaking; however, ordering the necessary components from Amazon, soldering them in myself, and verifying that I could receive the infrared signal with LIRC’s intuitively-named mode2 command in Raspberry Pi OS was an exhilarating experience.
At this point, I faced a pivotal decision: just how ambitious did I want to get with this project? Four possible paths lay before me.
The first challenge revolved around the complexity of air conditioner remote signals. Unlike TV or light remotes that typically send the same signal for each button press, allowing the receiver to interpret and reconcile the state, air conditioner remotes hold the state internally and transmit the full updated state with nearly every button press. This raised a question – would I be satisfied with simply recording and replaying a few known remote states, or did I want to dive deep, decoding, understanding, and reproducing the signal to any desired state?
The second challenge centred on deploying the web server that would present the user interface for controlling the A/C. Should I opt for the straightforward approach of deploying a Phoenix web server on Raspberry Pi OS, or should I embrace the more complex yet undeniably cooler option of bundling Phoenix with Nerves?
For both challenges, I chose the latter, crazier but unquestionably more impressive paths. Let’s talk Nerves first.
🐧🧪 Embedded Elixir
Nerves is one of Elixir’s most significant libraries. Where Phoenix allows you to write web servers that outperform a cheetah on caffeine, Ecto enables you to communicate with a wide range of databases and Nx lets you harness the power of machine learning and artificial intelligence, Nerves allows you to effortlessly deploy Elixir on embedded devices, such as Raspberry Pi – and I finally had the opportunity to use it for the first time!
Nerves bundles your application, along with a slimmed-down Linux kernel and a few essential utilities, into firmware that you can burn onto a microSD card, allowing your embedded computer to boot directly into BEAM, the Erlang Virtual Machine. This minimalistic approach, compared to deploying your Elixir application on a full-fledged Raspberry Pi OS, offers several advantages:
- the entire OS + application bundle measures in tens of megabytes, not hundreds[2];
- the system boots and makes your application available in seconds, not tens of seconds;
- the application & its dependencies updates are handled as part of your code, not via a slow and hard-to-reproduce package manager;
- the attack vector is significantly smaller due to the lack of included software;
- instead of dealing with Linux’s init systems, you define Erlang Applications;
- while still retaining the Linux kernel’s ability to interact with hardware via Linux drivers.
Getting a basic Nerves application up and running was a breeze, but getting the infrared receiver and transmitter working in Nerves would prove to be a more daunting task than a simple apt install lirc and some config.txt editing that were required in Raspberry Pi OS.
Fortunately, Nerves sports an absolutely amazing documentation that guides you throughout the entire process of customizing the underlying system. Even though I had very little idea what I was doing half the time, I was able to package lirc-tools to the userspace, infrared remote support into the Linux kernel, and configure my Nerves project to use this custom OS. But then… nothing happened, /dev/lircX devices didn’t magically become available‽
Turns out, there were a few more steps that were necessary, and a few obstacles that needed to be hurdled. In particular:
- first, I needed to overwrite the default
fwup.conf, so that I can later overwrite the defaultconfig.txtand load my device tree overlay; as a result of this step, I gained access to the very necessary/dev/lirc0and/dev/lirc1devices; - overwrite LIRC’s broken
default.soplug-in with one that I gracefullystoleborrowed from my previous Raspberry Pi OS installation; this is certainly not the correct way to solve the issue, and I have reported the bug to Nerves, but it might be up to the upstream developers to fix this; - create a
/var/run/lircfolder on start-up so that LIRC can create its socket and PID file, and use MuonTrap to keeplircdup and running – this is so much easier than having to deal with an init system!; - configure LIRC’s parameters by layering an
overlayfson top of the default filesystem; - finally, override
erlinit.configto mounttmpfsonto/etc/lirc/lircd.conf.dto make it writeable – Nerves mounts the root filesystem in read-only mode, so this is necessary to create LIRC configs on the fly!
Once all of this was done, it was time to write a simple signal decoder that would turn LIRC’s mode2 command’s output and turn it into a CSV line that can be imported into Google Sheets for analysis!
🔓 Cracking the code
After reading the articles I mentioned earlier, I had an inkling that the remote’s infrared signal would be encoded using a modified version[3] of the NEC protocol. This protocol represents a binary zero as a series of a short pulse burst (562.5µs) followed by a short space, whereas a binary one as a series of short pulse burst followed by a long (1.6875ms) space[4].
Using the decoder mentioned in the previous section (and later fixed to distinguish chunk start and end portions), my workflow turned into something akin to this:
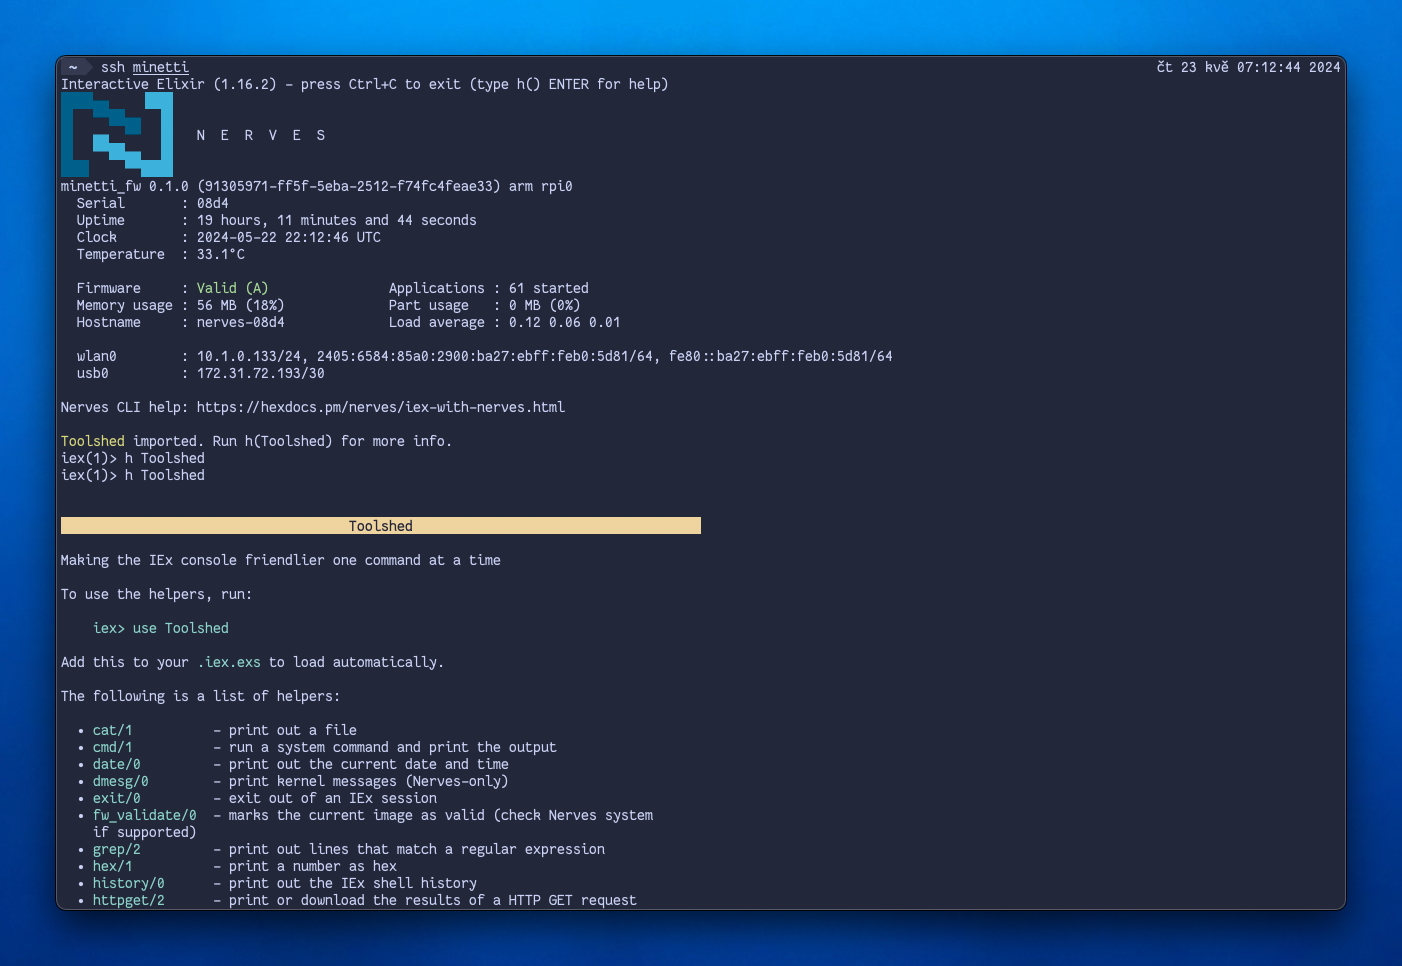
- open an SSH connection to my Nerves application to arrive in an IEx shell, not in
bashor anything alike; - call my decoder’s function which uses MuonTrap to launch
mode2, waits 3 seconds for output and then terminatesmode2(mode2runs indefinitely but I’m only interested in scanning one command at a time); - press a button on my A/C’s remote control to scan the emitted code – focus on making the smallest possible change[5] from the previously scanned command, to easily distinguish changed portions of the signal;
- grab the decoded CSV line and paste it into my monster-Google-Sheet.
And when I say monster-Google-Sheet, I mean truly monster-Google-Sheet 👺.
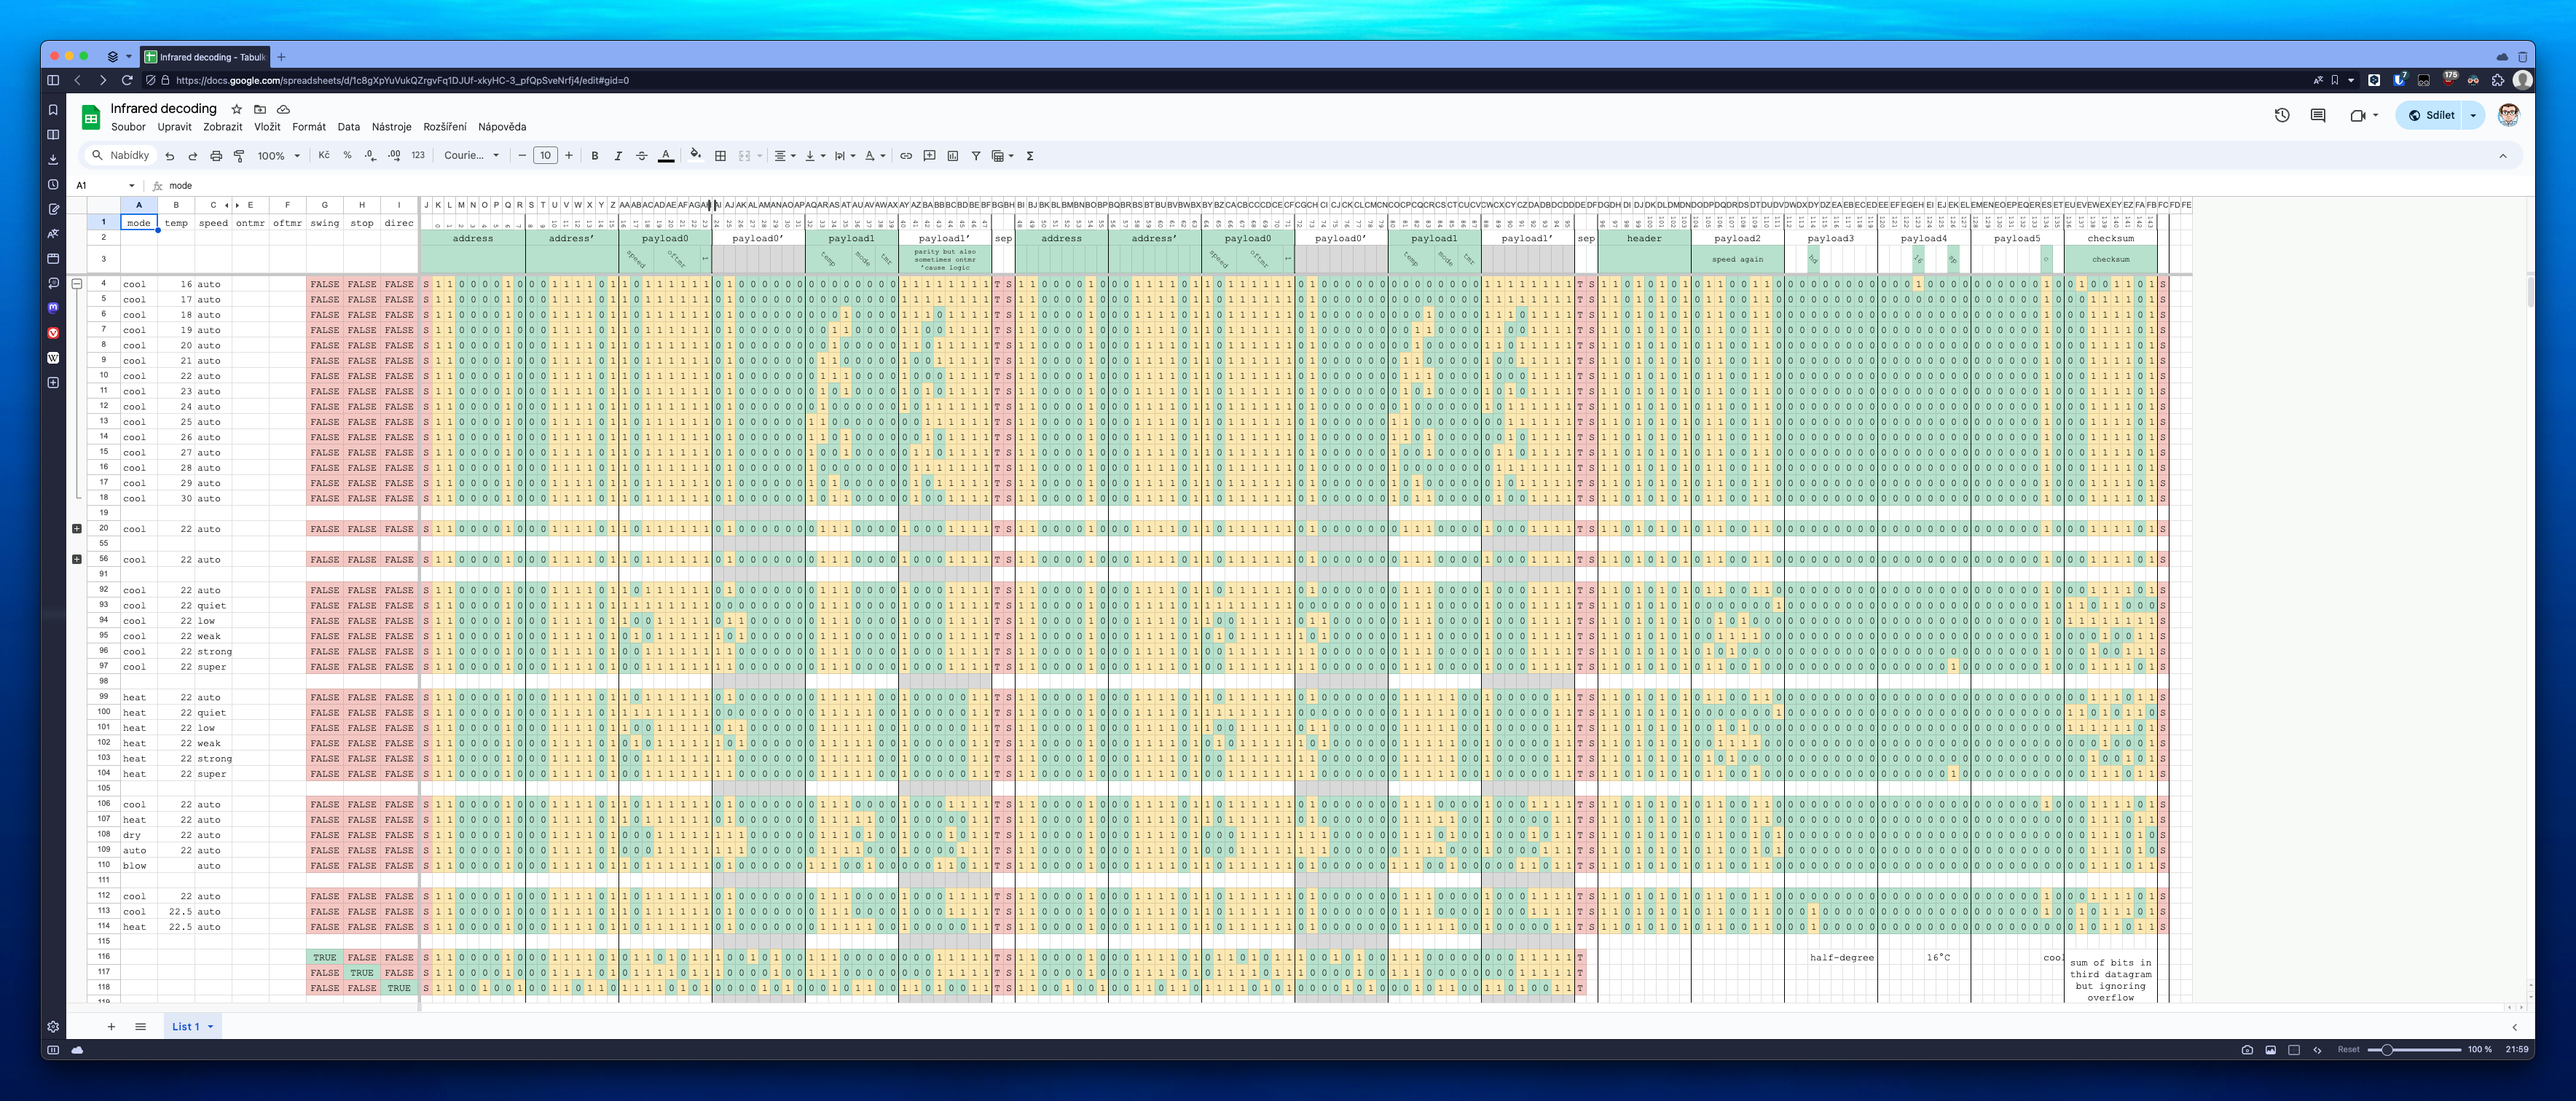
The only byte (or bit? 🤭) that was slightly tricky to figure out was the very last one, a checksum. Fortunately, it turned out to be a simple sum of bytes in the third datagram (minus the part that would overflow), without even the need to consider different endianness.
With the spreadsheet in hand, it was time to start writing (and subsequently fixing) the encoder module that would be able to convert any state into a representation of the signal that the A/C unit would understand. To my great advantage, my living room A/C is already smart and understands the signal emitted by my upstairs A/C’s remote, so I could take advantage of a feedback loop consisting of attempt to blast a signal → check smart A/C’s mobile app if it was understood as I expect it.
Also no, I will not apologize nor repent for representing the binary signal with a string instead of bits. Deal with it 😎
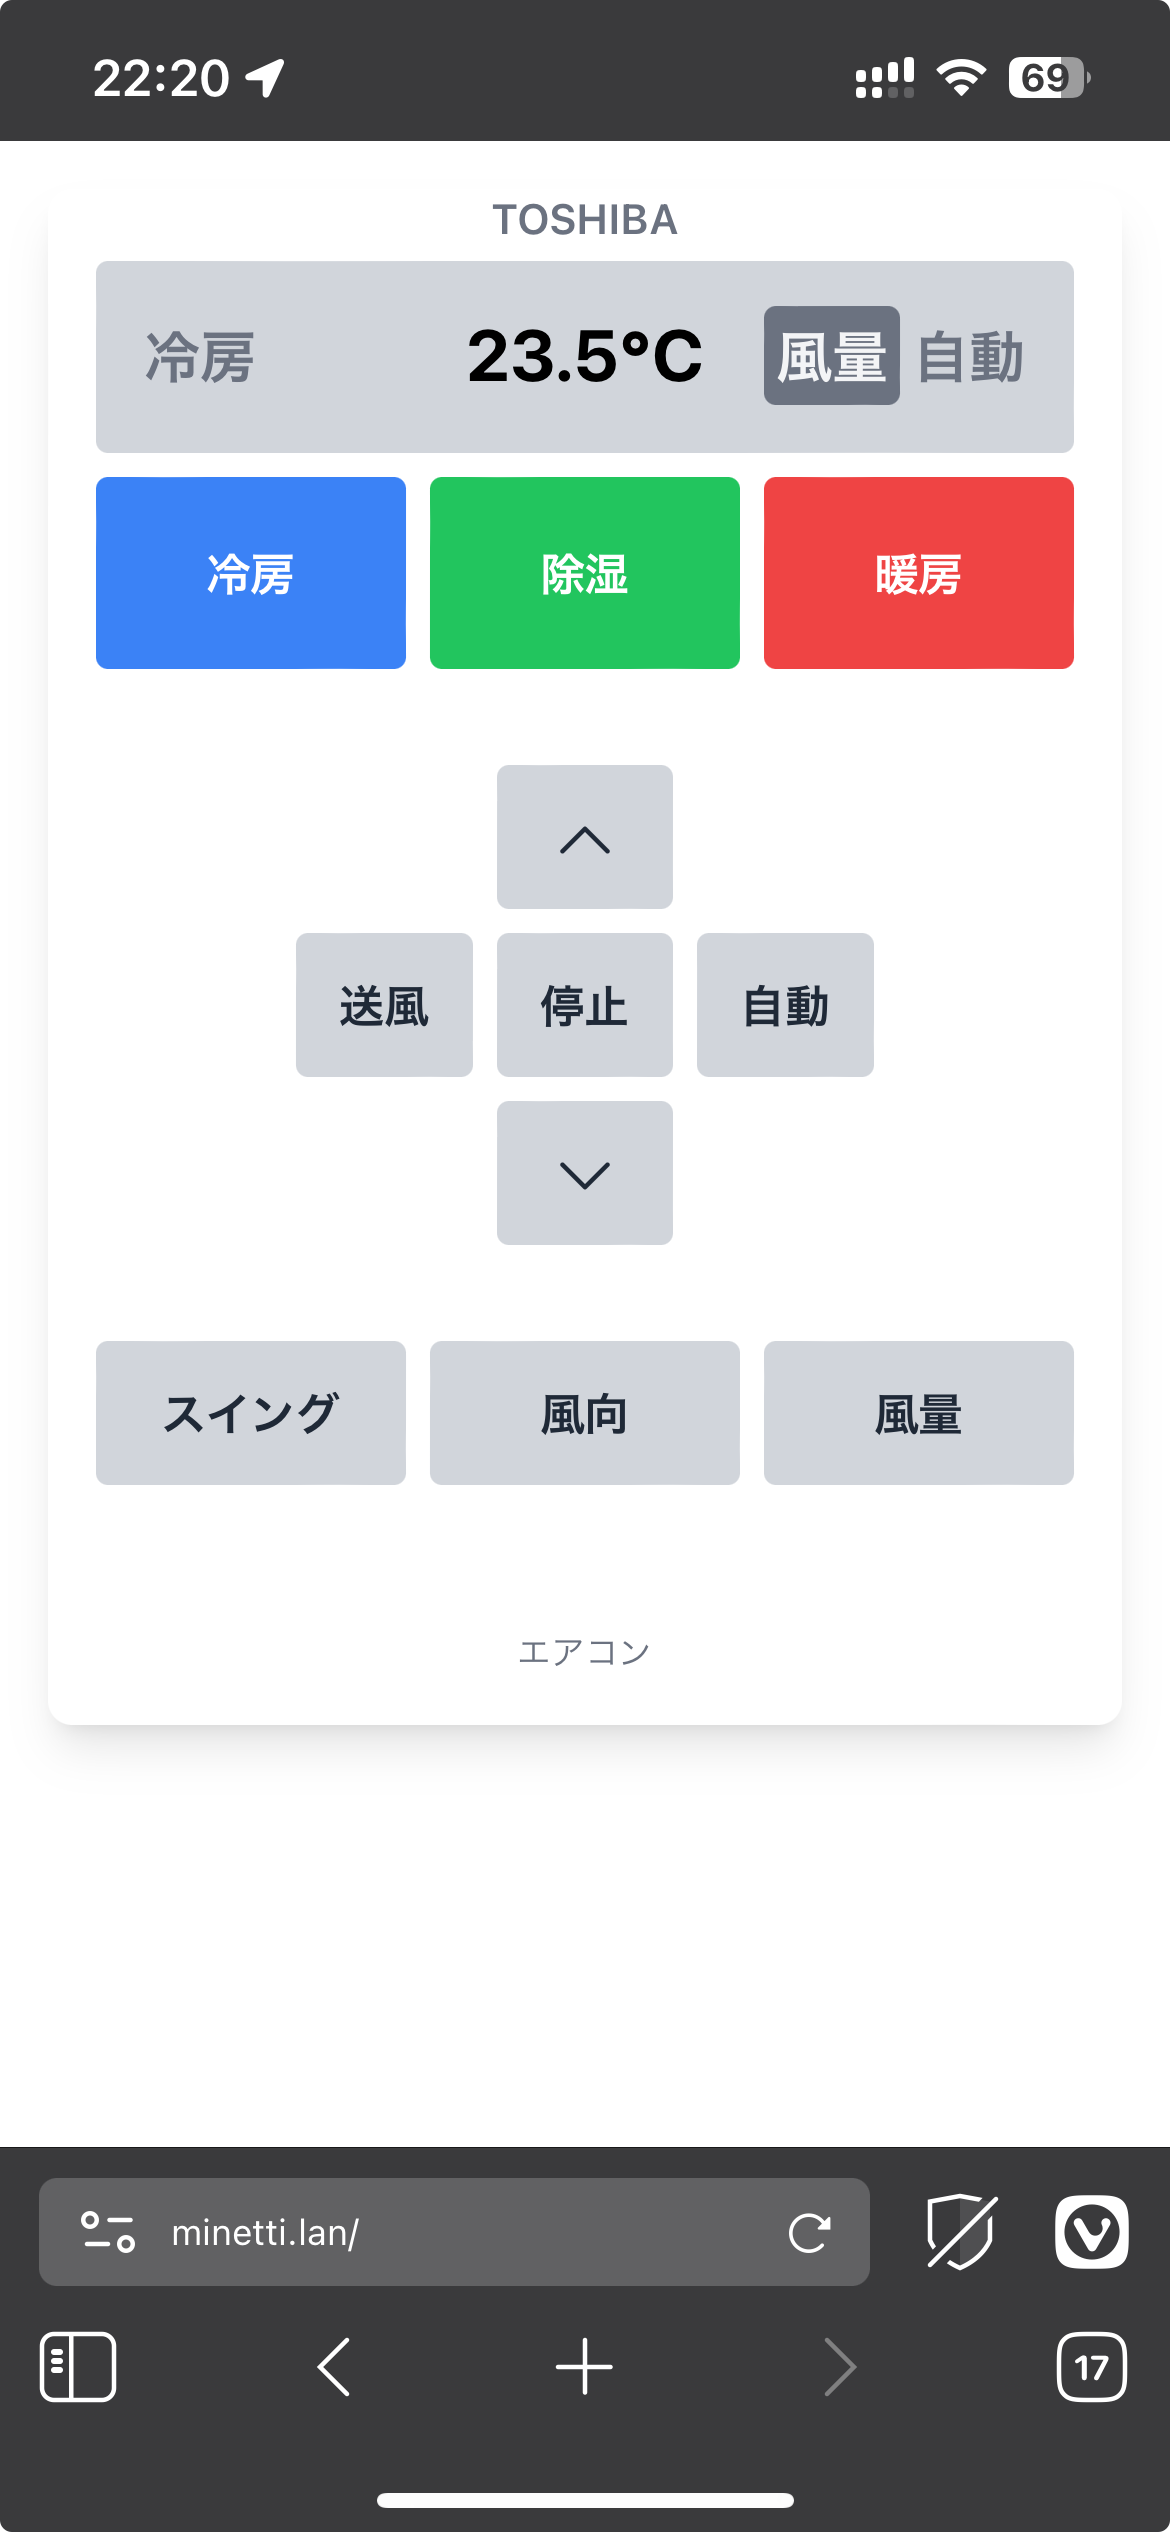
Fast forward a few hours later, I was able to fully control my A/C from an SSH session, and a few more hours later, I had a super shrimple 🦐 yet functional web interface finished using Phoenix and LiveView[7]. It will never cease to amaze me that you can synchronize the state between two browser windows on two different devices with just two lines of code in LiveView – a truly magical feeling ✨.
I’m truly impressed with how easy and fun it was to develop my first IoT device using Nerves, and am already searching for ideas as to what to do next.
Also, huge thanks to the Elixir/Nerves community in the #nerves channel on Elixir’s official Discord server. You were an inspiration, an encouragement and a huge help!
-
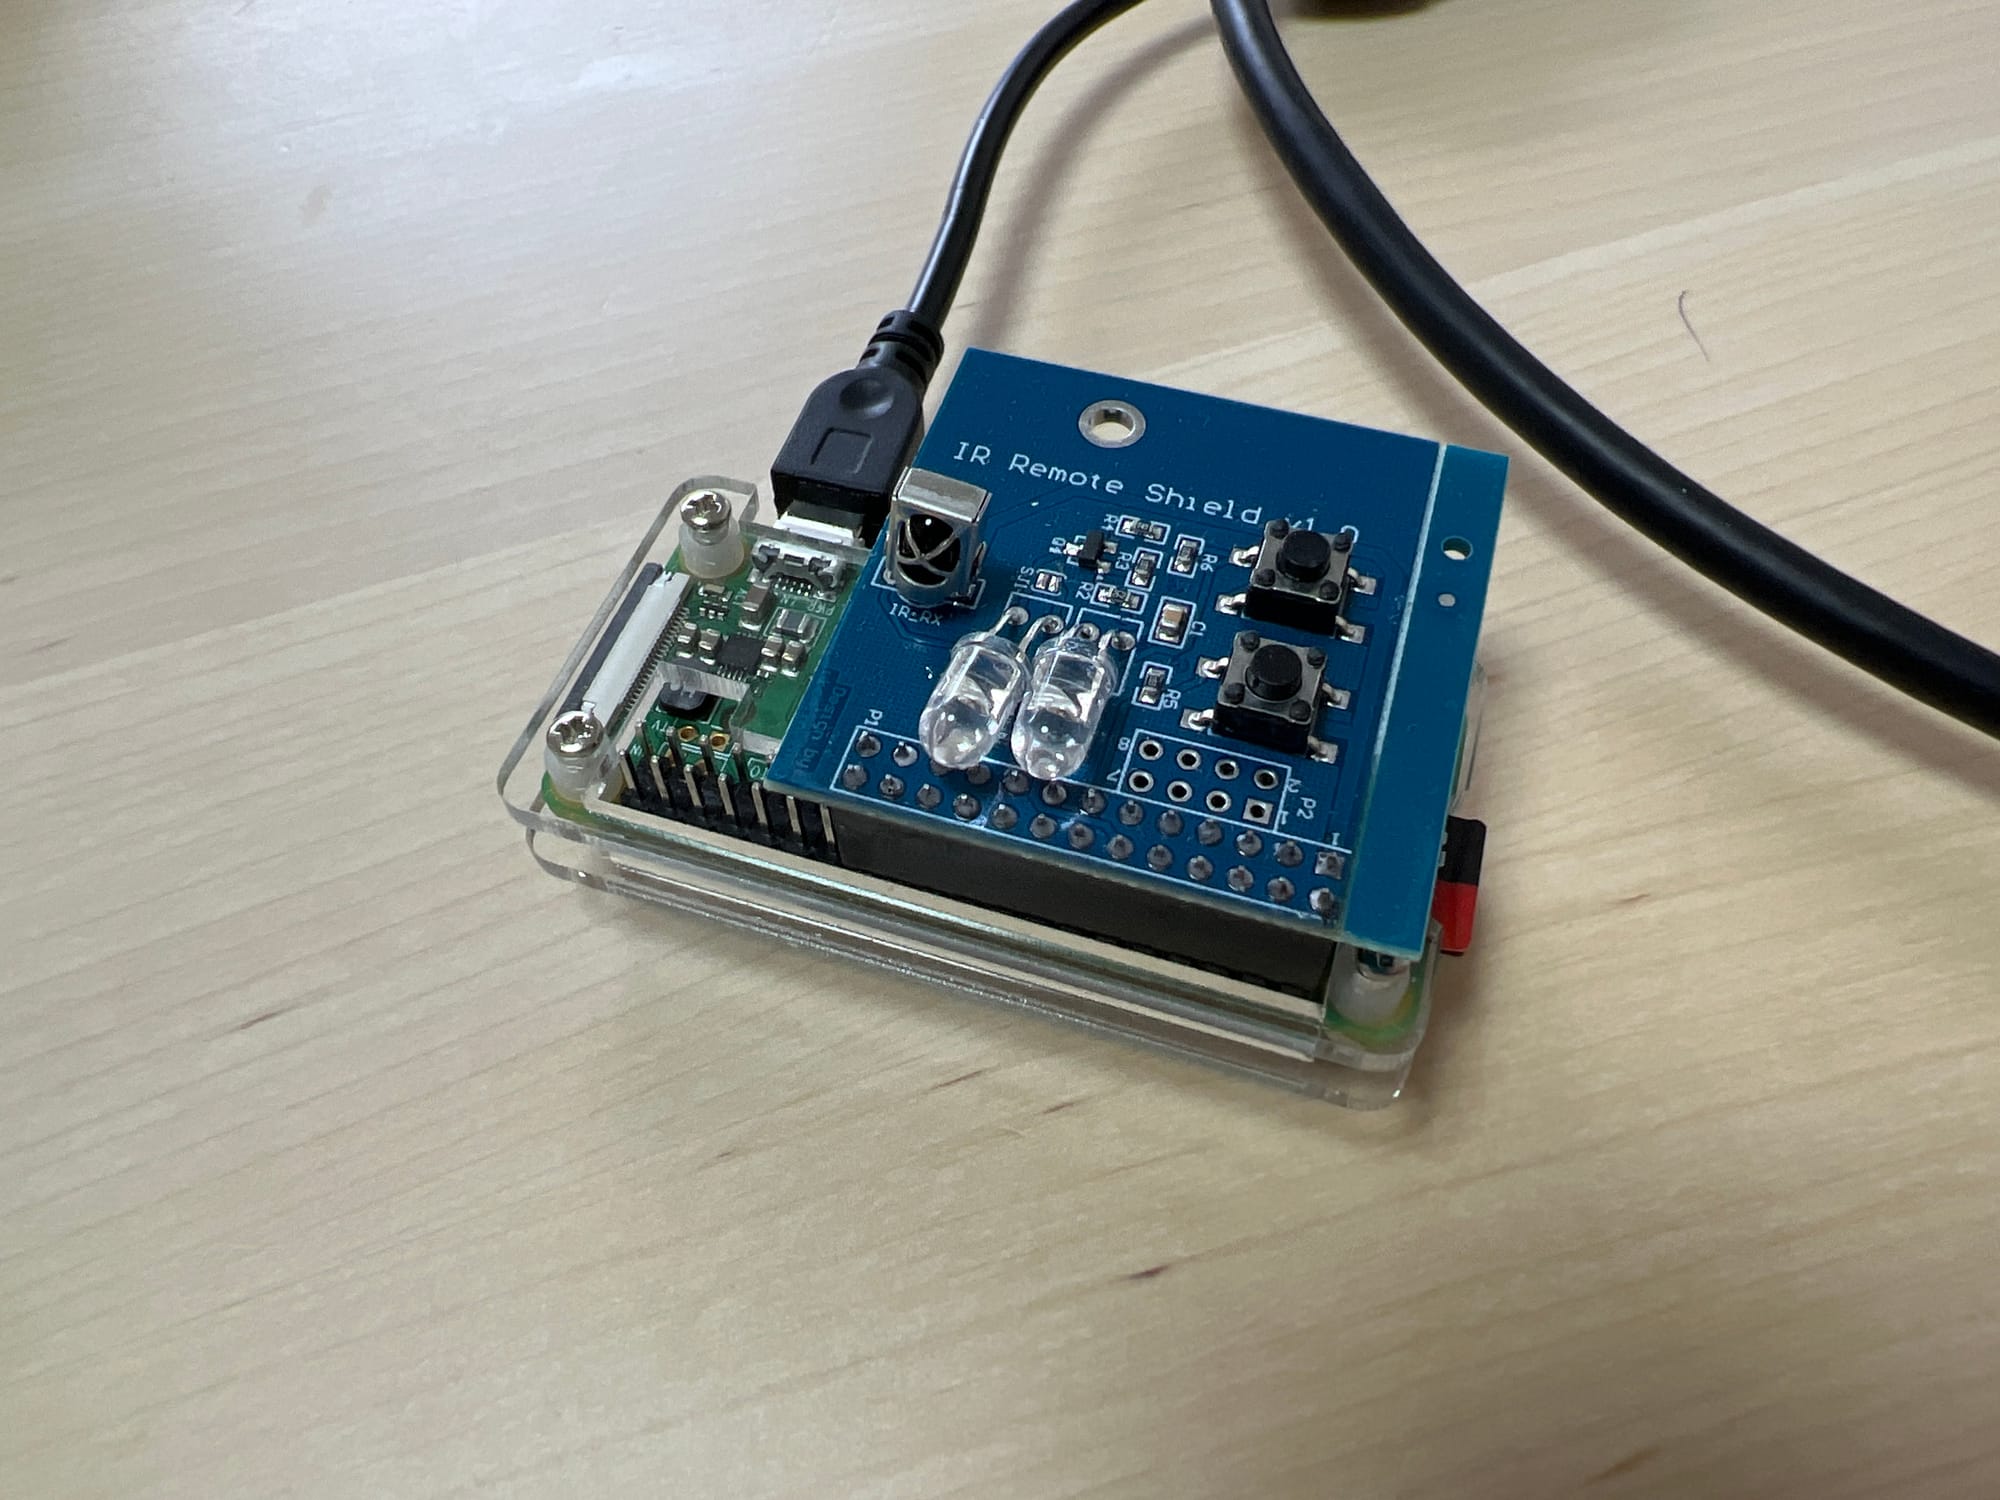
Side note: I originally only soldered in one IR diode, as that was how the board was shown in every article I have ever seen on the Internet – and the result was disappointing, as the board didn’t react to my commands in the slightest. Out of frustration, I randomly stuck the other diode in place, not even soldering it down, and not even hoping anything to happen, I checked the diodes through the lenses of my iPhone – and to my utmost surprise, now both of them were emitting infrared light. I think that this is related to the sector
SJ1which is connected with a blob of solder on most boards I’ve seen but not on mine, though I haven’t tested this theory. -
It also consumes a truly minuscule amount of memory.
-
Modified because at least according to a specification I found, NEC protocol is fairly strict about the overall structure of the signal, saying that it starts with a 9ms pulse burst followed by a 4.5ms space, then followed by a combination of
addressandaddress’(logical inverse), ending with acommandandcommand’. Neither of these things turned out to be true about the signal my A/C’s remote was producing: the opening was a 4.5ms burst signal & 4.5ms space, theaddress&address’were present only on the first two datagrams but omitted from the third one, instead of onecommand&command’blocks, there were two command blocks present, and in some scenarios, the secondcommand’block was replaced with another structure (as in, Toshiba gave up on the paritycommand’block and instead reused the section for a different purpose). -
By the way, this strict timing is exactly the reason why I had to rely on LIRC to send the signals on my behalf. When I tried to transmit the signal using Elixir code alone, I could not get the timing quite right.
-
For example, in one step, I’d scan a code that represents cooling mode at 20.0°C with automatic fan speed. In the next step, I’d keep the mode and fan speed the same, but raise the temperature by one degree. The difference between these two signals would indicate where in the signal is the temperature encoded. (Actually, it ended up encoded in two places – the half-degree of 20.5°C was in an entirely different place than the integer portion.)
-
Also, if anyone can find any rhyme or reason with how the temperature is encoded, I’m all ears 👂. It doesn’t increase monotonically with the temperature value, I can’t find any logic even if I consider different endianness.
-
Fun fact: the base of the UI was generated by sending a photo of my A/C’s remote to Claude.ai and asking it to generate a code in HTML & TailwindCSS that would resemble the real-world item.