Retro gallery: GameBoy Zero

Or technically, a “double retro gallery” since these images are over 1.5 years old; back when I was taking them, I didn’t have a website to share the fruits of my labor with the world, but since now I have one that sometimes even works, I thought to myself, “why not publish these images again”?

Retro gallery: GameBoy Zero

Or technically, a “double retro gallery” since these images are over one and a half years old; back when I was taking these photos, I didn’t have a proper website to share the fruits of my labor with the world, but since now I actually have one that sometimes even works properly, I thought to myself, “why not publish these images in their full glory”?

Before I present you with recycled images ♻️ with the exact same captions I wrote many months ago, let me create at least the tiniest bit of original content by describing what I’m going to show you.

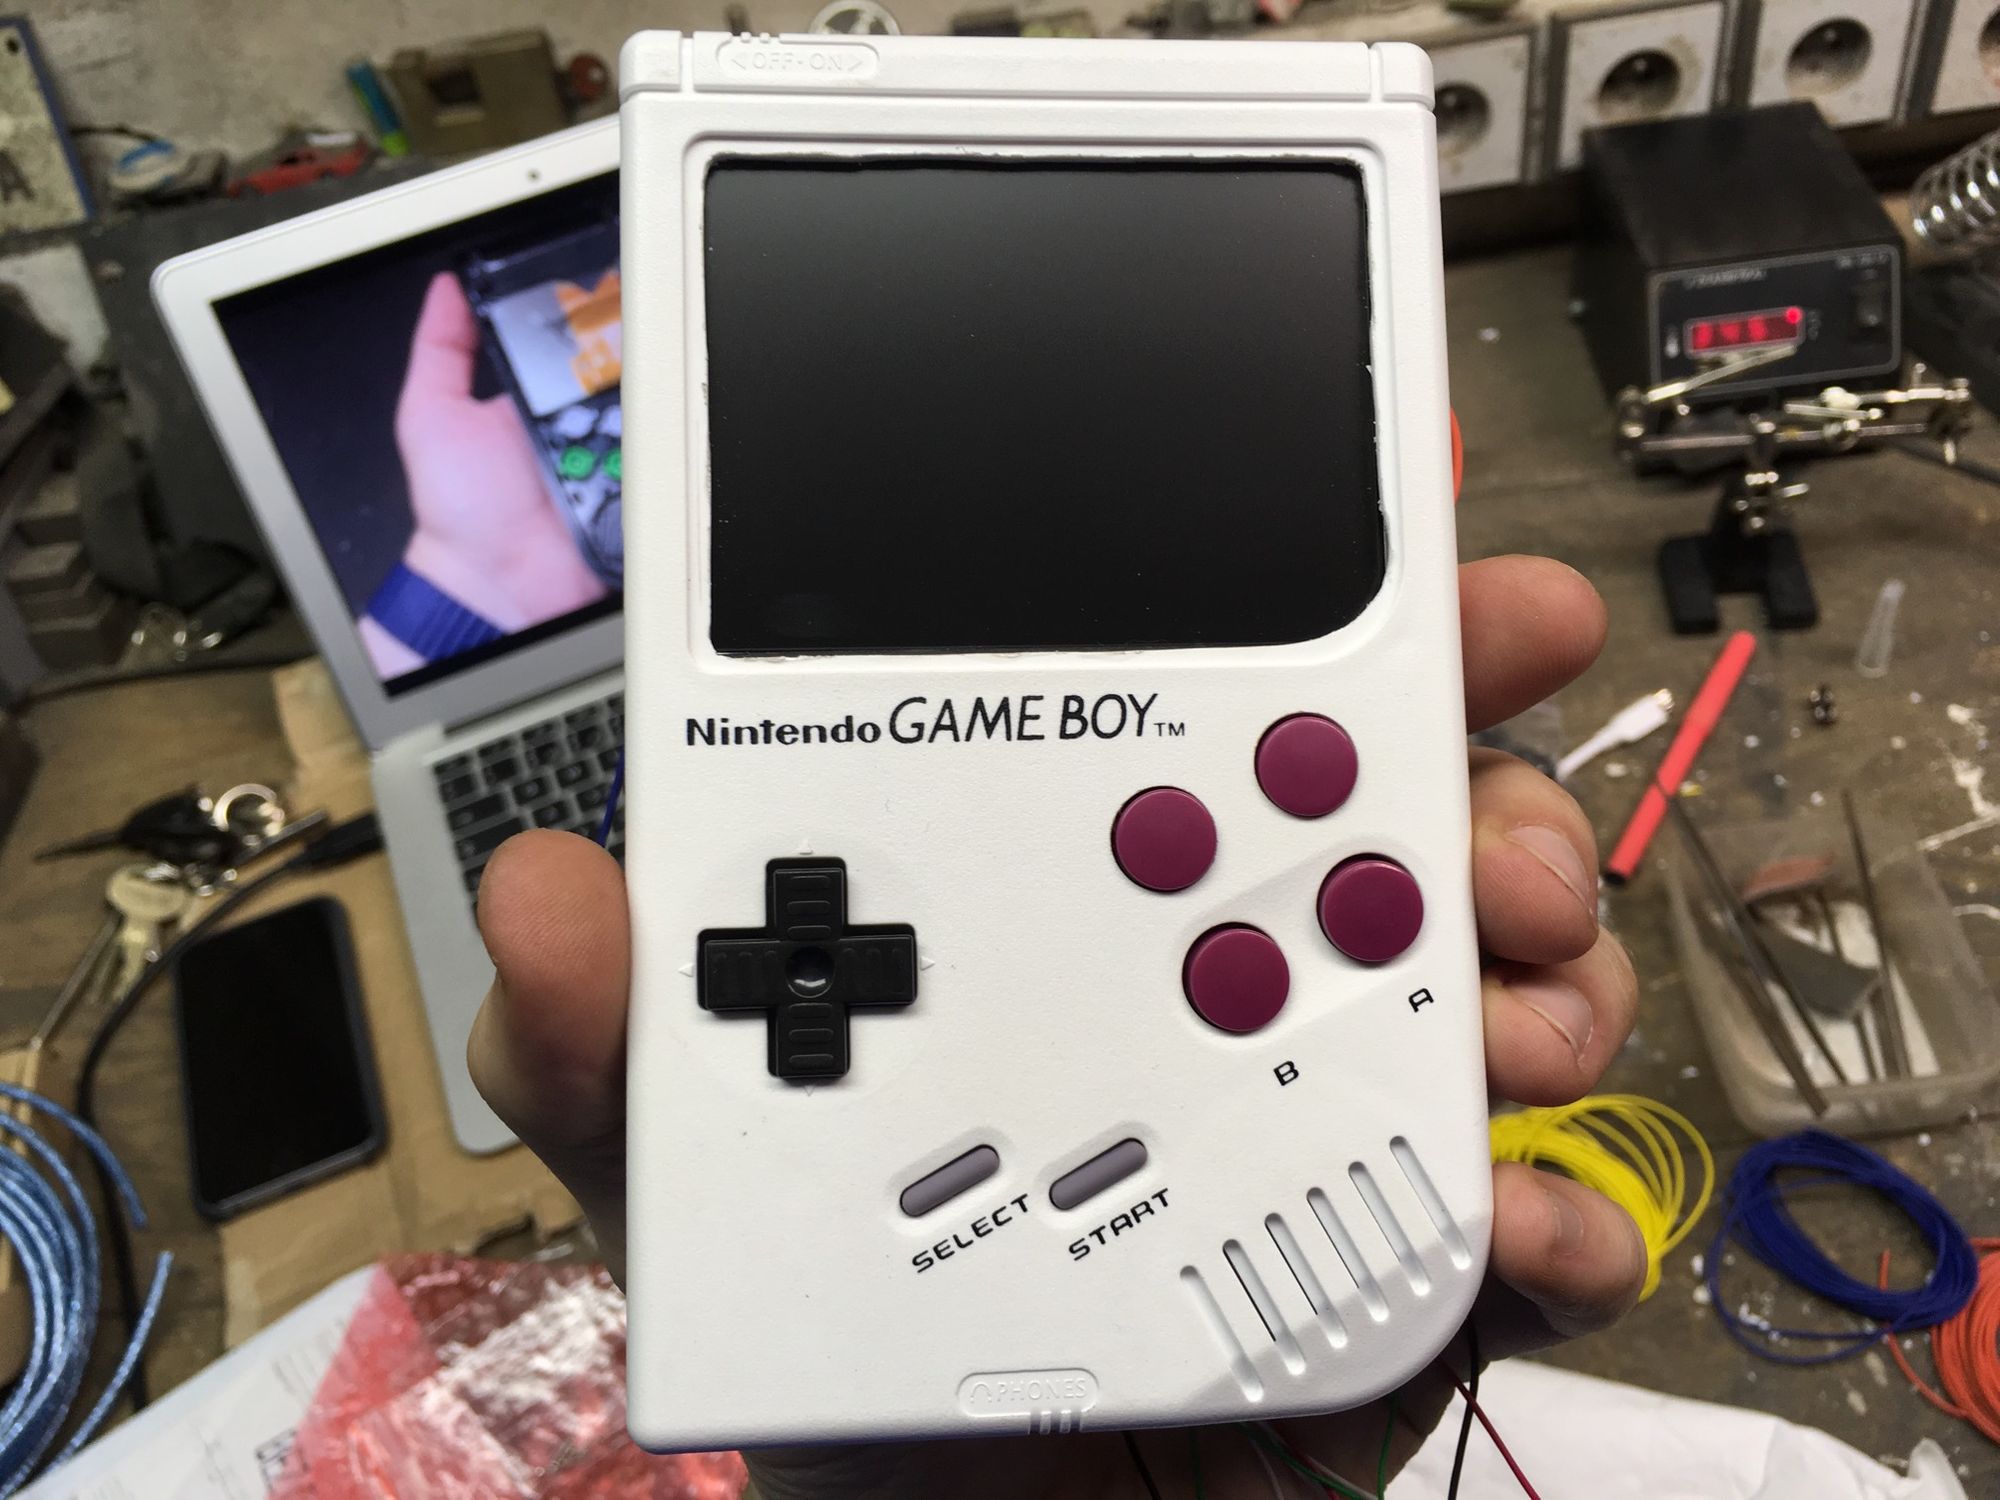
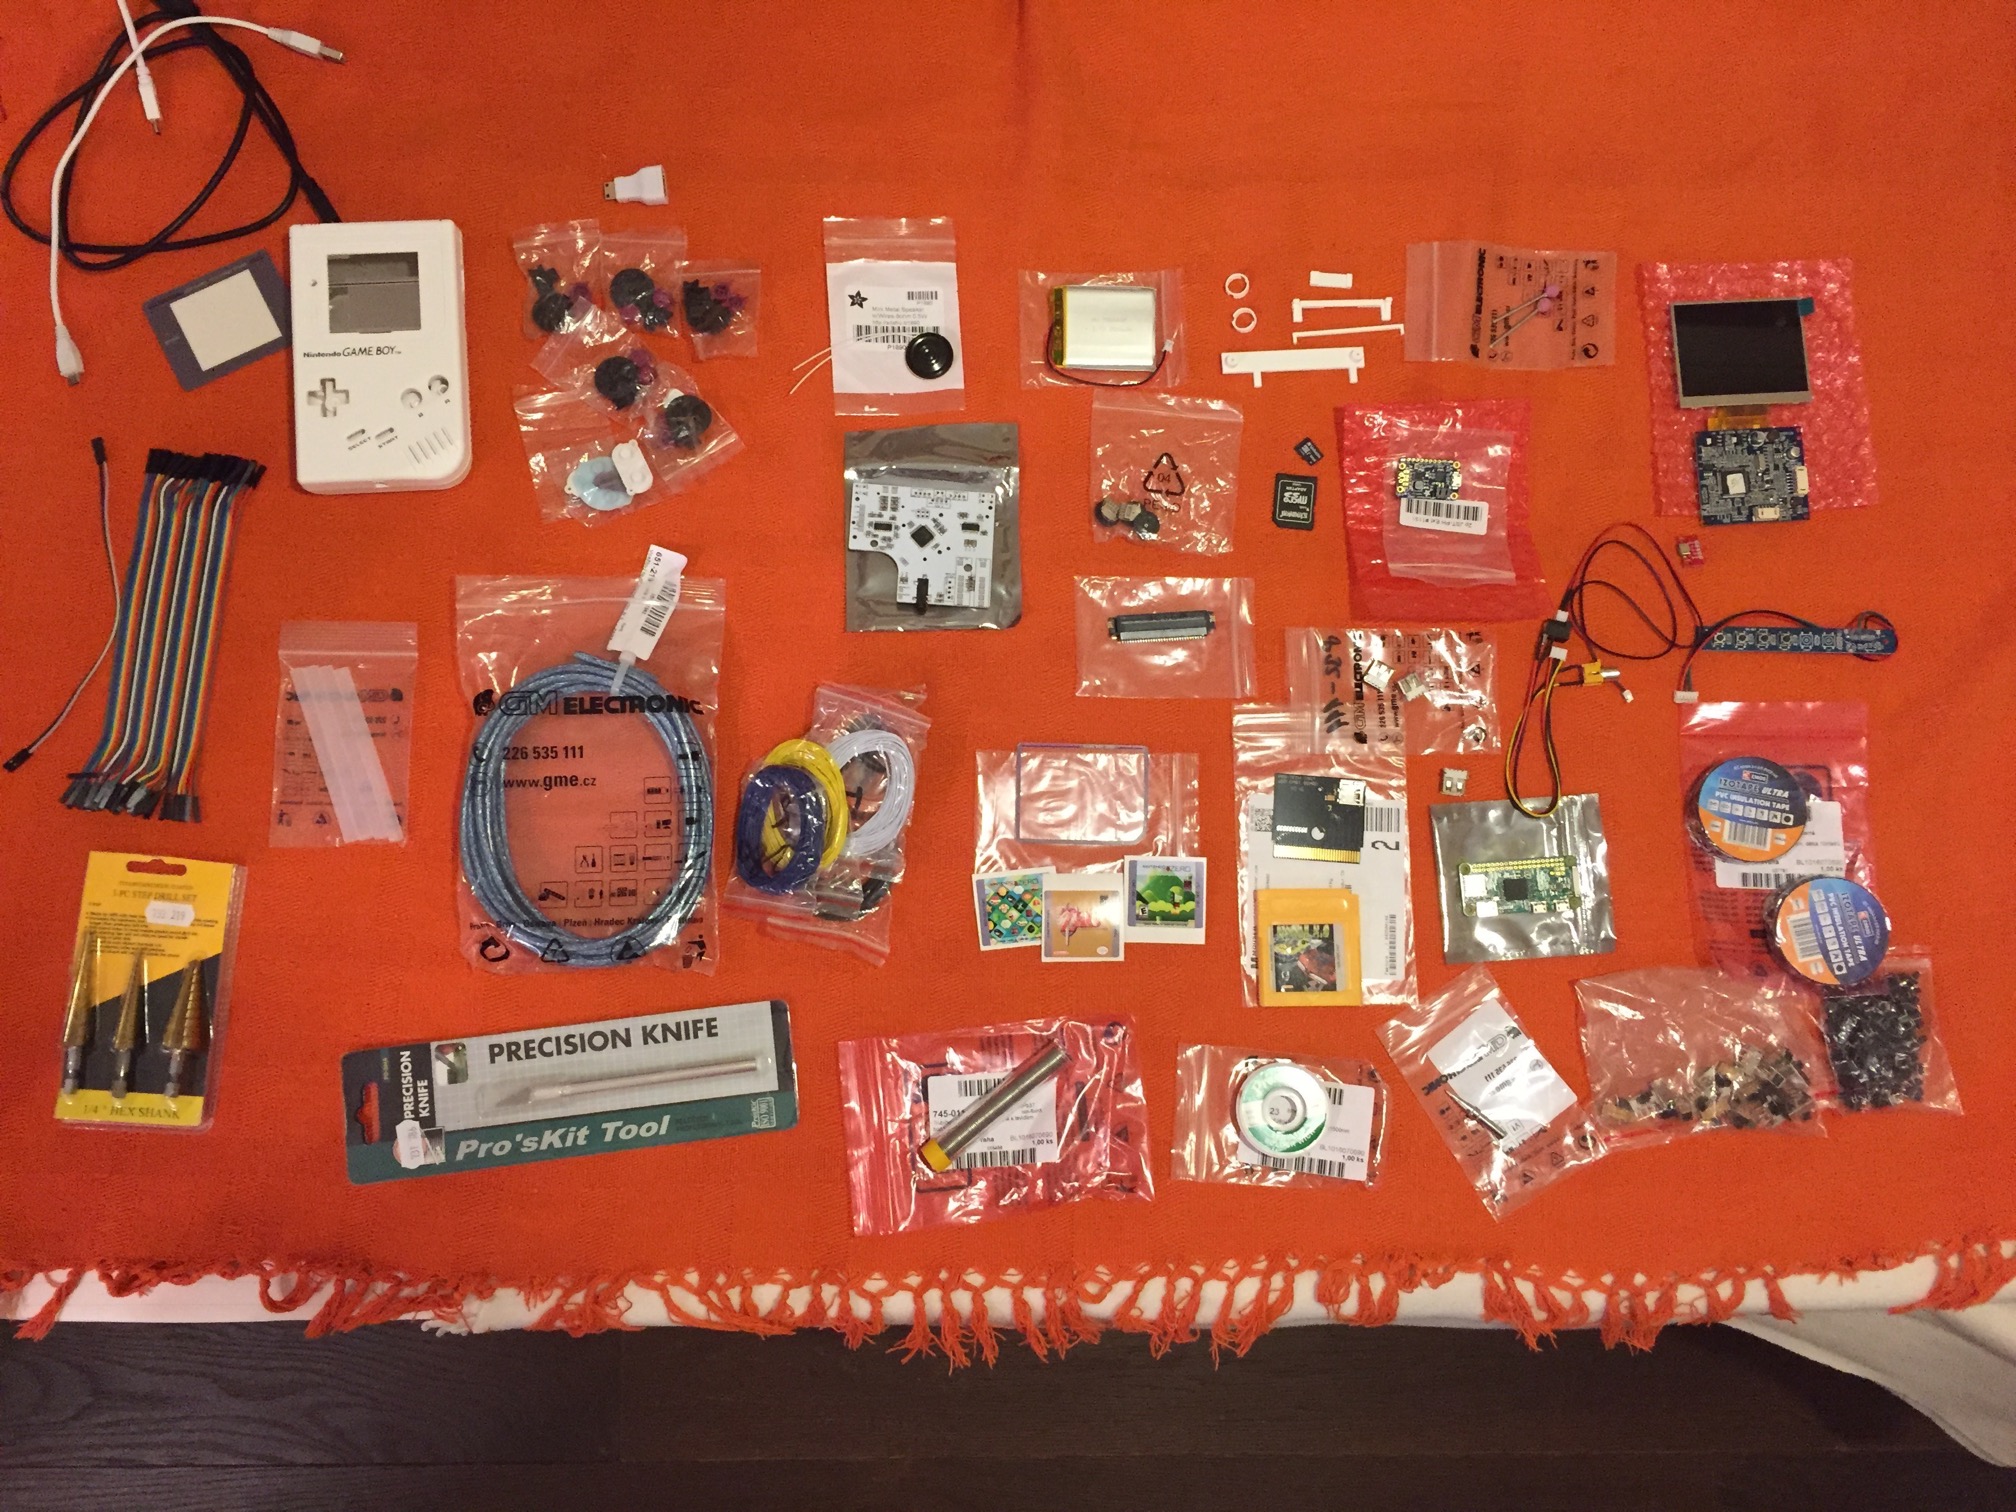
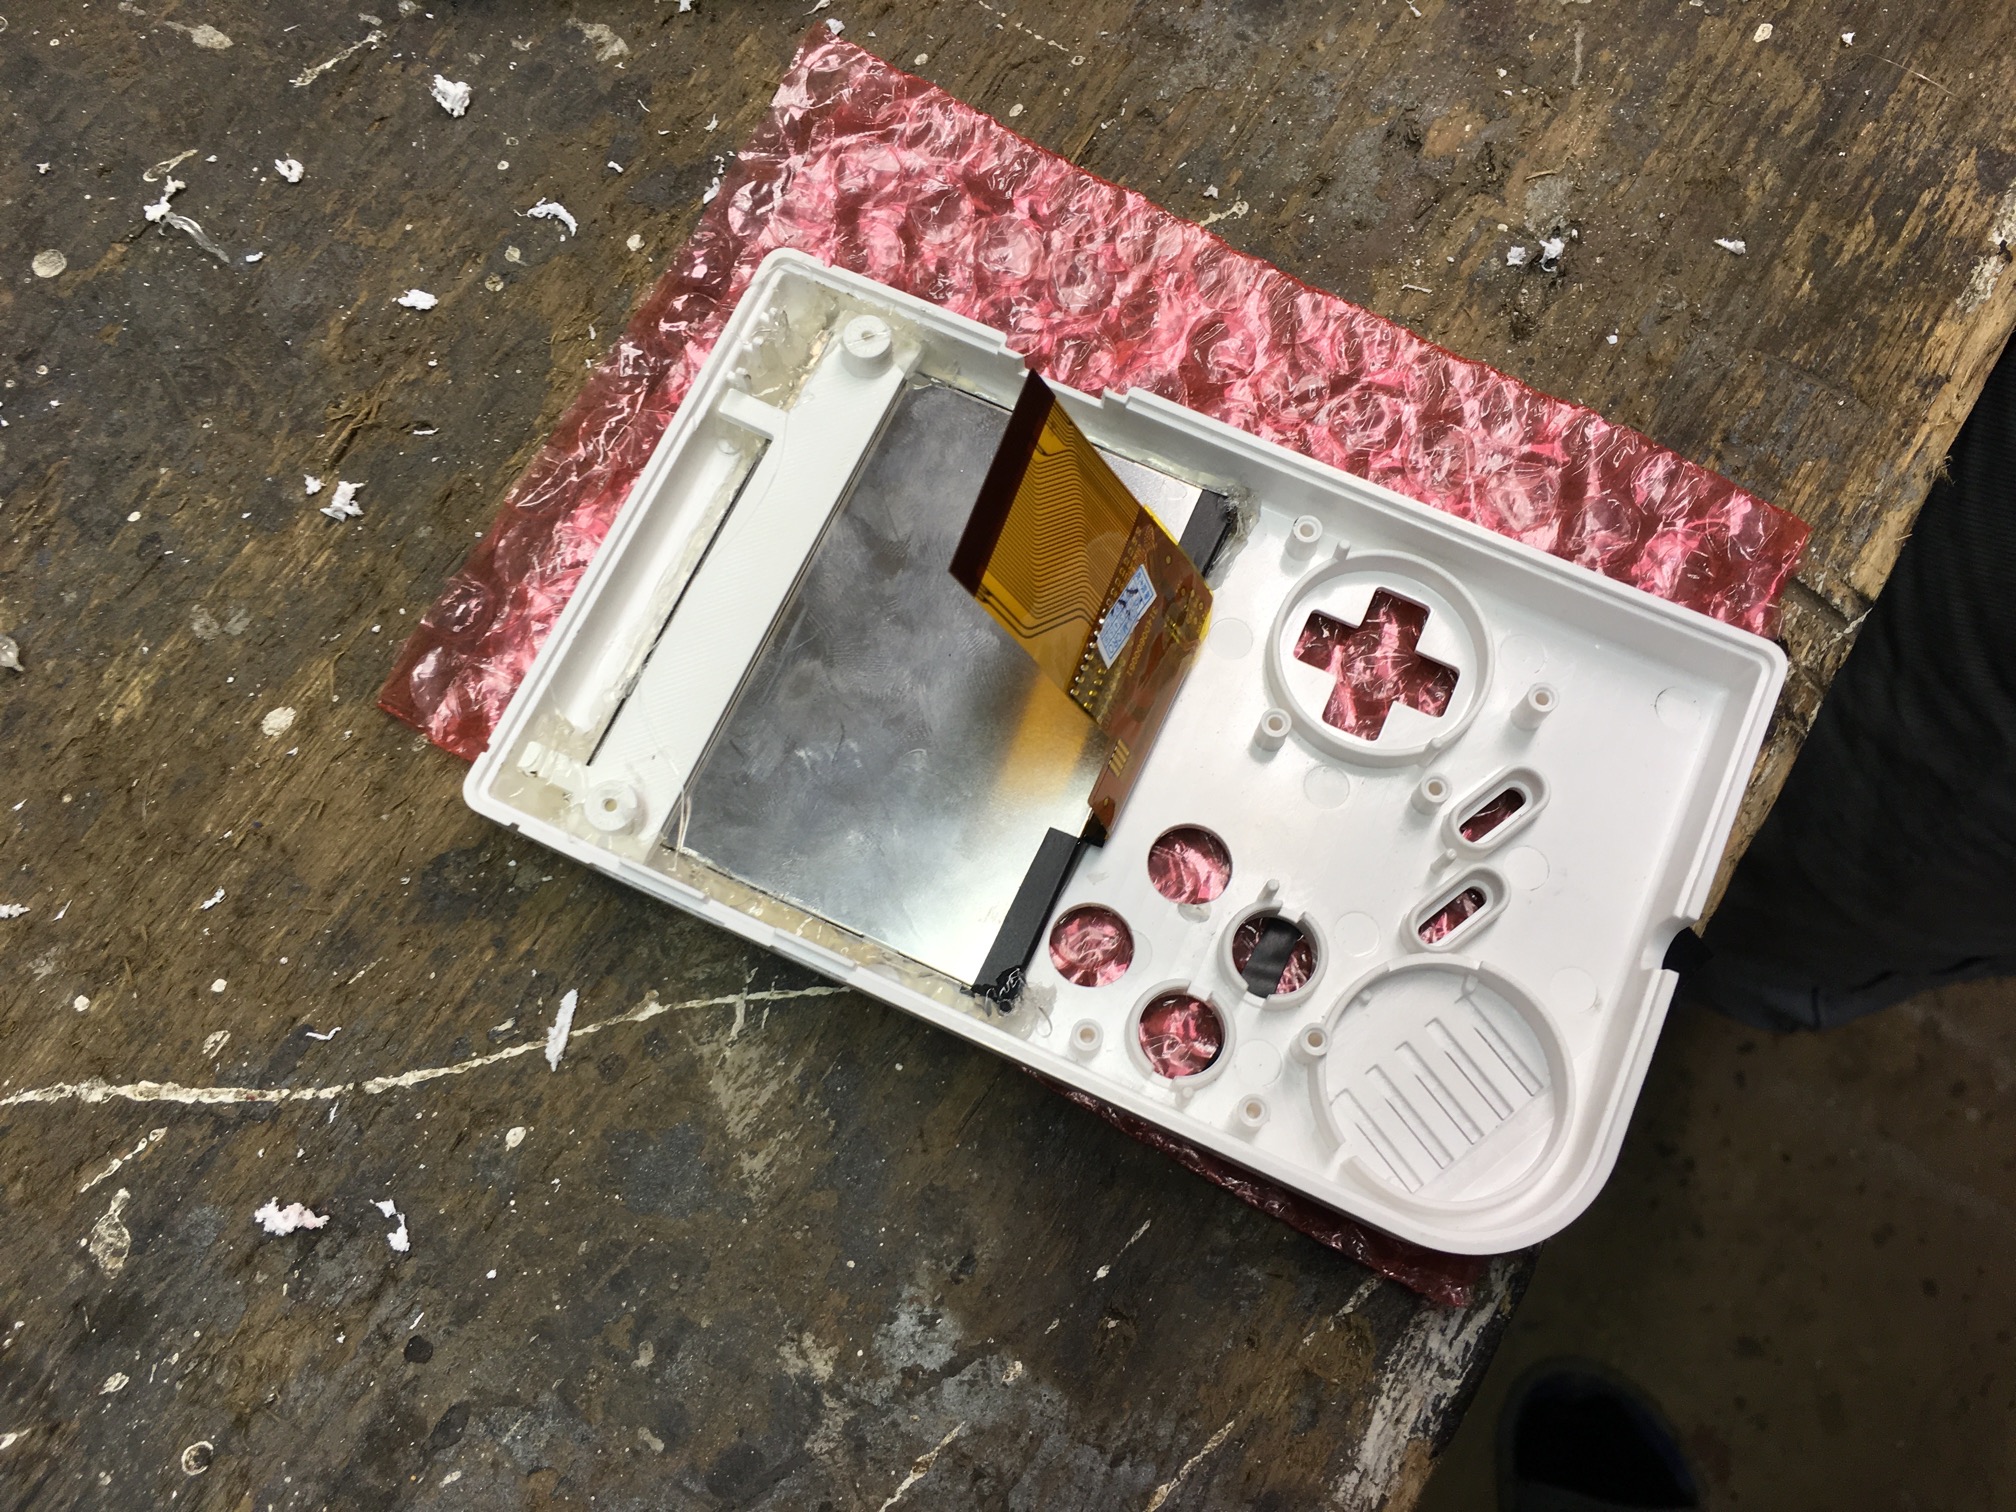
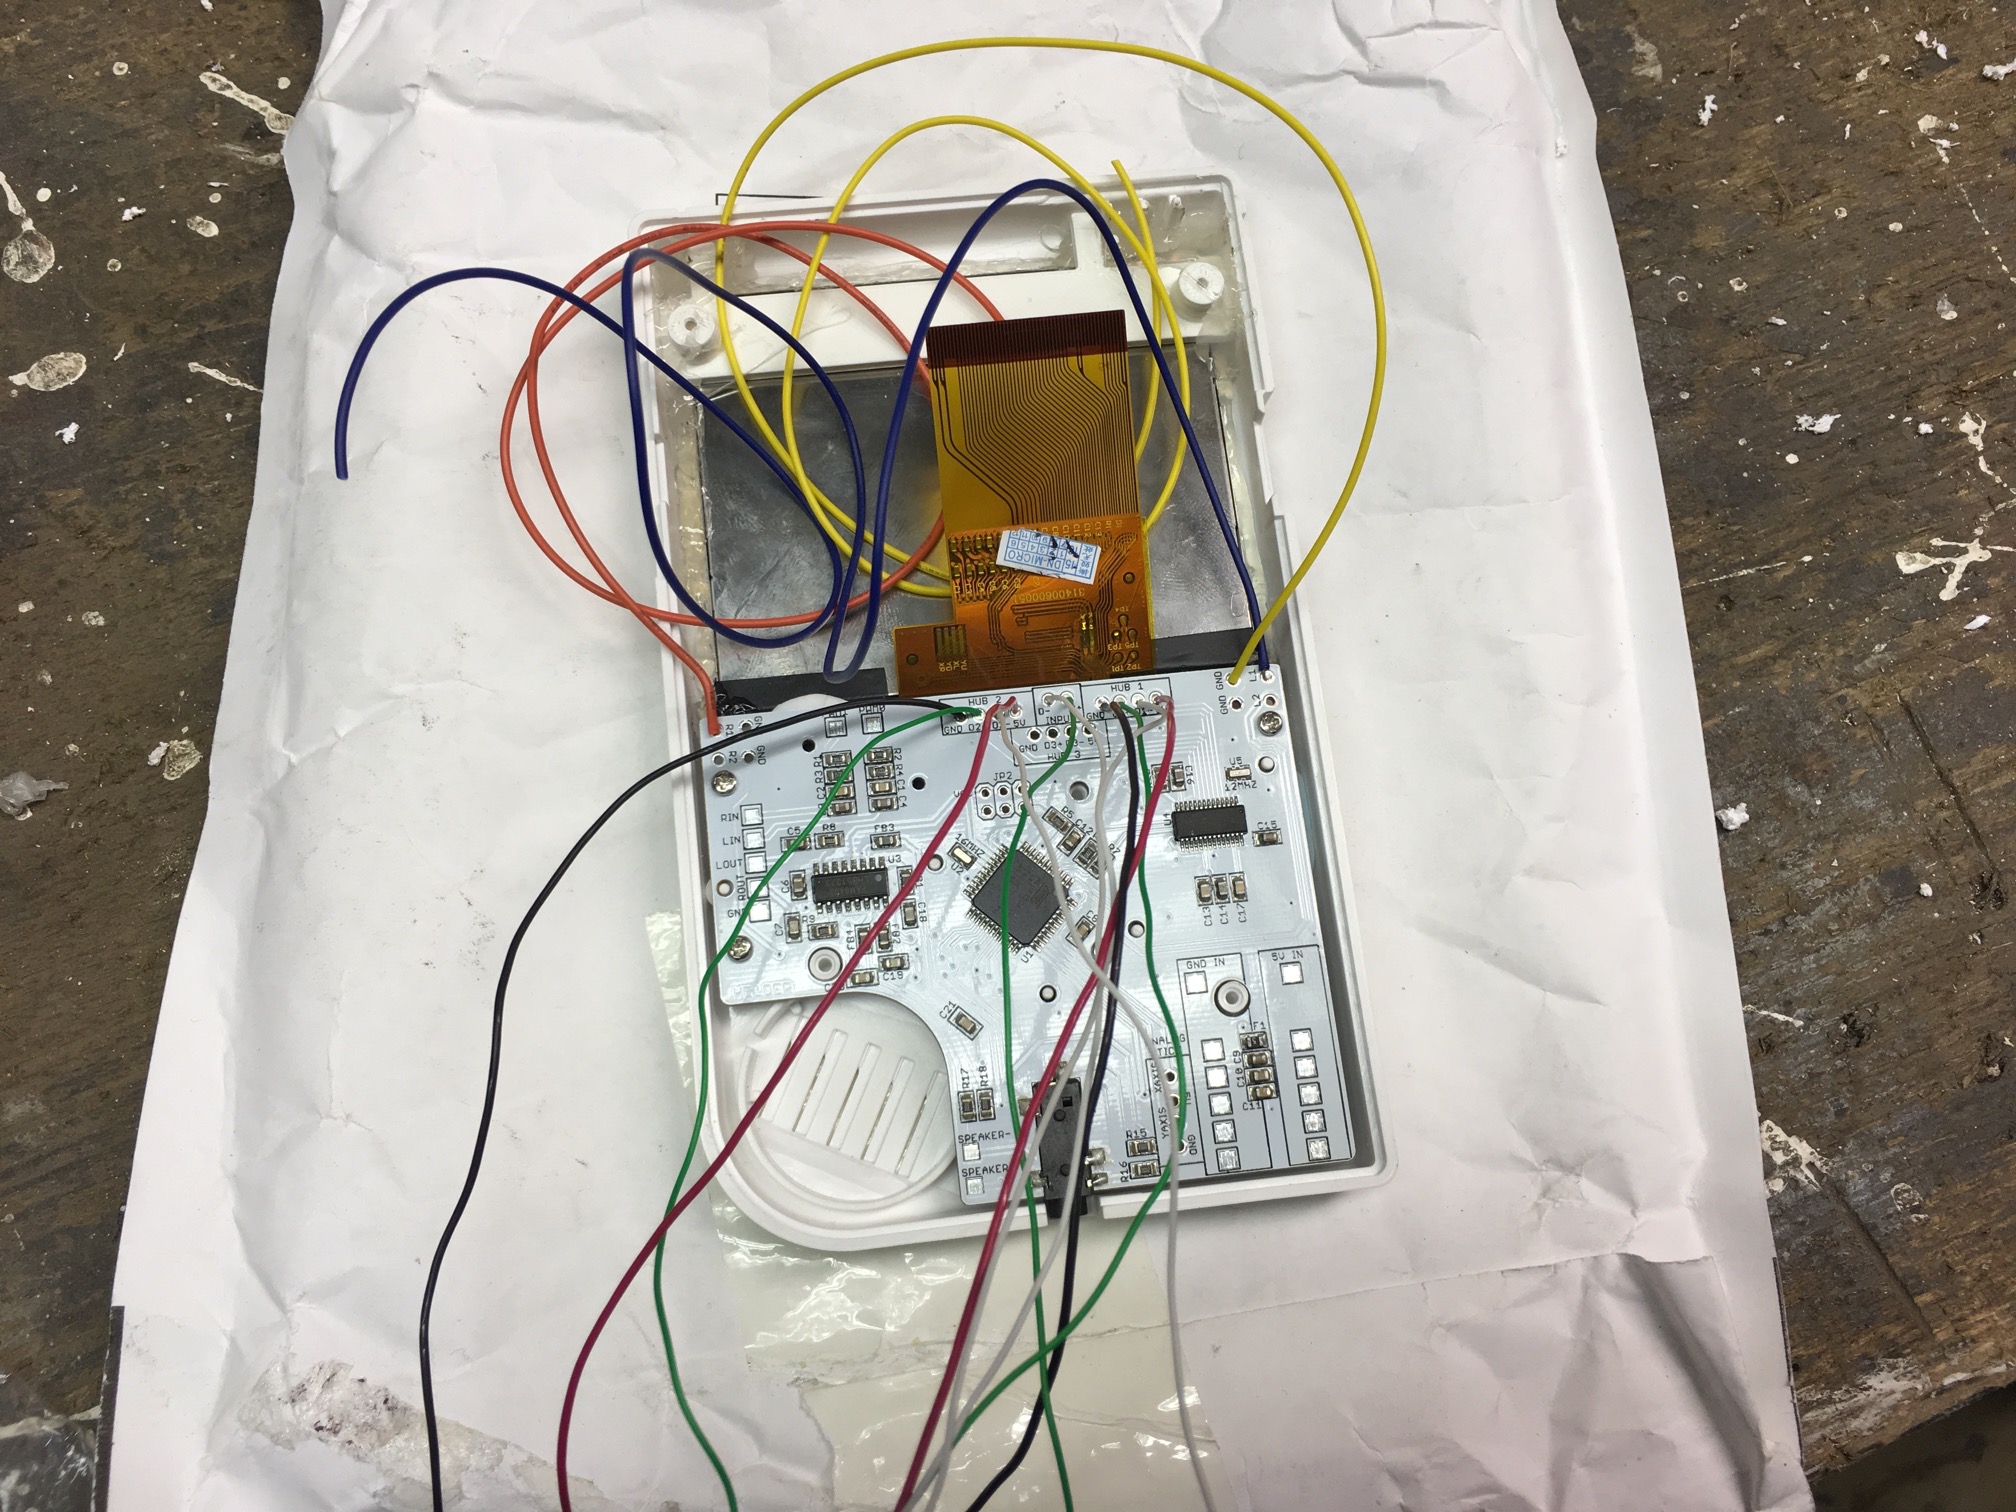
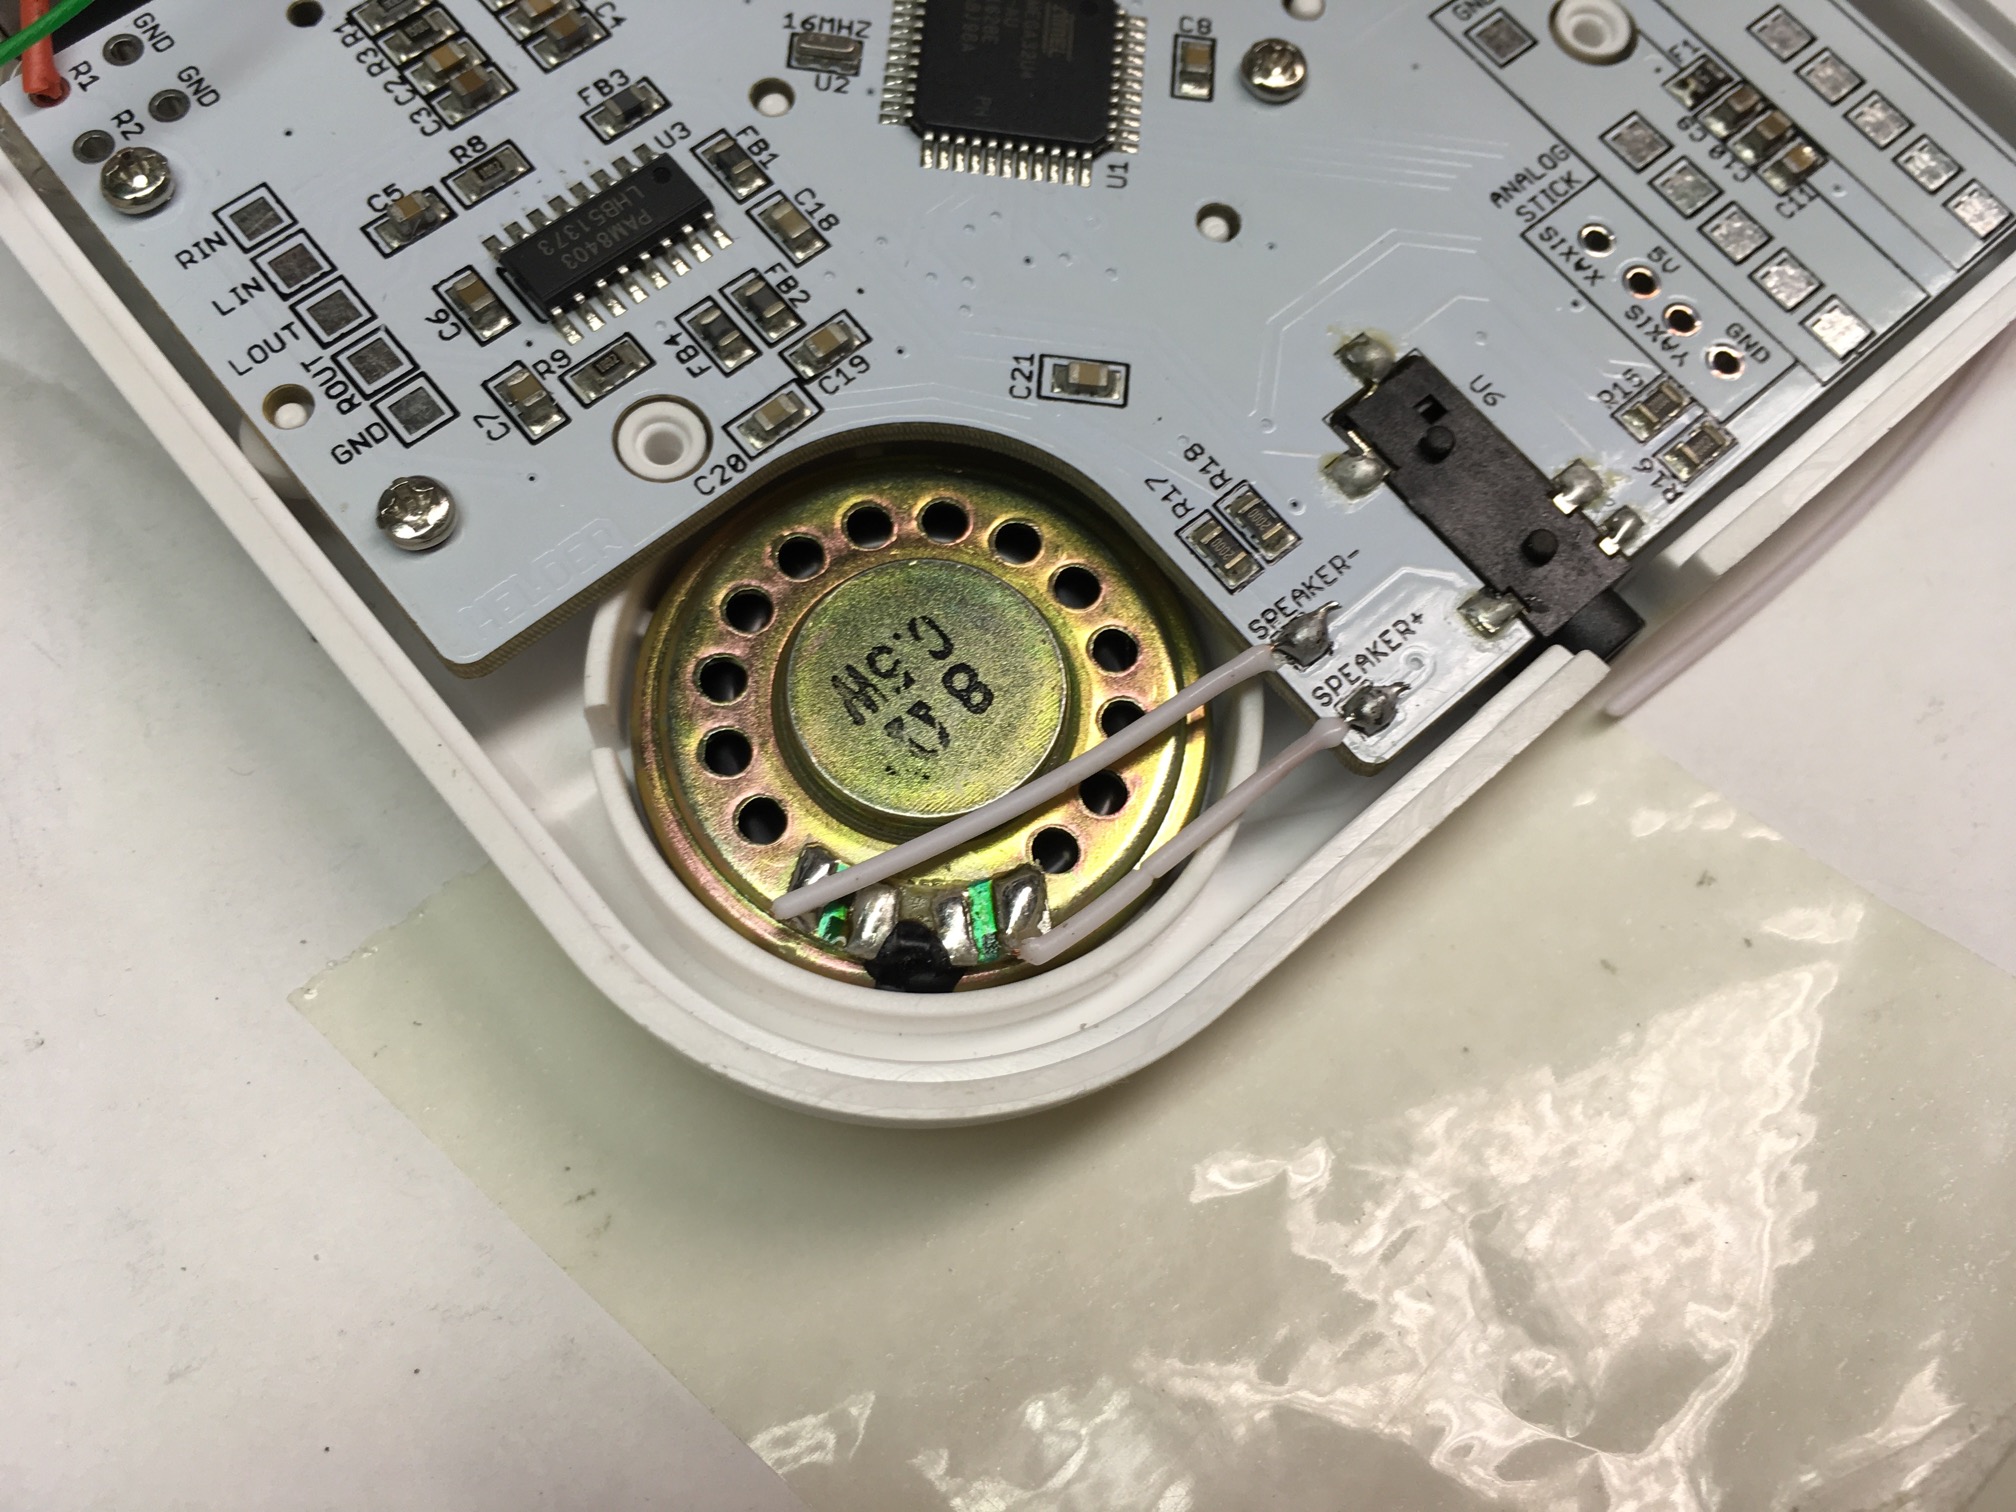
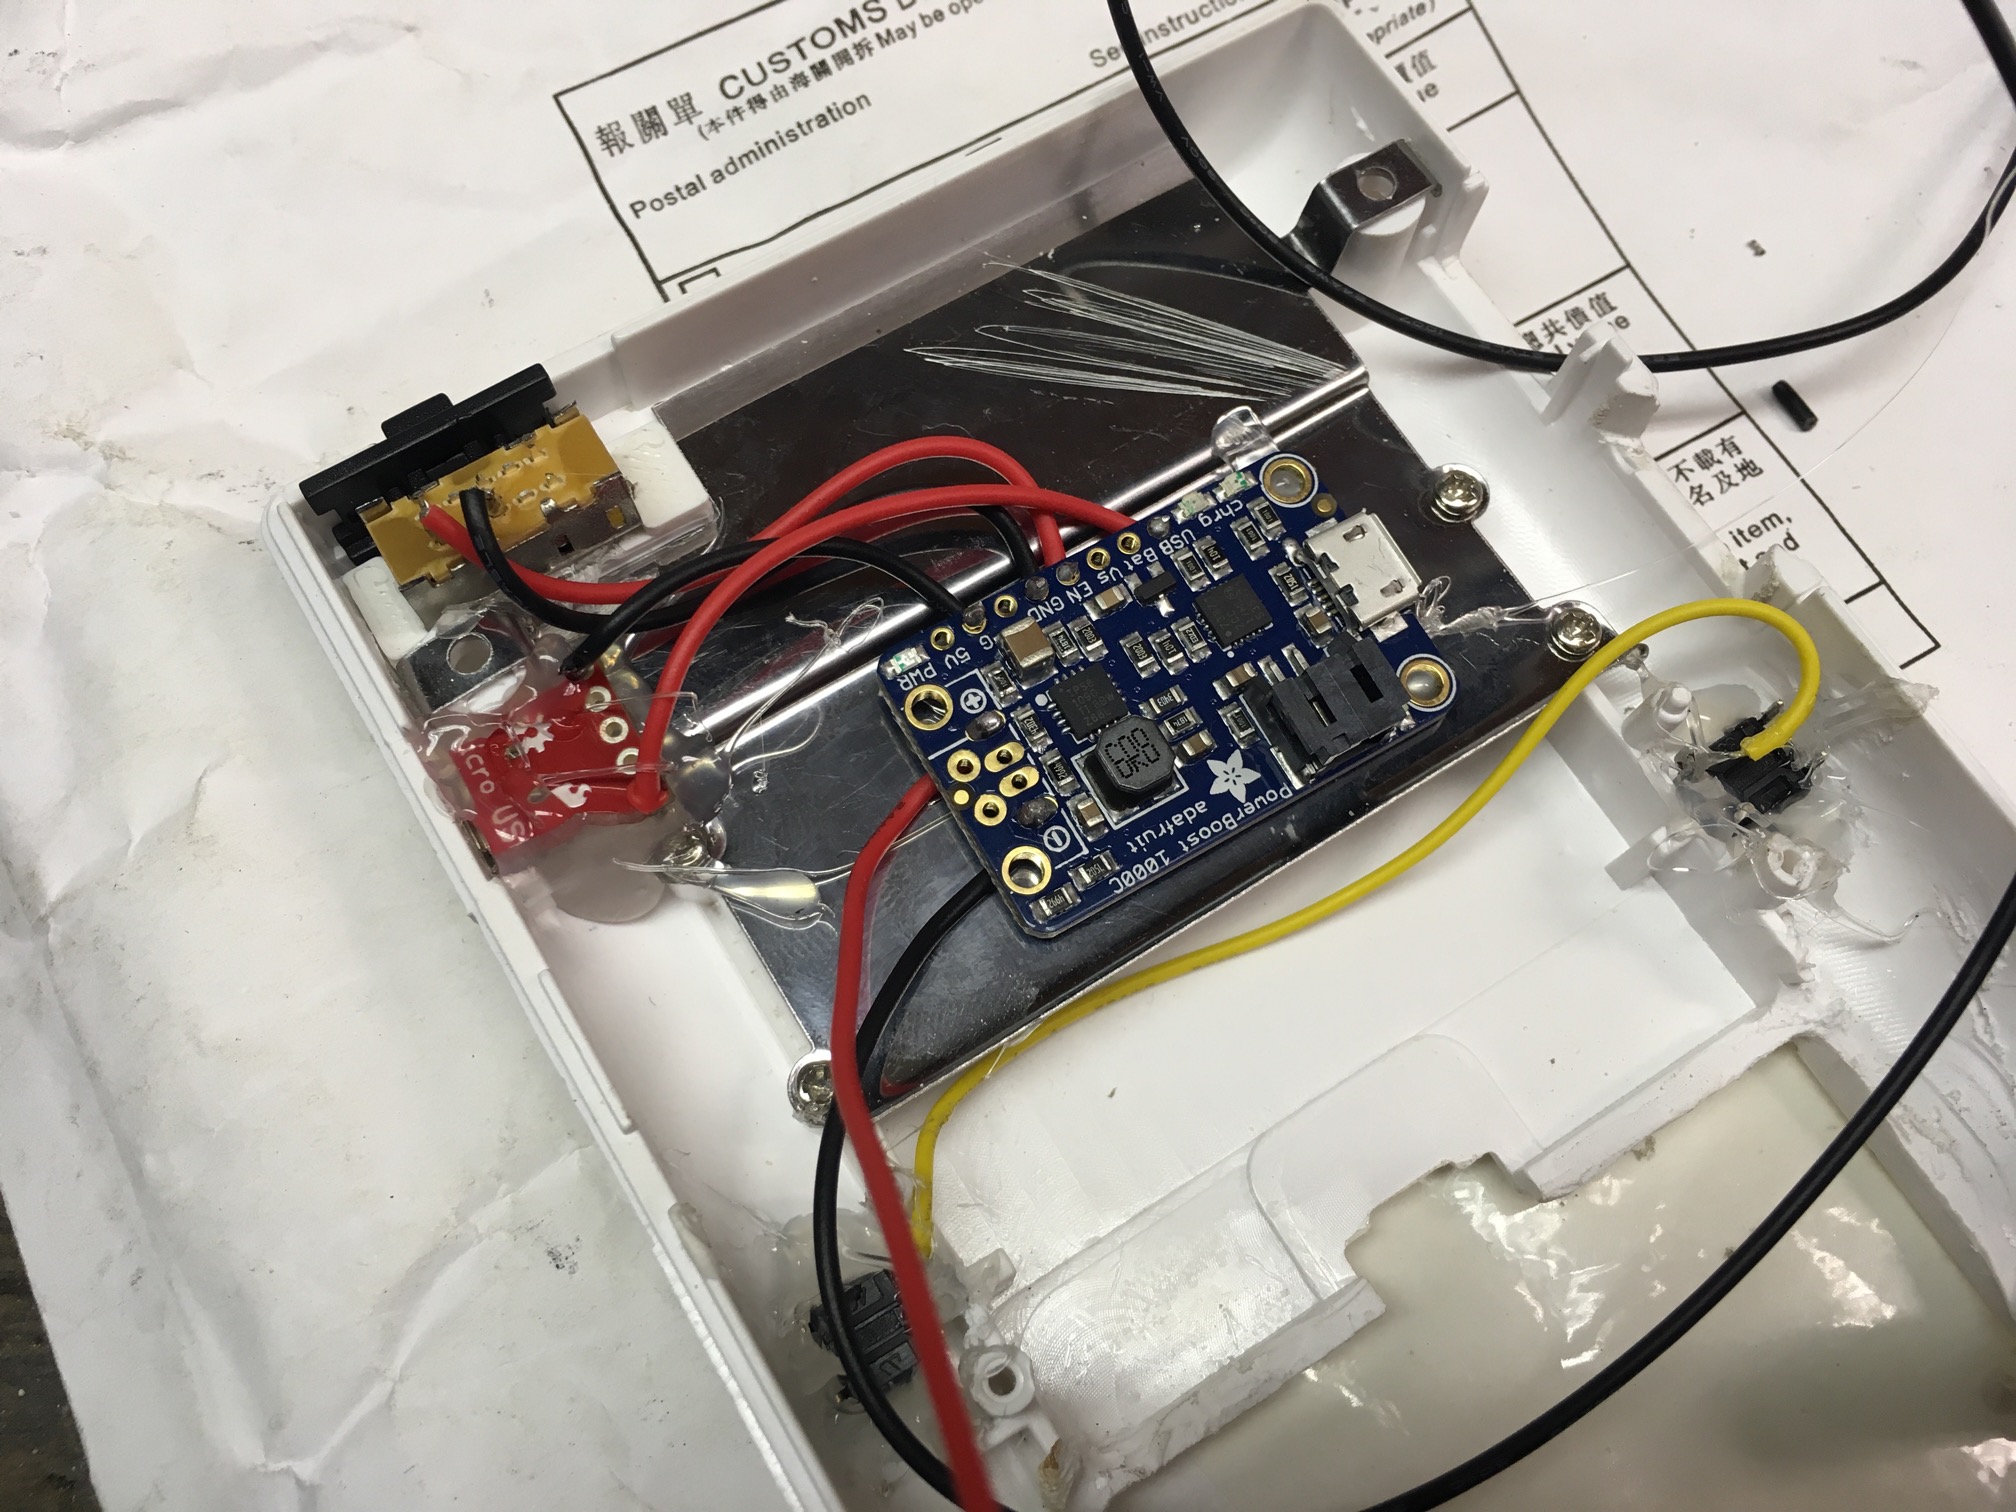
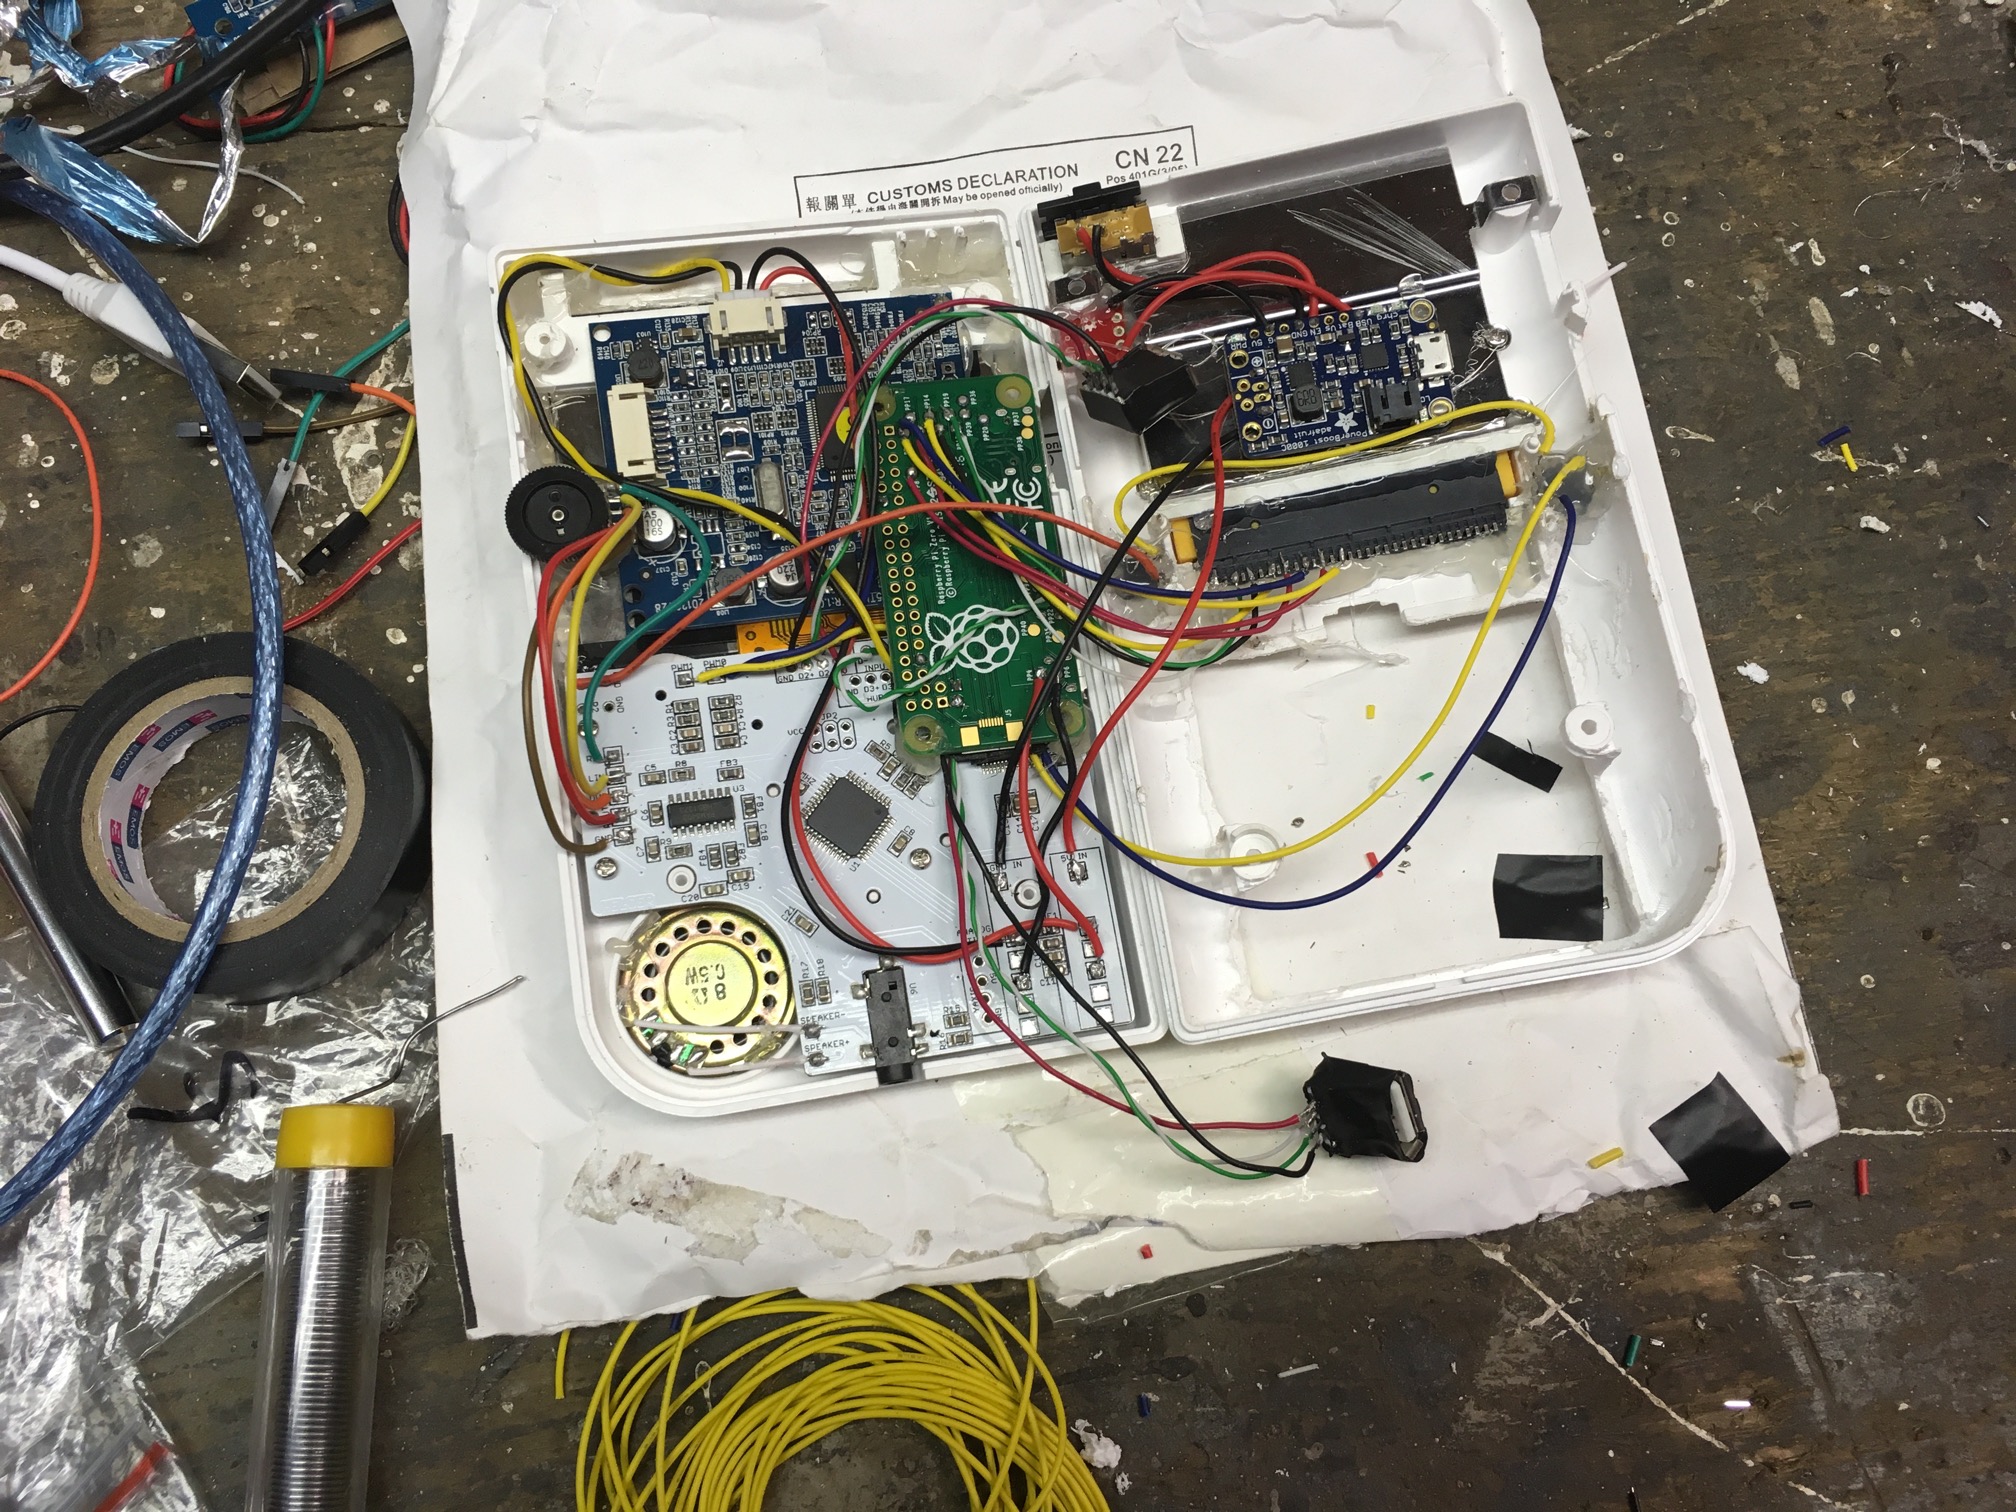
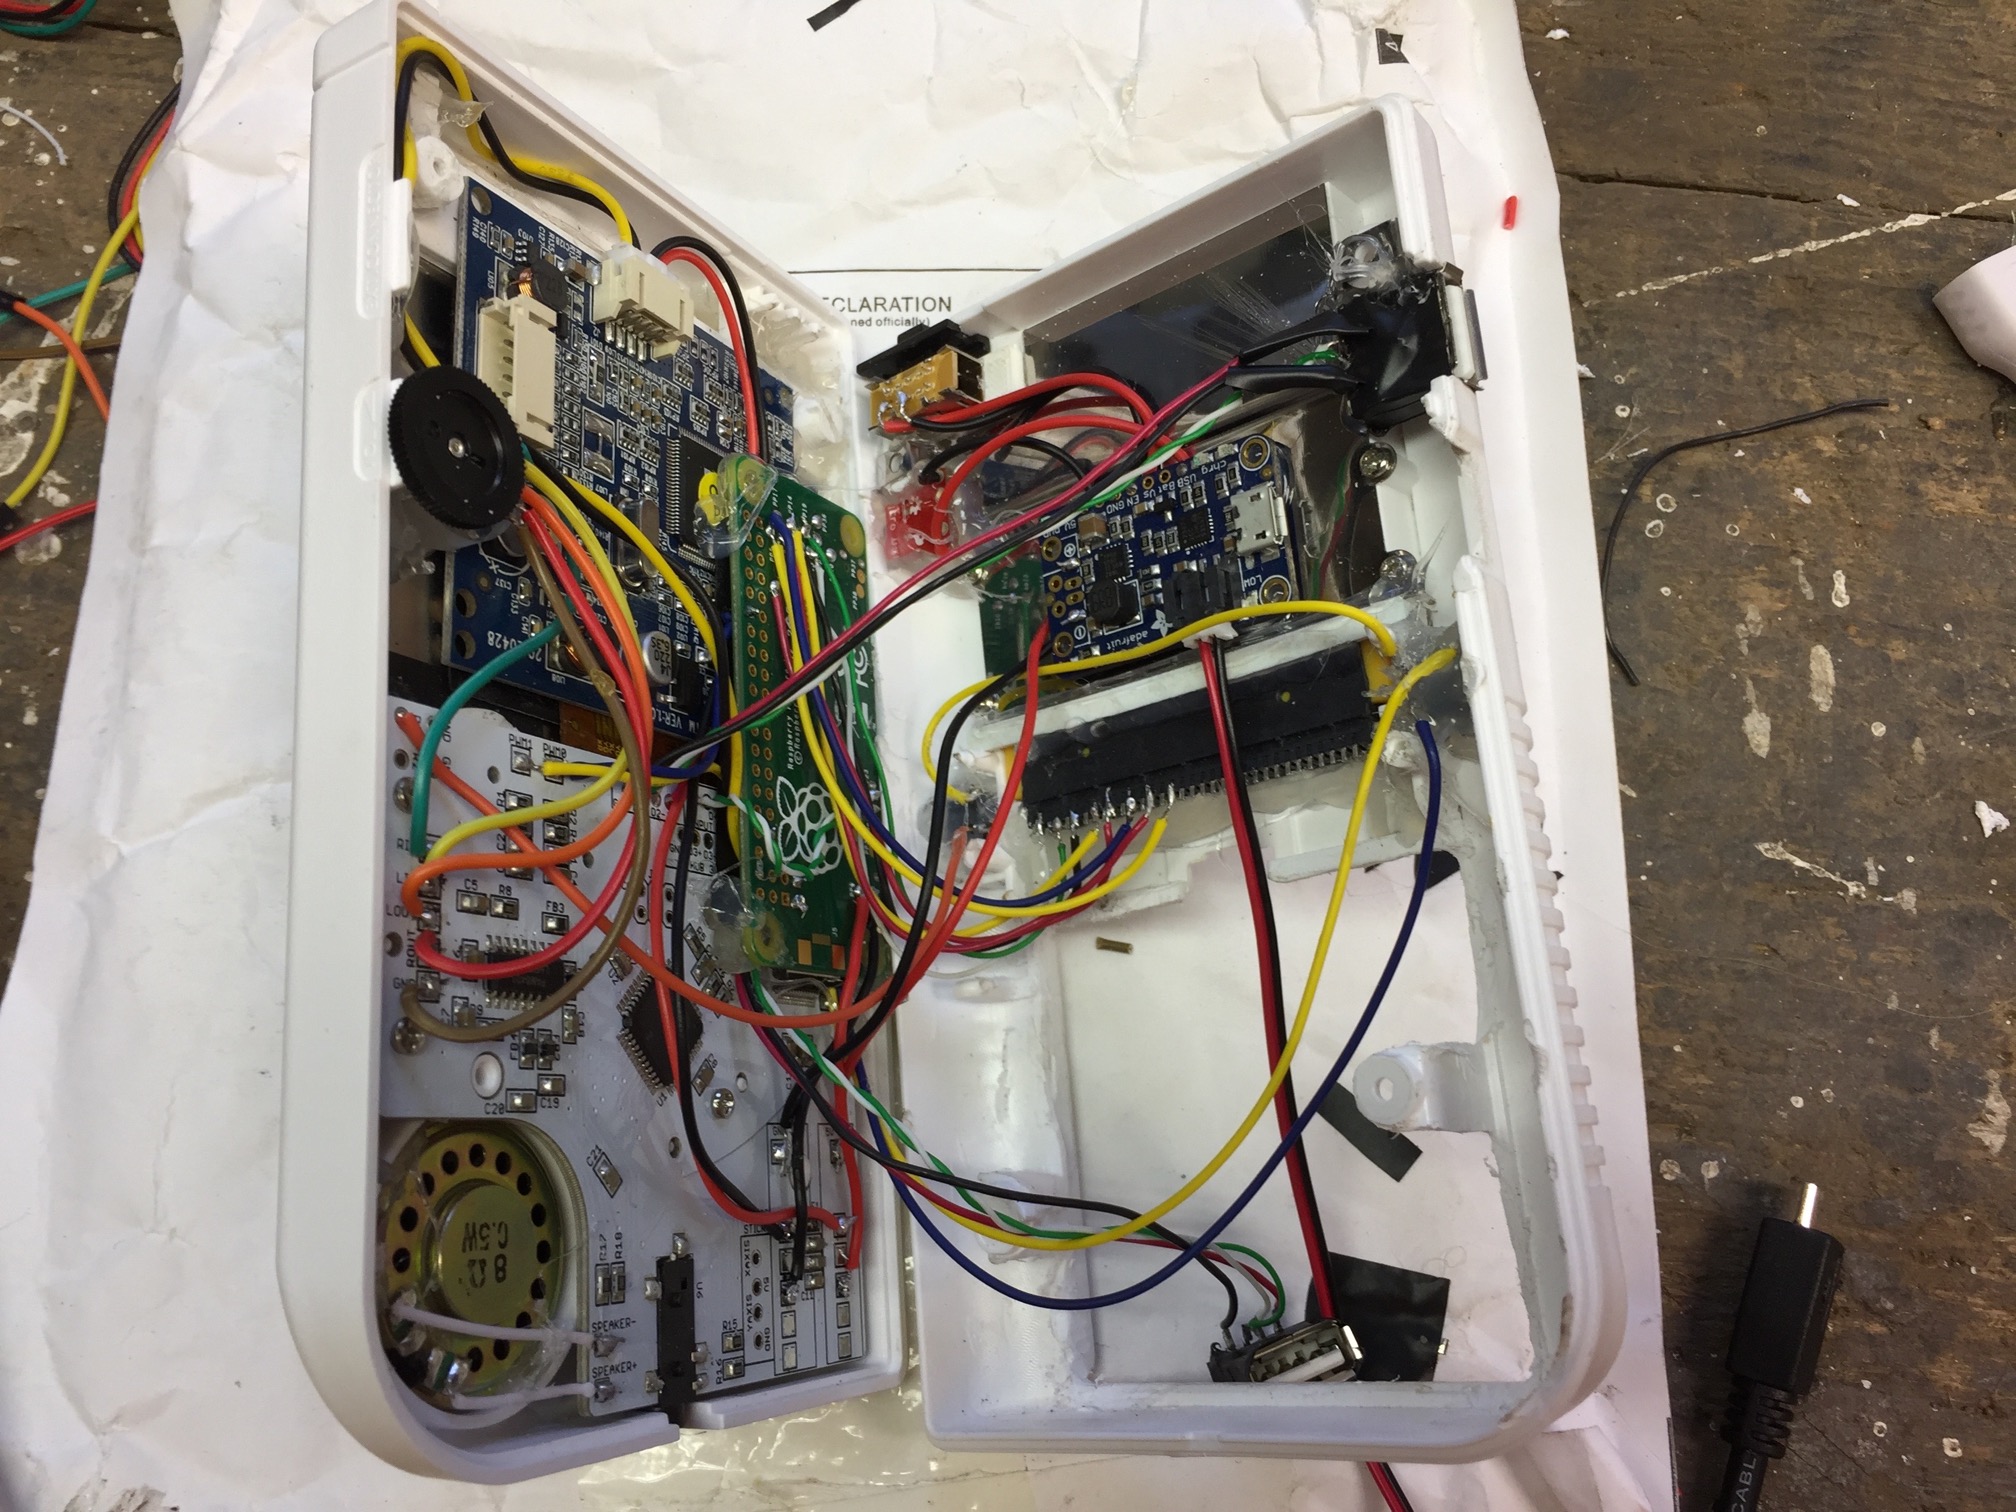
In the middle of 2016, while randomly browsing YouTube, just before I hit the weird parts (and trust me, there are a lot of weird parts of YouTube – I’m looking at you, people who are addicted to ASMR videos – yes, it is weird, and you should feel weird), I stumbled upon something called GameBoy Zero by wermy. In short, it’s a project consisting of a shell of the original GameBoy console retrofitted with all new components: Raspberry Pi Zero to run the system, backlit LCD display to bring colors into the old console’s life, Arduino to convert button inputs into something that’s easier to work with, rechargable battery to remove the hassle of buying new AA batteries every few days 🔋, and much more.

At first, I thought of this as something incredibly cool but never really intended to try any of this myself – even though my ego sometimes spirals into the heights of heaven itself, I would never thought of myself as capable of assembling all of this together. Eventually (mostly through the persistent nagging of one particular koňomrd 🐴🍆 from my now-previous company), however, my plans changed when my stupidity and perseverance topped my limited reasoning skills and I started ordering various parts on eBay from China.

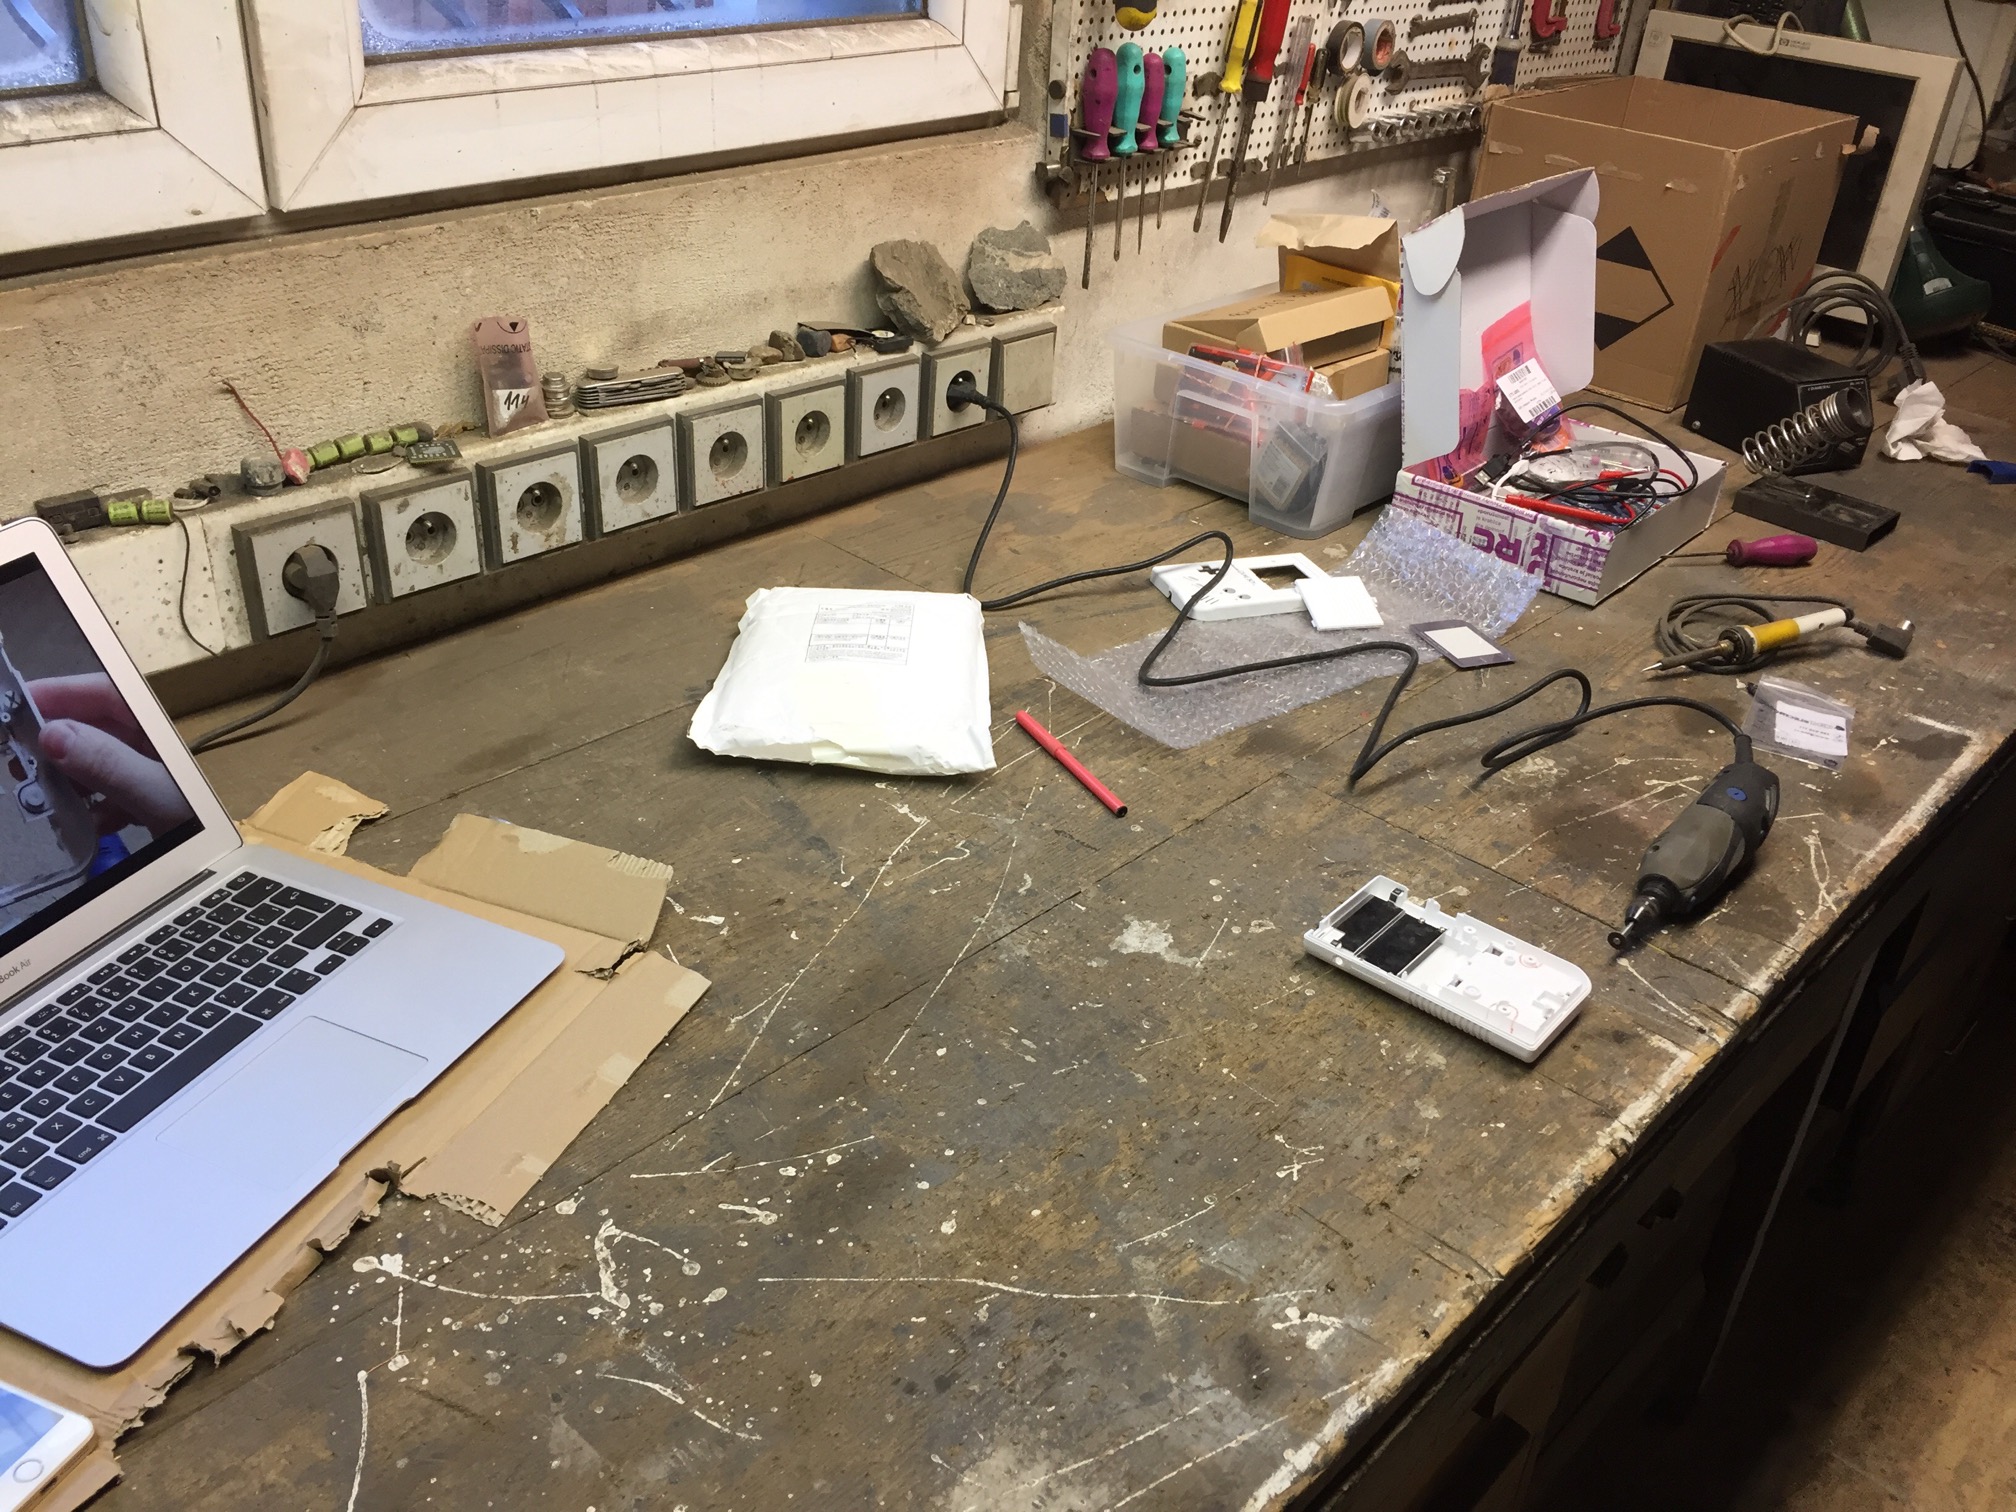
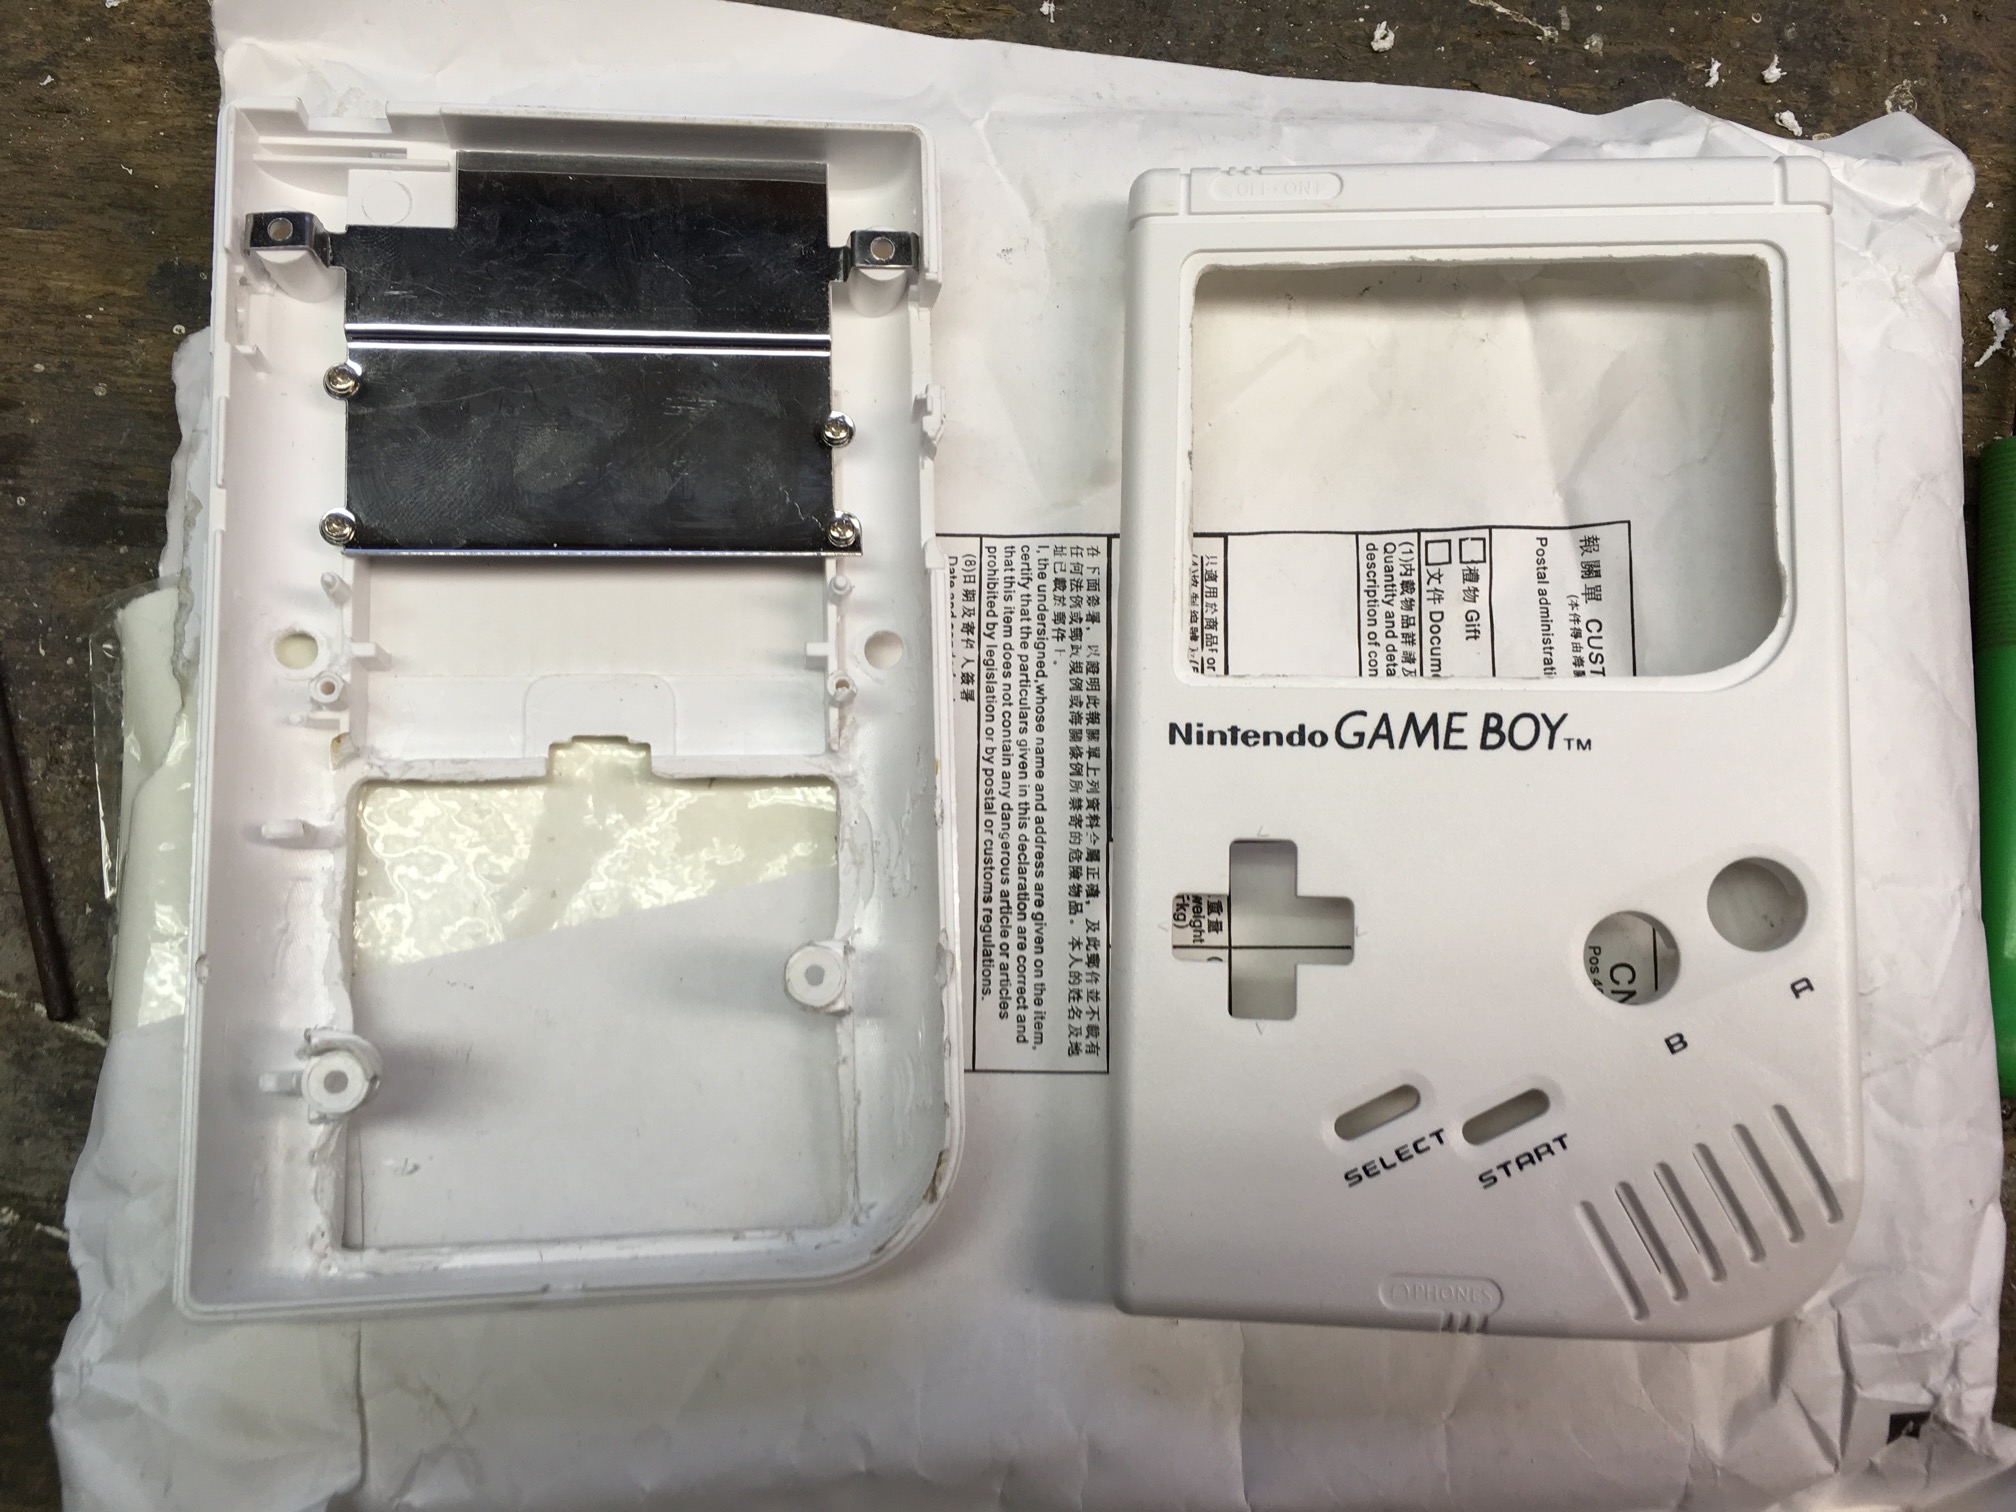
Half a year later (seriously!), everything finally arrived in my hands and it was time to visit my friend’s workshop for some drunken soldering. 🍻 Here are the photos I took during and after the assembly process.

(Caption) Finished product! I’ll show you the whole thing from all angles and then some photos from making it. I finally tried Mega Man 2 for the first time in my life. It’s just as awesome as everyone claimed it to be!

(Caption) Right side retains the volume wheel like the original but the EXT connector is replaced by traditional USB, which means my GameBoy has more USB-A ports than the new MacBook Pro. You can use this to connect keyboard, WiFi card or probably additional controller as well. Also, you can see the R button poking out of what used to be a screw hole.

(Caption) Left side has Micro-USB for charging the battery and mini-HDMI for when you want to play on big screen TV. Similarly to previous image, the L button is visible from this angle.

(Caption) I managed to retain the 3.5mm jack purely to have more jack connectors than current iPhones. Let’s have a look at the assembly process!

(Caption) All of the materials and some of the tools. How is this going to fit inside a small GameBoy case? I had to buy most of the tools that were required for the completion of the project because I’ve never done anything like this. Or anything electrical. Or mechanical. Or just… anything! Oh shush, you, I’m a software developer! I don’t do physical stuff! Oh, and don’t worry, no original GameBoy was harmed in this process. I’d really hate that to happen. The only thing I destroyed was the yellow cartridge but that suuuurely doesn’t count as it was a bootleg cartridge anyway. Everything else is an aftermarket or repair part. I would have used an aftermarket cartridge shell if postal services didn’t lose the one I ordered from eBay.

(Caption) First step: remove the battery compartment. We won’t use AA batteries to power this thing anyway and by doing so, we get a lot more space. And trust me, you do need space. Also, I definitely did not use soldering iron to melt the plastic in the corners of the compartment. DEFINITELY. (Oh god the smell 🤮)

(Caption) Battery compartment removed, screen area extended and the middle screw posts grounded out. So instead of six screws, the whole case has to hold together using only four screws. The newly created space will be used for tactile switches for L and R buttons.

(Caption) New display and replacement screw bracket installed (and by installed, I mean “used tons of glue to hold in place”). Also, new holes were drilled for the X/Y buttons. That was nerve-wracking! And funny story: apparently you have to be very specific when ordering stuff from China. “Oh, that display adjusted for 5V? No problem, $25 display and $25 postage.” “Ugh, fine.” Few weeks later after receiving the package: “Hey, the display has one stuck pixel that I can’t get rid of, any chance you can replace it for me?” “No, stuck pixels might happen. If you wanted display without stuck pixels, that’s $29 display and $25 postage.” “Ughhhhh… Ugh… Fiiiiine.”

(Caption) Logic board with all through-hole wires soldered in! That allows us to mount it and handle all the surface mounted stuff later. This beauty not only takes care of converting all button presses into USB keyboard emulation via an Arduino compatible chip but also serves as an USB hub (I used two USB ports in my build), audio amplifier and low-pass filter and the power strip in the bottom right makes sure each component requiring electricity gets it.

(Caption) Look how perfectly it fits! All the buttons are of course in place with their appropriate conductive rubber pads.

(Caption) Even though it’s far from finished, it already looks awesome, doesn’t it? Don’t pay any attention to the rough area around the display, that’ll all get covered in the end!

(Caption) Speaker is installed! I kind of wish it could play louder but I’m happy with the sound anyway.

(Caption) Moving to the other side of the case, I got the power switch, Micro-USB port for charging and PowerBoost installed. Thank goodness for glue. But the Micro-USB port feels very securely installed and when the charging cable is connected, it doesn’t feel like it’s going anywhere. By the way, getting the PowerBoost board in Czech Republic was a royal PITA. 🍑😫 Adafruit charges you an arm and a leg for shipping and other retailers are not much cheaper. But the board is definitely worth it, it takes care about charging the battery and stabilizes the output voltage. Also, tactile switches were installed with a mountain of glue. They also won’t move an inch though!

(Caption) Volume wheel and display board installed! Now smart people would probably solder the wires the other way around… but nobody said we’re smart.

(Cation) Raspberry Pi Zero glued down – we have audio, USB input and USB ports soldered and are reaching the end at this point! The goal is just beyond the corner! Also, it’s around 3 AM in the morning at this point.

(Caption) The cartridge reader is in place! Now other people would just put the SD card directly into the Pi, but… I thought if I want to build this correctly, the SD card obviously has to be in the cartridge, right? So the GameBoy won’t even boot without a correct cartridge, just like the original!

(Caption) One last look inside before we attempt to close the case!
We still weren’t sure at this point if everything will really fit inside. It seemed impossible at first and it still doesn’t look optimistic from this picture, does it?

(Caption) This was a triumph! I’m making a note here: huge success!
It’s hard to overstate my satisfaction. I never had any console as a kid because my parents thought it would distract me from studying, so it was great to not only have something that’s in the shell of an old console, but to actually build it myself.

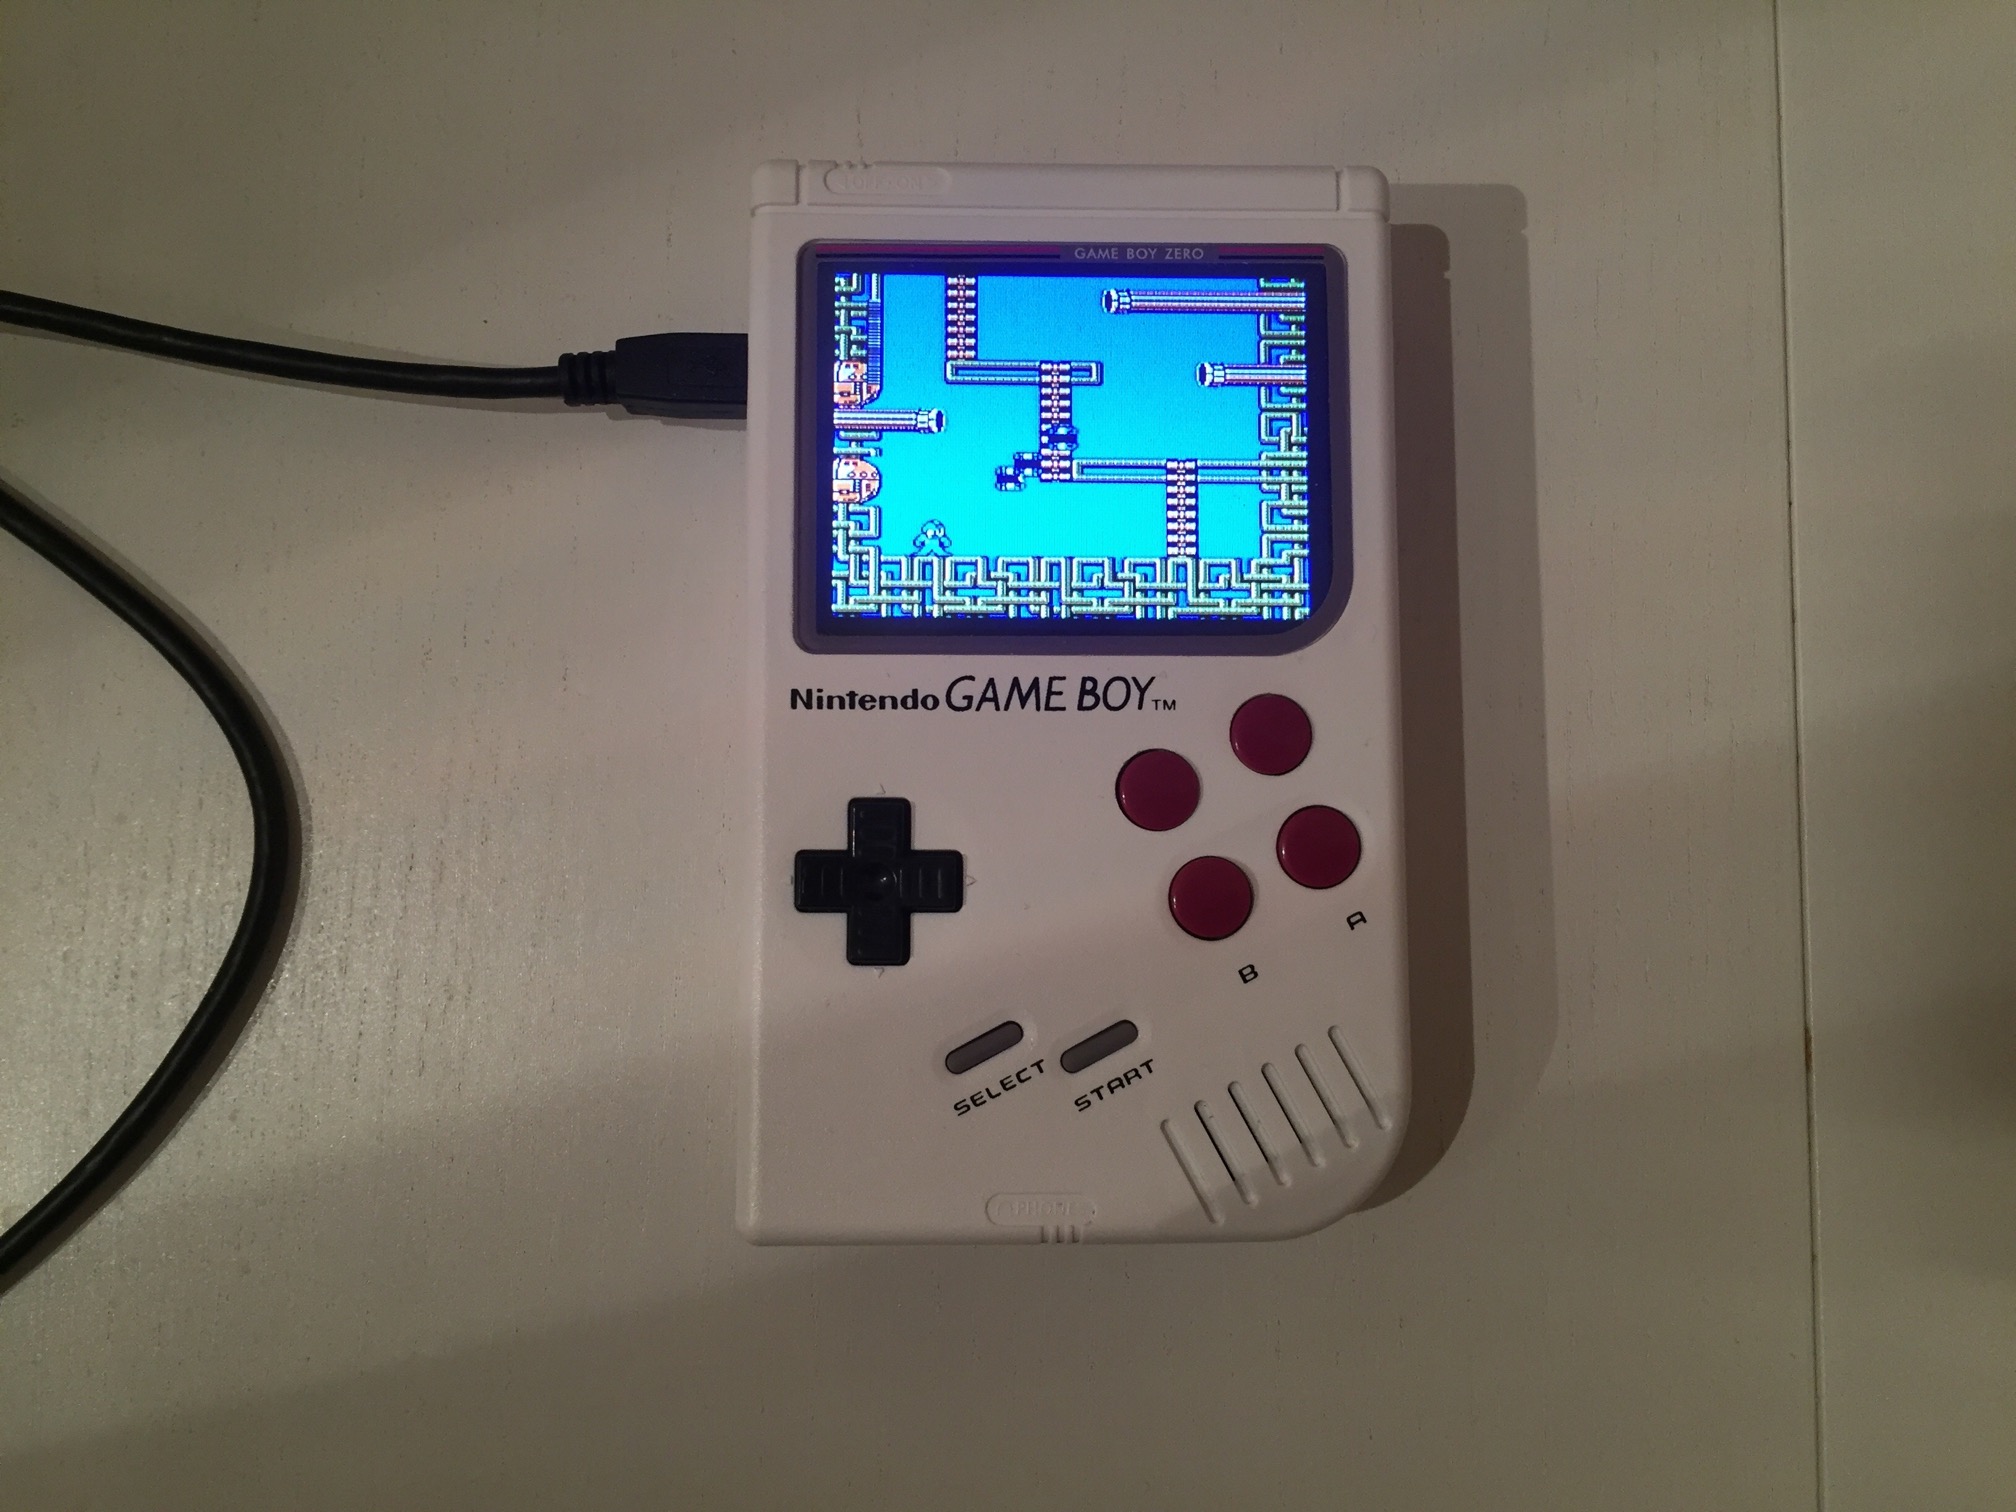
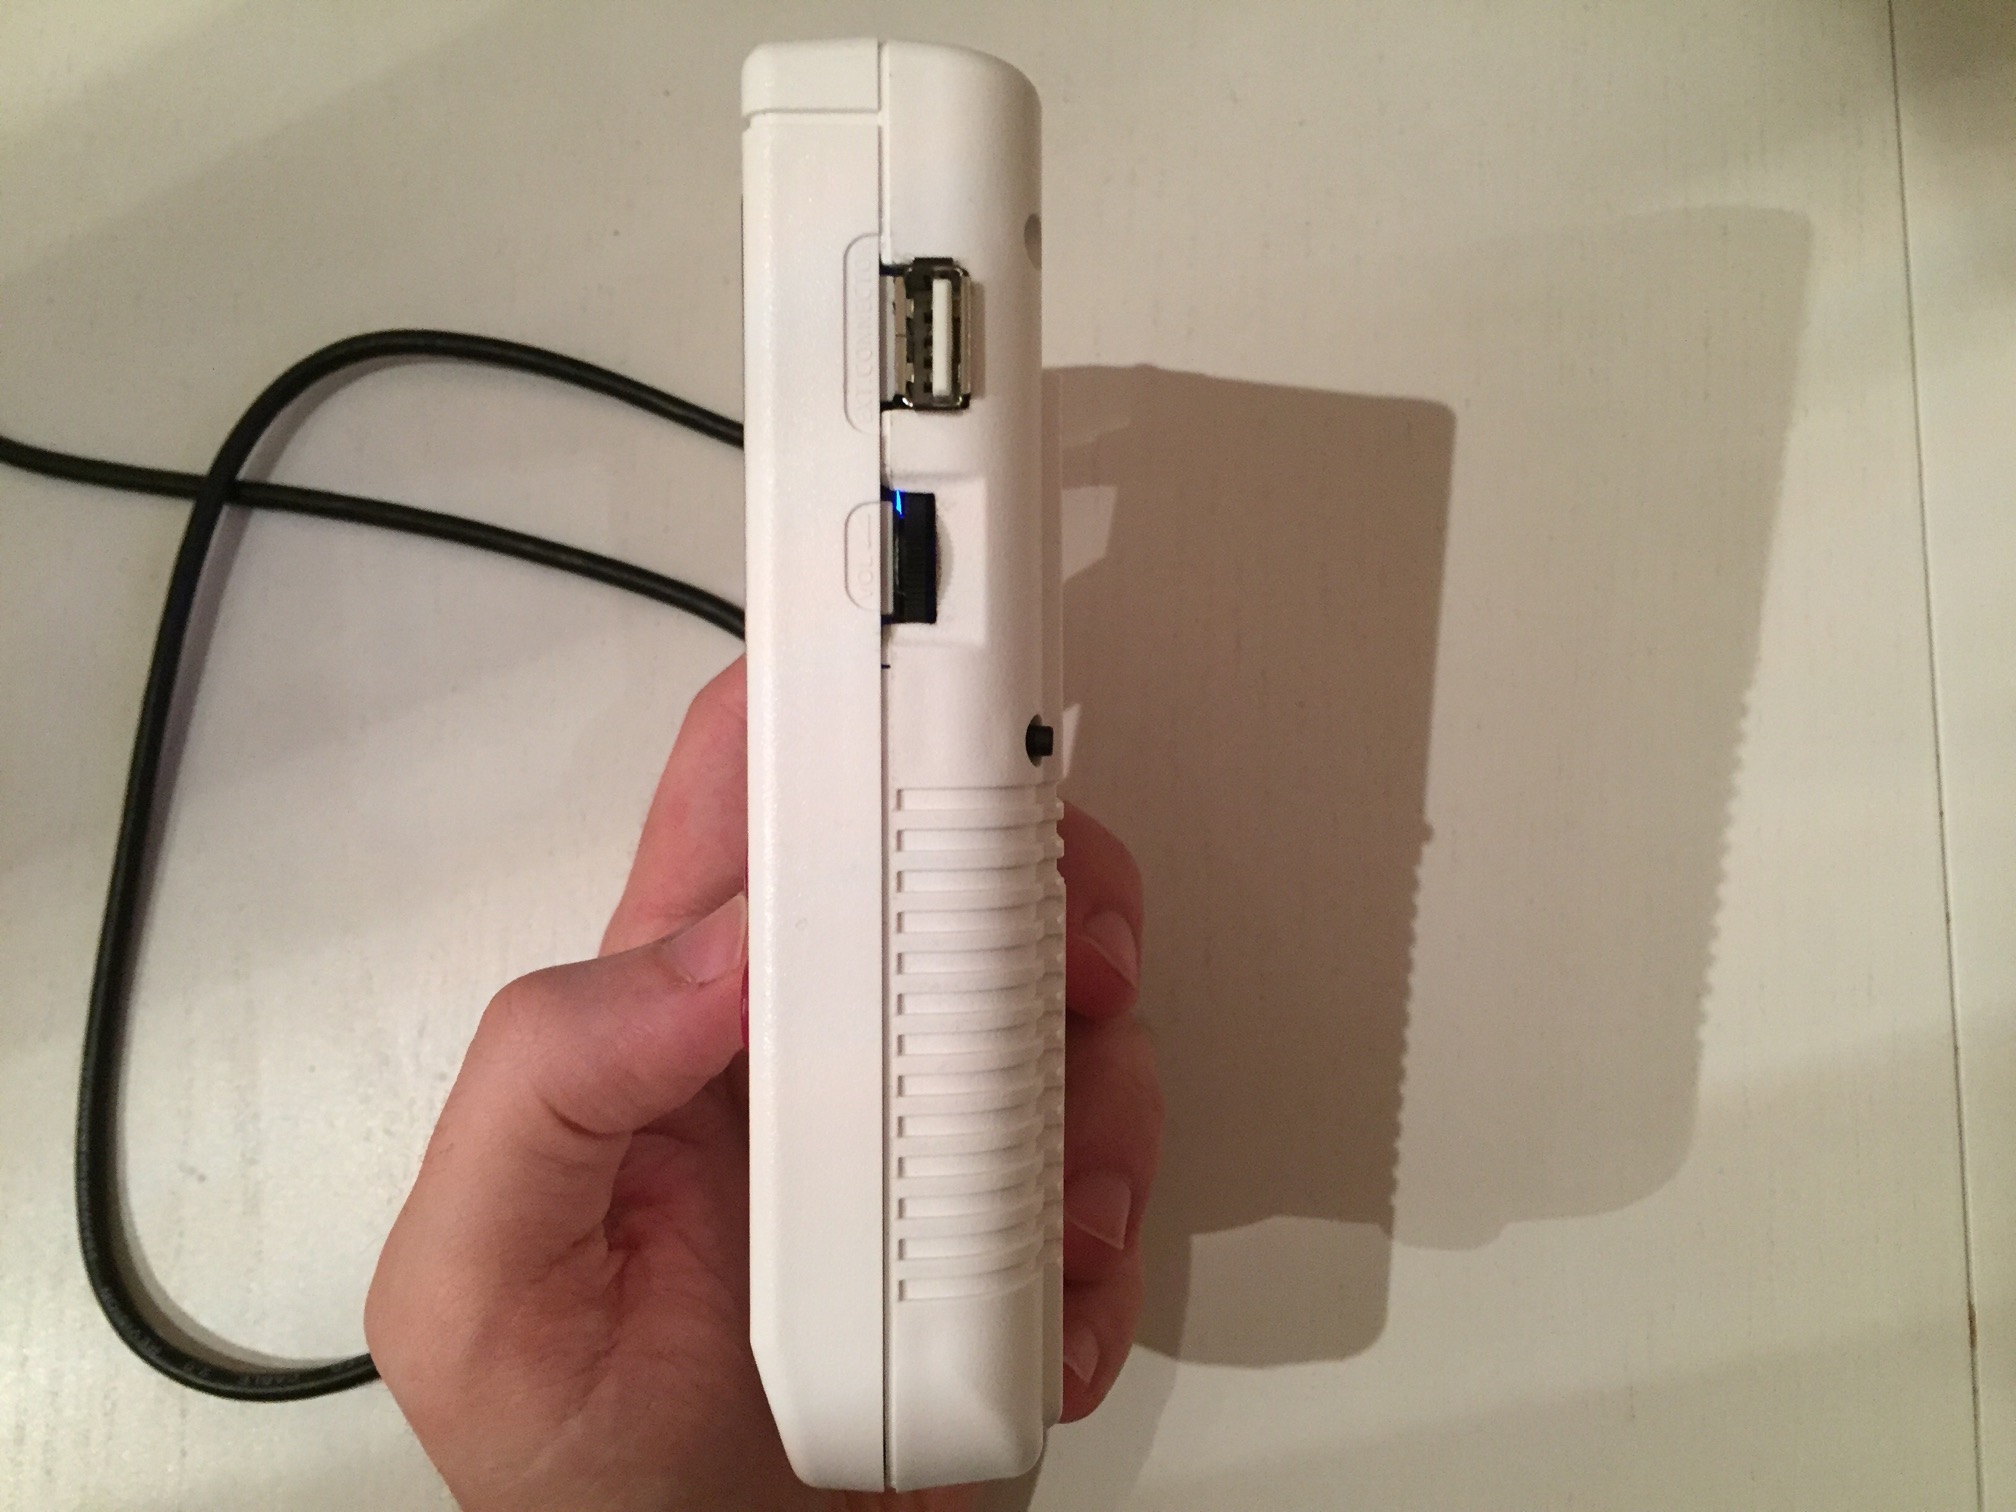
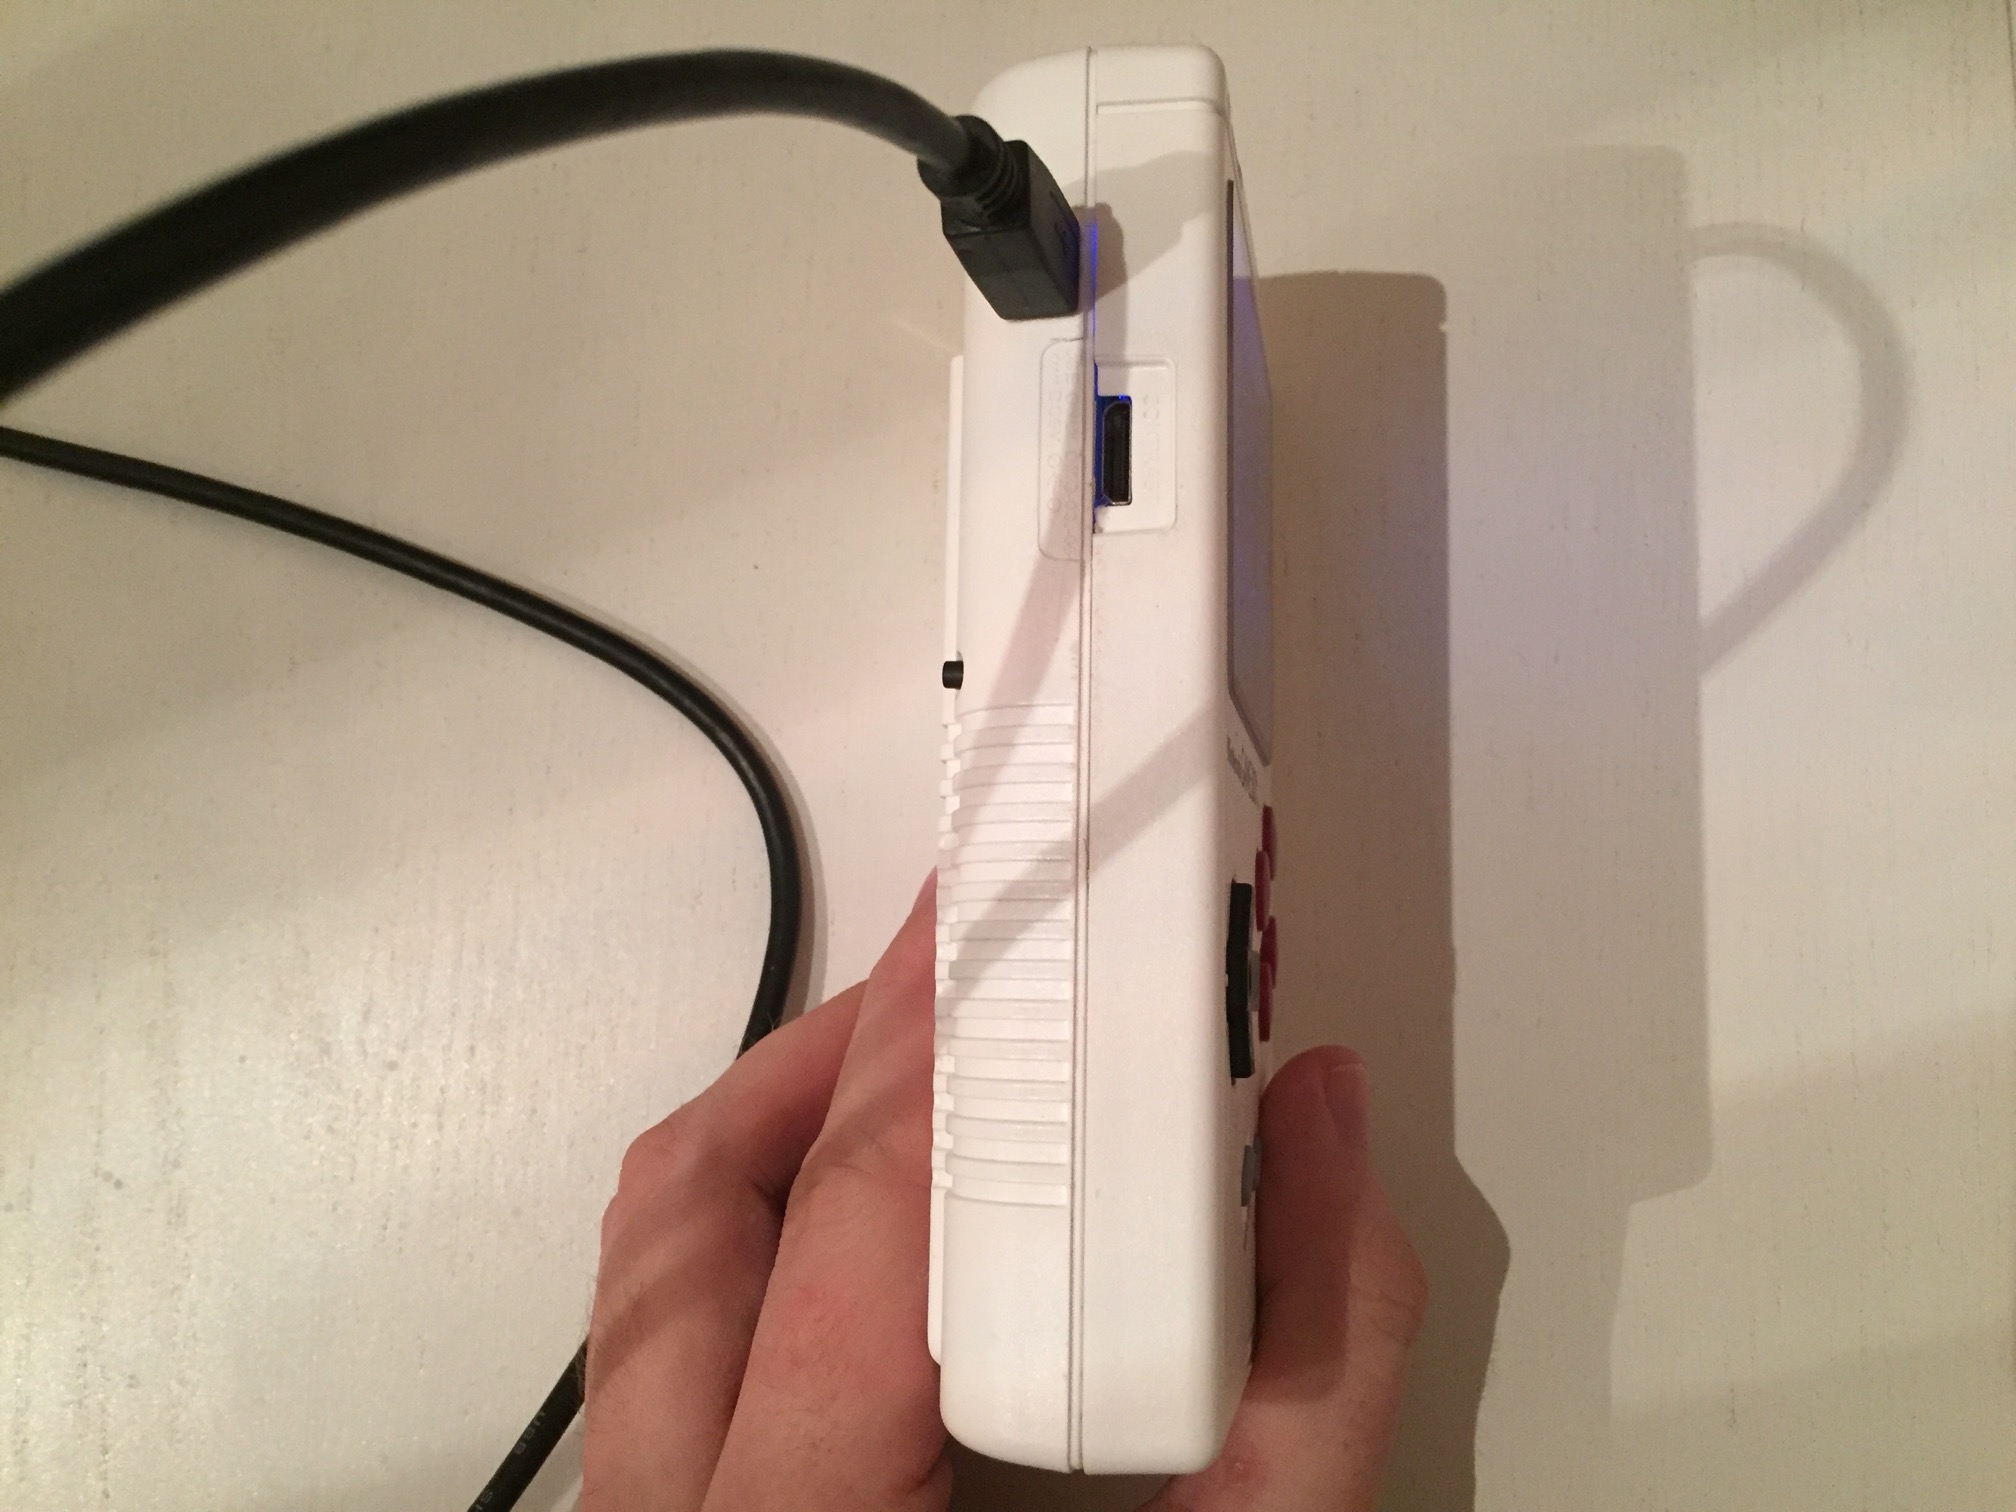
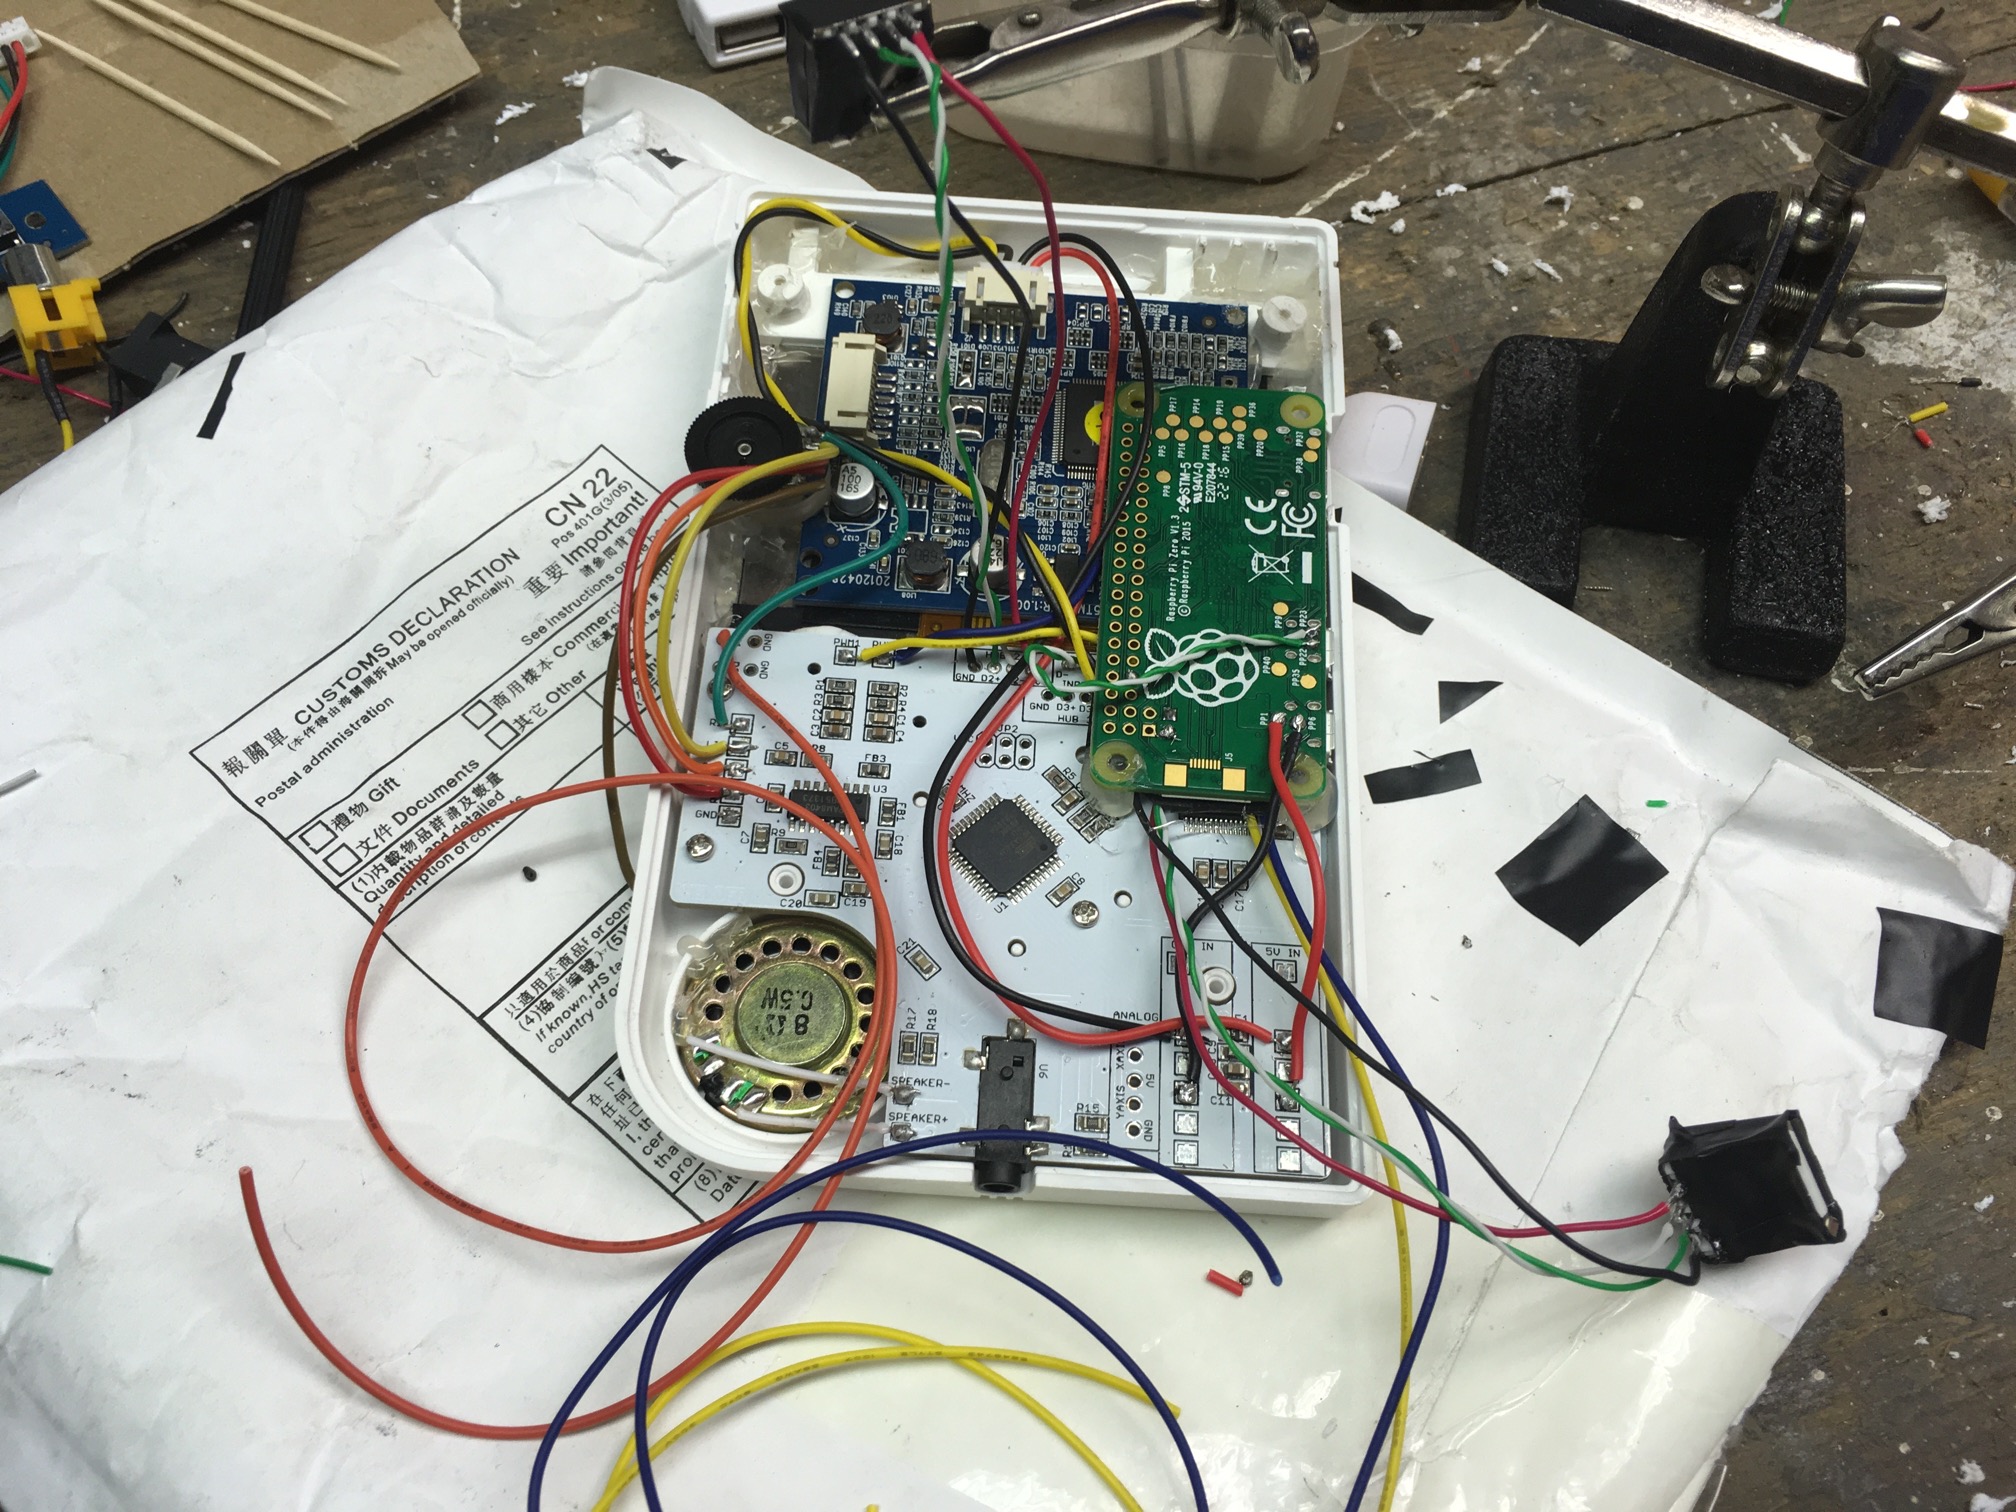
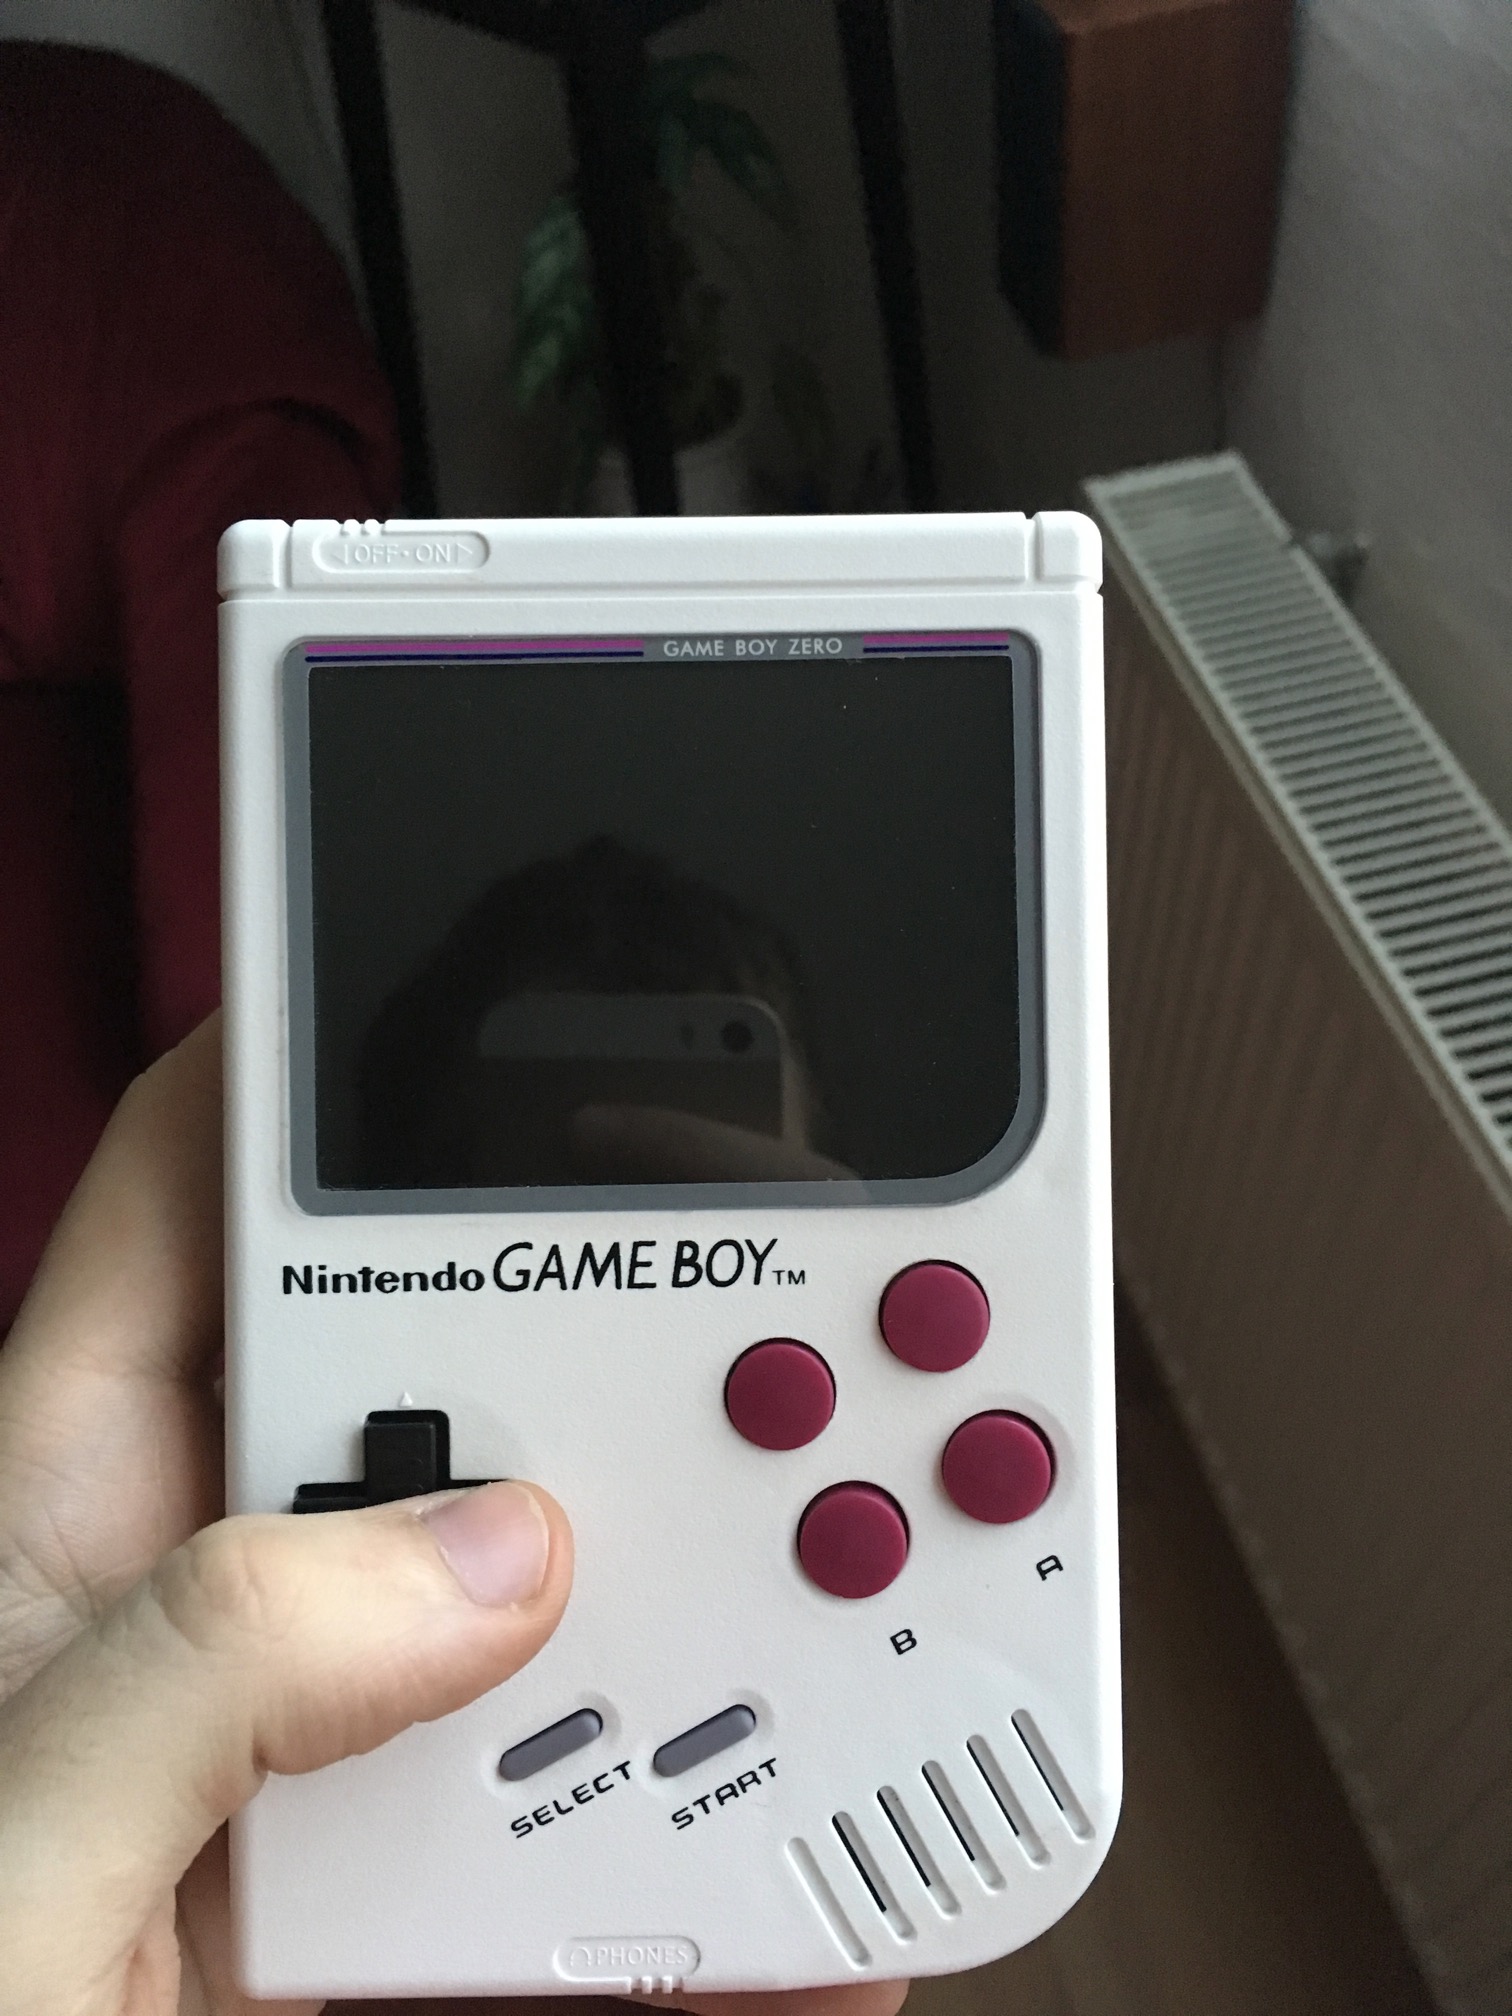
A year and half later, the GameBoy surprisingly still works, and has survived numberous trips around the world with me. The battery obviously isn’t what it once used to be and will require a replacement soon, but that’s fairly normal and to be expected – fortunately, when building the GameBoy, we made sure that replacing the battery will be incredibly easy thing to do.

That’s it for today and next time, I’ll hopefully return back to reporting from Japan! 🇯🇵